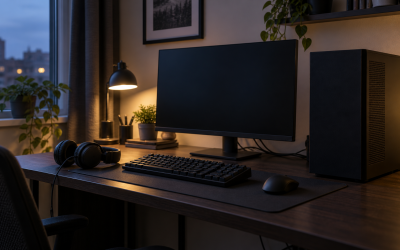
Getting the best monitor light bar brightness settings is less about maxing out lumens and more about balancing eye strain, screen contrast, and desk illumination. A light bar that is too bright washes out a matte display and creates reflected glare; one that is too dim forces your pupils to constantly adjust between a bright screen and a dark desk, which accelerates fatigue during long gaming or work sessions. The goal is to match the light bar’s output to your ambient light, your monitor’s brightness, and your wall color so the light feels invisible.
Prioritize three things in order: first, asymmetry and positioning to keep light off the screen itself; second, brightness matched to your monitor’s white point; third, color temperature that complements your time of day and task. Once those are dialed in, auto-dimming, CRI, and control method are fine-tuning. The recommendations below apply to most popular bars including BenQ ScreenBar series, Quntis, Baseus, and Xiaomi variants, and the adjustments take under ten minutes with the physical dial, remote, or app.
As an Amazon Associate we earn from qualifying purchases at no extra cost to you.


Our Top Picks
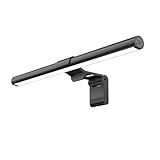
 Quntis Curved Monitor Light Bar 15 RGB BacklightIM 26 inch17.3 x 5.5 x 4 inches2.7 poundsCheck on Amazon
 Quntis Monitor Light Bar with Remote Control20-Inch20.08 x 0.79 x 0.79 inches1.3 PoundsCheck on Amazon
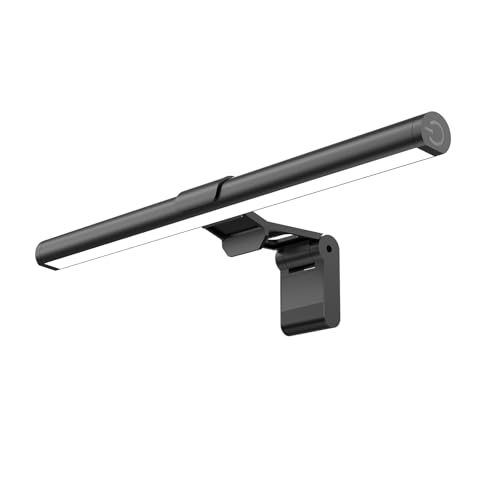


Top 3 picks at a glance
Quick Recommended Settings
| Setting | Recommended value | Why |
|---|---|---|
| Brightness Level | 45-55% day / 20-35% night | Matches 120-180 nits monitor brightness without overpowering screen contrast |
| Color Temperature | 4000K-4500K day / 2700K-3200K night | Neutral white preserves color accuracy by day; warm white reduces blue light and eye strain at night |
| Light Angle / Position | Front edge of monitor, asymmetric beam angled 45 degrees toward desk | Keeps 0 lux on screen, 300-500 lux on desk surface |
| Auto-Dimming Sensor | On for mixed lighting, Off for controlled dark room | Prevents flicker and hunting in dark rooms but useful near windows |
| Control Mode | Physical dial or wireless puck over app-only | Faster 1% incremental adjustments without on-screen overlay |
| Power Source | USB-A 5V/1.5A from monitor or powered hub, not PC sleep port | Avoids brightness reset after sleep/wake |
Setting-by-Setting
Brightness: 45-55% Day, 20-35% Night
What causes it: Eye fatigue comes from a luminance mismatch. If your monitor is at 150 nits and your desk is dark, your eyes adapt up and down constantly. A light bar at 100% in a dark room can hit 800+ lux on the desk and create disability glare off a white keyboard or paper.
How to check: Set your monitor brightness first. On Windows, go to Settings > System > Display and note your slider, or use your monitor OSD: Menu > Picture > Brightness. Aim for 40-60 on most 250-350 nit monitors. Then turn your light bar to 50% and place a white sheet on the desk. If the sheet is noticeably brighter than the white of a blank browser page, the bar is too high.
What to do: For daytime with ambient window light, set the bar to 45-55%. For evening with lights off, drop to 20-35%. On BenQ ScreenBar Halo: tap the brightness icon on the wireless dial, then rotate to adjust in 5% steps. On Quntis / Baseus with touch bar: press and hold the brightness + / – until the indicator shows 4-6 of 10 bars for day, 2-3 bars for night. On Xiaomi Mijia 1S: press the center knob to switch to brightness mode, then rotate.
How to undo: Return to 50% neutral or re-enable auto-dimming by holding the auto button for 2 seconds until the indicator blinks. This restores the sensor-controlled curve.
Color Temperature: 4000K-4500K Day, 2700K-3200K Night
What causes it: Cool temperatures above 6000K skew blue and make warm game tones and skin tones look harsh, while also suppressing melatonin at night. Fixed 6500K bars also clash with the typical 6500K monitor white point and make the desk look sterile.
How to check: Open a color temperature test page or look at a white document. If paper under the light bar looks blue compared to the monitor’s white, you are too cool. If it looks orange-yellow, you are too warm for daytime work.
What to do: Set 4000K-4500K for daytime productivity and competitive gaming where color accuracy matters. Switch to 2700K-3200K after sunset for reading and single-player. Exact paths: BenQ Halo dial > tap color temp icon > rotate between 2700K and 6500K in 100K steps; Quntis MAX > tap the sun icon to cycle 3000K / 4500K / 6500K; Xiaomi Mijia > double-press knob to enter color temp mode > rotate. If your bar only has three presets, use the middle 4500K by day and the warmest by night.
How to undo: Press the auto-color or reset button, or cycle back to 4000K. No permanent change is written to firmware on most models.
Position and Asymmetric Angle: Front-Center, No Screen Spill
What causes it: Glare and washed-out blacks happen when the light bar sits too far back or tilts upward, spilling light directly onto the matte coating. A centered but backward position also creates a shadow from the monitor bezel.
How to check: With the bar on at 70%, look at a black screen. If you see a bright gradient or reflections on the top third of the display, light is hitting the panel. Check that the clamp’s weighted end is flush and the bar’s lens faces straight down and slightly forward, not toward your eyes.
What to do: Mount the clamp at the exact center of the monitor’s top edge. Push the bar so the front LED edge overhangs the screen by 5-10mm. Tilt the bar until the light falloff line sits just behind the monitor stand, with no halo on the screen. For curved monitors 1000R-1800R, use the included curved adapter or silicone shim to prevent side lift. Tighten the clamp thumb screw until snug, not overtight, to avoid panel pressure.
How to undo: Loosen the clamp and slide the bar back 5mm, or return the tilt to the default horizontal detent where the bar clicks.
Auto-Dimming and Ambient Light Sensor: Use Selectively
What causes it: The front-facing illuminance sensor samples room light every few seconds. Near a window or under a flickering ceiling light, it will hunt between levels, causing visible pulsing.
How to check: Enable auto mode: BenQ > press the eye icon; Quntis > hold brightness + and – for 3 seconds; Baseus > tap Auto. Watch for 30 seconds. If brightness steps up and down without you touching anything, the sensor is fighting mixed light.
What to do: In a stable light environment or dark room gaming setup, turn auto off and use manual 20-35% at night. In a bright office with daylight changes, leave auto on but set a ceiling: manually cap brightness to 60% first, then enable auto so it never exceeds that. Cover the sensor with your finger to test – if brightness drops predictably, the sensor is working.
How to undo: Tap auto again to disable. Manual level is remembered after power cycle on most bars that draw continuous USB power.
Dimming Curve, Flicker, and CRI
What causes it: Low-quality PWM dimming below 30% can introduce invisible flicker that causes headaches, while low CRI below 80 makes colors look dull and makes it harder to distinguish wires, print, or key legends.
How to check: Set the bar to 15% in a dark room and record slow-motion video on your phone at 240fps pointed at white paper under the bar. Visible banding indicates PWM flicker. For CRI, compare a color swatch or photo print under the bar versus daylight – if reds look brown, CRI is low.
What to do: Avoid sustained use below 15% brightness; instead raise the bar slightly and use 20%+ to stay above the flicker threshold. Prefer bars rated CRI 95+ and R9 > 90. If yours is CRI 80, compensate by using 4000K而不是6500K to preserve natural tones. Keep the USB power at 5V stable; low voltage from an unpowered hub increases flicker.
How to undo: Increase brightness to 25% or swap the USB cable to the monitor’s USB-A downstream port labeled 5V 1.5A or BC 1.2.
By Hardware Tier
Low Tier: Basic USB Bar Without Sensor (Under $40)
These bars typically offer 10-level brightness and 3 color presets, no wireless dial, and clip directly over the bezel. You will not get smooth dimming, so stepwise tuning matters more.
Use 6/10 brightness by day and 3/10 at night. Use the middle color preset for day and warm for night. Position is critical because the beam is wider – push the bar forward to limit screen spill. Power it from the monitor’s USB port, not the PC case front panel, to avoid sleep resets. If the clip wobbles, add the included anti-slip pad and angle the bar slightly forward. As we head into 2026, even budget bars have improved asymmetric lenses, so you can expect less glare than older models if you mount it correctly.
Mid Tier: Touch Control with Auto-Dimming ($40-$90)
This includes Quntis Computer Monitor Lamp, Baseus Monitor Light Bar, and Xiaomi Mijia Lite with touch sliders and a built-in light sensor. You get finer control but touch surfaces are easy to overshoot.
Set manual brightness to 50% and color to 4300K as your baseline, then enable auto-dimming only during daytime. Use two-finger tap or long-press to lock the setting on models that support it: Quntis > long-press power 3 seconds to lock. Set monitor brightness to 45-55 in the OSD to match. If you use Windows Night Light at Settings > System > Display > Night light > Strength 35-50, drop the bar to 3200K to match and avoid a mismatched warm screen with cool desk.
High Tier: Wireless Dial, High CRI, Precision Optics ($90+)
Flagship examples like the BenQ ScreenBar Plus, Halo, and Halo 2 offer a wireless puck, stepless dimming, 2700K-6500K in 100K steps, CRI 95+, and backlight fill options.
Use the puck: Tap brightness > rotate to 48% day, 28% night. Tap color temp > rotate to 4200K day, 3000K night. Enable the front fill light on Halo to 15% for bias lighting that raises perceived contrast on OLED and IPS without adding glare. For OLED monitors, keep the bar at the lower end at 30-40% because OLED black levels are more sensitive to any veil of light. Save the setup to favorites if your model supports it: Halo > press dial for 3 seconds to save to My Favorite. Power the puck via AAA or USB-C and keep the dongle or receiver within 50cm of the monitor to prevent lag.
Common Mistakes
Running 100% Brightness Overnight
What causes it: Users assume brighter equals better visibility, but at night your pupils are dilated and 100% creates harsh specular reflections off the desk and keyboard.
How to check: Look at your monitor’s black borders. If they appear gray when the bar is on versus true black when it is off, you are over-lit. Also check if white paper on the desk is glaring.
What to do: Use the key combo on the bar to quickly halve brightness: on BenQ dial press the brightness icon and rotate counter-clockwise four clicks; on touch bars tap – four times. Target 20-35% for lights-off gaming. Pair with monitor brightness reduction: OSD > Brightness 35-45.
How to undo: Double-tap the power button to restore last manual level, or rotate the dial clockwise back to 50%.
Matching Color Temperature to 6500K Exactly
What causes it: The 6500K monitor standard tempts users to set the bar to 6500K as well, but desk surfaces are not color-critical and cool light feels harsh in a dark room.
How to check: Set bar to 6500K and work for 10 minutes at night. If eyes feel strained or the room feels clinical, the temperature is too cool.
What to do: Offset the bar 1500K-2000K warmer than the screen. Keep monitor at 6500K, set bar to 4500K day and 3000K night. This preserves screen accuracy while making the environment comfortable. Change via dial or app slider in 100K increments.
How to undo: Dial back to 6500K with one press of the color temp preset or re-enable auto color.
Blocking the Sensor or Mounting Off-Center
What causes it: A webcam, sticky note, or off-center clamp covers the illuminance sensor window or shifts the asymmetric cutoff, causing uneven desk illumination and auto-dimming failure.
How to check: With auto on, cover and uncover the sensor dot on the top of the bar. If brightness does not change, it is blocked. Visually, if one side of the keyboard is brighter, the bar is off-center.
What to do: Re-center the clamp and ensure 10mm clearance around the sensor lens. Move webcams to below the bar or to a side mount. If you must keep a top webcam, place the light bar slightly in front of the camera so the lens is not shadowed.
How to undo: Slide the bar back to center and wipe the sensor with a dry cloth; auto mode will recalibrate within 5 seconds.
Powering From a PC USB Port That Sleeps
What causes it: Many motherboard USB ports cut power in S3 sleep or modern standby, causing the light bar to forget manual levels and reset to 100% cool white on wake.
How to check: Put the PC to sleep via Start > Power > Sleep, wait 10 seconds, wake. If the bar flashes or resets, its USB source is sleep-gated. Check Device Manager > Universal Serial Bus controllers > USB Root Hub > Properties > Power Management > Allow the computer to turn off this device to save power is checked.
What to do: Move the USB-A cable to the monitor’s USB hub output or a powered USB hub that stays on. On the PC, uncheck Allow the computer to turn off this device to save power. For bars with wireless pucks, this keeps memory settings intact across sleep.
How to undo: Re-enable power saving by rechecking the box, or move the cable back to the PC port if you prefer the bar to turn off with the PC.
FAQ
What brightness should I start with for gaming at night?
Start at 25% brightness and 3000K color temperature with your monitor at 35-45 OSD brightness. This keeps the desk at roughly 150-250 lux, enough to see your keyboard and reduce contrast strain without lifting OLED blacks or creating reflections on the screen. If you play competitive shooters and need to spot details on a dark desk, bump to 30-35% but do not exceed 40% in a dark room.
Should I use auto-dimming or manual for best results?
Use manual at night and auto during the day if you have a window nearby. Manual prevents flicker hunting in the dark and gives consistent 1% control via the dial. Auto is helpful when daylight shifts the room from 100 lux to 600 lux over an afternoon. Test by enabling auto for one day; if you notice stepping or pulsing, return to manual and set 50% for day use.
Does a light bar affect monitor color accuracy or FPS?
A properly angled asymmetric bar adds zero light to the screen, so it does not affect measured color accuracy, response time, or frames per second. It can improve perceived contrast by reducing the eye’s adaptation to a bright screen in a dark room. If you do color-critical work, set the bar to 4000K-4500K and CRI 95+ or turn it off for final validation, then use a calibration profile via Settings > System > Display > Advanced display > Color profile.
Why does my light bar flicker or buzz at low brightness?
What causes it: Low duty-cycle PWM dimming and insufficient 5V current. How to check: Set the bar to 10% and listen close; a faint whine or visible flicker in phone slow-motion confirms it. What to do: Raise to 20%+ and power from a stable 5V 1.5A source, not a passive splitter. Keep the USB cable away from power bricks to reduce interference. How to undo: Lower again to your previous level if you need a dimmer room, but prefer adding bias lighting instead of dropping below 15%.