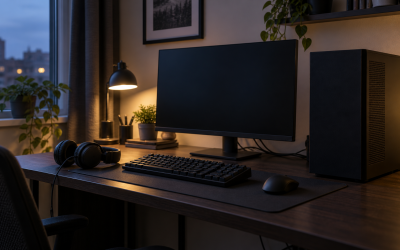
An optimal monitor riser setup for posture is about placing your screen so your neck stays neutral, your eyes land naturally near the top third of the display, and your shoulders can stay relaxed for hours. Gamers often chase refresh rate and response time, but the physical position of the panel determines whether you end the session with focused aim or with neck strain, eye fatigue, and upper back tightness. The goal is not to lock yourself into a rigid pose, but to create a neutral baseline where small postural shifts are easy and you are not constantly looking up, down, or forward to see critical HUD elements.
What you should prioritize is height, distance, and angle in that order. Height controls cervical spine alignment. Distance controls eye strain and how much head movement you need to track motion across the screen. Angle and tilt control glare and the vertical gaze angle. When those three are correct, arm, wrist, and chair adjustments fall into place more naturally. Most modern monitor risers in use as of 2026 offer 3 to 6 inches of height adjustment, either via fixed shelves, stackable legs, or electric lift columns, so you can dial this in without replacing your desk or mount.
As an Amazon Associate we earn from qualifying purchases at no extra cost to you.


Top 3 picks at a glance
Quick Recommended Settings
| Setting | Recommended value | Why |
|---|---|---|
| Riser Height (Screen Center to Desk) | 7.5 to 9 inches of lift; top bezel at or just below eye level | Keeps neutral neck with 15-20 degree downward gaze to center of screen |
| Viewing Distance | 20 to 30 inches (50 to 76 cm) for 24-32 inch panels | Fills field of view without forcing head panning or eye convergence |
| Screen Tilt | 10 to 20 degrees backward (top tilted away from you) | Aligns panel perpendicular to your line of sight and reduces glare |
| Horizontal Alignment | Center of panel aligned with nose / keyboard home row, 0 degrees swivel | Prevents sustained neck rotation during aiming and inventory management |
| Eye-to-Top-Bezel Relationship | Eyes level with top bezel to 2 inches above top bezel when sitting upright | Encourages slight downward gaze which is less fatiguing for neck extensors |
| Keyboard and Mouse Height | Elbows at 90 to 110 degrees, wrists neutral, forearms parallel to desk | Prevents shoulder shrugging caused by a desk that is too high relative to riser |
| Windows Display Scaling | Windows Settings > System > Display > Scale: 100% at 1080p, 125% at 1440p 27-inch | Prevents leaning forward to read text after raising the monitor |
| ClearType and Night Light | Windows Search > ClearType Text Tuner > Turn on ClearType; Settings > System > Display > Night light: Off for daytime gaming | Improves text legibility at correct distance without washing out colors |
Setting-by-Setting
Riser Height: Top Bezel at Eye Level
What causes it: A riser that is too low forces sustained neck flexion as you look down, while a riser that is too high forces neck extension and traps the upper trapezius. Both come from estimating height visually instead of measuring from your seated eye height.
How to check: Sit in your gaming chair with your back against the backrest and feet flat. Have someone measure from the desk surface to the center of your pupil, or use your phone front camera at eye level against a wall. Then measure from the desk surface to the center of your monitor. The center of the screen should be 5 to 7 inches below your pupil height. Alternatively, close your eyes for 5 seconds, open them and look naturally forward; you should be looking at the address bar or top HUD, not the center of the screen.
What to do: Adjust the riser legs or shelf. For fixed bamboo or wood risers with 3.5-inch and 5.5-inch leg options, start with the lower legs and add adhesive furniture risers (0.75 inch increments) until the top bezel is at eye height. For adjustable risers with twist feet, turn each foot clockwise to raise in 0.5 inch increments and verify with a tape measure. For electric standing desk converters with riser columns, use the Up/Down paddle and hold for 2 seconds to set Memory Preset 1. In Windows, verify you are not compensating by slouching: Settings > System > Display > Display resolution should remain native.
How to undo: Return to the previous leg height or press and hold Memory Preset 2 to revert. If you added adhesive risers, peel them off and clean residue with isopropyl alcohol.
Trade-off: A higher riser improves neck posture but can expose the underside of the panel to overhead light glare and may require a separate keyboard tray if your desk is now relatively too high for your elbows. A lower riser reduces glare risk but brings back neck flexion.
Viewing Distance: 20 to 30 Inches
What causes it: Placing the monitor at the back edge of a deep riser shelf pushes it beyond comfortable reading distance, or pulling it to the front edge brings it too close, increasing eye convergence effort and requiring more head movement to track corners.
How to check: Extend your arm fully with fingers extended; your middle fingertip should just brush the screen surface. For 27-inch 1440p, aim for the 24 to 28 inch zone. Open Notepad with 11pt Calibri at 100% scaling and check if you can read it without leaning forward. In Windows, check Settings > System > Display > Scale to confirm you have not set 150% to compensate for excessive distance.
What to do: Slide the monitor base forward or back on the riser. The riser should sit centered on the desk with its front edge 4 to 6 inches from the desk edge to leave room for keyboard. Use the monitor base depth as a guide and keep at least 1 inch of riser depth behind the stand for stability. If your riser has a storage drawer, do not let the drawer handle dictate position; position the panel first, then arrange storage around it. Lock the position by marking the riser top with painter’s tape.
How to undo: Slide back to the tape mark or to the rear rubber feet of the riser. Reset Windows scaling to the recommended value shown in blue text under Scale.
Trade-off: Closer distance improves target acquisition visibility but increases eye strain and can make 27-inch and larger panels require head turns. Farther distance reduces strain but may make HUD text and minimaps harder to parse without scaling.
Screen Tilt: 10 to 20 Degrees Backward
What causes it: A perfectly vertical panel viewed from a slightly downward gaze angle creates an off-axis view, washing out colors on VA panels and creating reflections from ceiling lights. No tilt also increases neck extension if you tilt your head to stay perpendicular.
How to check: Hold a small rectangular mirror against the screen. If you see the ceiling light fixture reflected back at your eyes while seated, tilt is too vertical. Or open a white browser page and look for a gradient shift between top and bottom of the screen which indicates viewing angle error.
What to do: Use the monitor’s mechanical tilt hinge. Grip the top and bottom bezel, tilt the top away until the panel face is roughly perpendicular to a line drawn from your eyes to the screen center. Most gaming monitors allow -5 to +20 degrees; set 12 to 15 degrees for seated eye heights 4 to 8 inches above screen center. If your riser shelf is not level, place a small bubble level on the shelf and adjust the riser feet until level before adjusting tilt. Access monitor OSD: Menu > Image > Sharpness and keep at default to avoid masking tilt-related blur.
How to undo: Return tilt to 0 degrees (vertical) by tilting forward until the OSD tilt indicator centers, or use Menu > System > Reset > Yes on the monitor.
Trade-off: More backward tilt reduces overhead glare and aligns with natural downward gaze, but excessive tilt beyond 20 degrees can distort perceived vertical straight lines and cause you to raise the chair to compensate.
Horizontal Alignment and Swivel: 0 Degrees
What causes it: Placing the riser and monitor off-center to make room for speakers, consoles, or a second monitor forces sustained neck rotation. Even 10 degrees of rotation held for an hour loads the sternocleidomastoid and causes one-sided neck pain.
How to check: Press Windows + P and set Second screen only to isolate your main panel. Sit naturally and close your eyes, then point your nose straight ahead. Open eyes; your nose should point at the center of the screen, and the screen bezel should appear symmetrical on left and right. Use a tape measure from each desk edge to the riser legs; distances should be equal within 0.5 inch.
What to do: Center the riser on your seated position, not the desk. If your desk is against a wall, measure from your chair’s center post rather than the wall. Set monitor swivel to 0 degrees (check OSD > System > Information often shows angle on monitors with swivel bases). Position keyboard so the B key aligns with your nose and the monitor center, which keeps shoulders square.
How to undo: Move the riser back to its previous off-center position if you need desk space for non-gaming tasks, and use Windows + Arrow keys to snap windows back.
Trade-off: Perfect centering is ideal for ergonomics but may crowd speakers or secondary displays. For dual-monitor setups, center the primary gaming monitor and angle the secondary at 30 degrees with its near edge touching the primary bezel.
Desk, Chair, and Arm Support Synchronization
What causes it: Raising the monitor without adjusting chair height or armrests leaves elbows too low, causing shrugging and wrist extension. The monitor height is correct but the support system is not.
How to check: Sit with shoulders relaxed and upper arms hanging vertically. Your elbows should be at 90 to 110 degrees with forearms resting lightly on desk or armrests, wrists straight. If your shoulders are elevated or wrists are bent up to reach the mouse, height is mismatched. Check chair height lever under the right side and armrest height buttons on the outer edge.
What to do: Adjust chair height first. Pull the lever up while standing slightly to raise until feet are flat and thighs are parallel to floor. Then adjust armrests so they support forearms without lifting shoulders. If desk is too high after adding a 5-inch riser, add a keyboard tray mounted 1.5 to 2 inches below desk surface or use a 1-inch desk footrest to lower effective desk height. In Windows, set Settings > Bluetooth & devices > Mouse > Pointer speed to 6/11 with Enhance pointer precision Off to keep wrist movement neutral rather than compensating with high sensitivity.
How to undo: Return chair lever to lowest position and armrests to level 0. Remove keyboard tray by unscrewing the clamp mounts and reinstalling the original screws.
Trade-off: Lowering the chair to meet arm support can force knees above hips if you are tall. A footrest solves this but adds another accessory to tune.
Glare, Lighting, and Screen Settings
What causes it: A higher riser brings the screen closer to overhead downlights or windows behind you, causing veiling glare that makes you lean forward and squint, undoing posture gains.
How to check: Turn off the monitor and look at the dark panel from your seated position; if you see a bright window or light sharply reflected, glare will be present when on. Check monitor OSD > Brightness. If it is above 80 in a dim room, you are fighting glare with brightness.
What to do: Position the riser perpendicular to the window, not facing it or with your back to it. Add a bias light behind the monitor using a USB-powered light bar clipped to the riser rear edge, set to 6500K and 10% of screen brightness. Set OSD brightness to 80-120 nits for evening use: Menu > Brightness > 30 to 40 on most 300-nit panels. Enable ambient light rejection by closing blinds or repositioning the desk lamp to the opposite side of your writing hand, angled 30 degrees to the desk.
How to undo: Remove bias light USB from monitor USB Service Port and reset OSD > Color > Picture Mode to Standard.
Trade-off: Bias lighting and lower brightness reduce eye fatigue and help maintain distance, but competitive players may prefer higher brightness for spotting dark corners. Use a custom OSD preset: OSD > Game Mode > Custom 1 for daytime bright play and Standard for evening posture-focused play.
By Hardware Tier
Low Tier: Fixed Bamboo or MDF Riser, 24-Inch 1080p 60-144Hz
Fixed risers at this tier offer 3.5 to 4 inches of lift and a shelf load limit near 30 to 40 pounds. They are stable but not adjustable beyond swapping legs. Pair them with a manual measurement workflow. Set viewing distance to 20 to 24 inches to keep pixel structure invisible without leaning in. Use Windows Settings > System > Display > Scale at 100% and rely on in-game UI Scale: Options > Interface > HUD Scale 90 to 100 for readability. If height is still low after installing the tallest legs, add 0.5 inch hard felt pads under the riser feet, not under the monitor stand, to keep the stand stable. Keep the storage area under the riser clear at the front edge so you can pull the keyboard fully under when not typing, which protects wrist posture. For tilt, depend entirely on the monitor hinge since the shelf is fixed; verify the shelf is level with a phone level app before locking tilt.
Mid Tier: Adjustable Metal or Wood Riser with Storage, 27-Inch 1440p 144-180Hz
Adjustable risers with twist feet or telescoping legs provide 4 to 7 inches of lift and often include a drawer or side cubbies. Set height to achieve top bezel at eye level, then fine-tune with 0.5 inch twists while seated. Viewing distance of 24 to 28 inches is ideal for 27-inch panels to see the full frame without head panning. Configure Windows scaling at 125% if text at 100% forces forward head posture; path: Settings > System > Display > Scale > Custom scaling 125. Use the riser drawer only for low items like controllers to avoid raising the shelf height inadvertently. Set monitor tilt to 12 to 15 degrees and check glare after each height change because twist adjustments can slightly alter shelf angle. If the riser has a phone or tablet groove, do not place your primary phone there during gaming; glancing down to the groove repeatedly breaks neutral neck alignment. Use OSD > Gaming > Overdrive > Normal to keep motion clarity without overshoot at this tier’s typical refresh range.
High Tier: Motorized Standing Desk Riser Column or Heavy-Duty Arm on Riser Shelf, 32-Inch 4K or OLED 240Hz
Motorized risers and stacked arm-plus-riser setups support 50+ pounds and offer continuous height control via paddle or remote, often with 2 to 3 memory presets. Program Preset 1 for seated gaming: desk at 29 inches, riser column at mid height with top bezel at eye level. Program Preset 2 for standing: desk at 44 to 46 inches depending on elbow height, riser column lowered 1 inch to compensate for standing eye height being higher relative to desk. For 32-inch 4K, set viewing distance to 28 to 32 inches and Windows scaling to 150% at native 3840×2160: Settings > System > Display > Scale > 150% and Settings > Accessibility > Text size 110% if you still lean in. Use monitor OSD > Picture > Aspect > Full and OSD > HDMI > Enhanced to maintain native timing after height changes. High-tier glass or solid wood riser tops can be slippery; affix the monitor base with the included non-slip pad or 3M Dual Lock strips rated for 10 pounds per square inch. Keep cable slack in a service loop tied to the riser rear with Velcro straps so motor movement does not tug the display and change viewing angle.
Common Mistakes
Mistake 1: Setting height by standing eye level. You game seated, so seated eye height is the reference. Recalibrate with seated measurements after any chair change.
Mistake 2: Pushing the monitor to the back edge for more desk space. This trades posture for space and forces you to lean forward to read HUD elements. Keep distance at 20 to 30 inches and reclaim space by storing the keyboard under the riser shelf when not in use.
Mistake 3: Ignoring tilt after raising height. Every inch of lift changes the perpendicular viewing angle. Re-check tilt after any riser adjustment and reset OSD color presets if washout appears.
Mistake 4: Compensating for bad distance with Windows scaling extremes. Scaling at 175% on a 1080p panel does not fix a monitor that is too far. Move the panel first, then adjust scaling to the nearest recommended value.
Mistake 5: Leaving the riser off-center to favor the mouse hand. Mouse space is important, but centering the monitor and shifting the keyboard slightly left provides mouse room without rotating the neck. Test: Game > Settings > Input > Mouse Sensitivity should not require shoulder abduction to reach the desk edge.
Mistake 6: Forgetting arm and foot support. A perfect monitor height with dangling feet or elevated shoulders still creates compensatory posture. Adjust chair, armrests, and footrest together: Chair lever under seat, Armrest buttons on arm housing, Footrest height to keep thighs parallel.
FAQ
Should the top of the monitor really be at eye level if I wear progressive lenses?
What causes confusion is that progressive lenses have a narrow intermediate zone low in the lens. How to check: look through the top third of your glasses while seated; if the screen is blurry, your head is tilted back to find the reading zone. What to do: lower the riser by 1 to 1.5 inches so you view the center of the screen through the intermediate corridor without tilting the head, or raise your chair 0.5 inch and add a footrest to change head angle. What to do instead of tilting the screen excessively: keep tilt at 10 to 15 degrees and move distance to 24 to 26 inches to enlarge the clear zone. How to undo: restore riser leg height and reset chair lever to default.
How do I align a dual-monitor setup on a single wide riser without hurting posture?
What causes strain is treating both panels as primary and constantly rotating between them. How to check: open Task Manager with Ctrl + Shift + Esc and observe which monitor you look at most during a 10-minute gaming session. What to do: place the primary gaming monitor centered as described, then place the secondary monitor with its near vertical bezel touching the primary bezel and angled 30 degrees inward. Align the secondary’s vertical center 1 inch lower than the primary so eye travel is slightly downward. Set Windows Settings > System > Display > Arrange displays by dragging the secondary icon to match physical angle, and set Taskbar > Show taskbar on all displays Off to reduce head turns. How to undo: drag displays back to side-by-side horizontal in Display settings and return secondary to flat 0 degrees swivel.
My riser has a fixed 5.5 inch height and my eyes are still above the top bezel. What is the fastest correction?
What causes it is a tall seated eye height or a low chair that cannot rise further. How to check: measure seated pupil height versus top bezel; if pupils are more than 3 inches above bezel, height is insufficient. What to do: first raise the chair 1 inch via the gas lift lever, then add a firm footrest to keep feet flat and thighs parallel. If chair is at maximum, add stable riser extensions under the riser feet only, not under the monitor base, using 1 inch furniture leg extenders rated for the riser weight limit. As a last resort, lower desk height if you have adjustable desk legs: turn the leg levelers counterclockwise 0.5 inch per rotation. How to undo: remove extenders, lower chair to previous lever position, and return desk levelers to tight.
Does a monitor light bar or bias light change the ideal riser height?
What causes the question is the light bar adds 0.5 to 1 inch on top of the bezel and can block your sight line. How to check: mount the light bar and sit normally; if you see the LED strip directly or the bar forces you to raise the monitor to clear it, ergonomics are affected. What to do: keep riser height at the posture-correct value and mount the light bar behind the panel as bias lighting rather than on the bezel, or choose a low-profile bar under 0.6 inches tall that clamps to the top bezel without raising eye line. Adjust OSD brightness down 5 to 10 points after adding bias light because perceived contrast improves: Menu > Brightness > Decrease 5. How to undo: unclip the bar and reset OSD brightness to previous value, and remove USB power from the monitor’s USB-A port or desk USB hub.