Wireless charging on iPhone is convenient, but out-of-the-box settings and placement often lead to slow charging, excess heat, and unnecessary battery wear. The goal is not to push the fastest possible wattage at all times, but to balance speed, temperature, and long-term battery health. iPhones manage this balance automatically, yet several iOS settings, charger features, and physical setup choices directly affect whether you get a stable 7.5W to 15W charge or a throttled, heat-limited trickle. Getting the placement, power delivery, and software toggles right prevents the most common issues: overheating pauses, overnight overcharging, and MagSafe alignment failures.
As of early 2026, all current iPhones continue to support Qi and Qi2/MagSafe wireless charging, and the optimal approach remains the same: keep the device cool, keep it centered, limit the time it spends at 100%, and let iOS battery management do its job without interference from cases or automations that work against it.
As an Amazon Associate we earn from qualifying purchases at no extra cost to you.


Our Top Picks
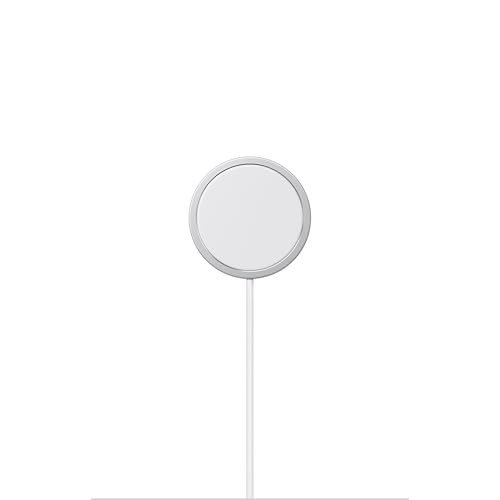


Top 3 picks at a glance
Quick Recommended Settings
| Setting | Recommended value | Why |
|---|---|---|
| Optimized Battery Charging | On | Limits time at 100% to reduce chemical aging |
| 80% Limit (Battery Health & Charging) | On for daily use, Off for travel days | Caps charge at 80% for longevity, disable when you need full capacity |
| MagSafe / Qi2 Alignment | Centered, magnets engaged | Prevents coil misalignment, heat, and wattage drop |
| Case Compatibility | MagSafe/Qi2 certified case, 2.1mm max thickness, no metal / credit cards | Ensures magnetic lock and avoids interference and heat buildup |
| Wireless Charger Power Source | 20W or higher USB-C PD adapter (USB-IF certified) | Provides full 15W to MagSafe/Qi2 stands, avoids under-powered cycling |
| StandBy Mode | On if using a StandBy-capable stand, Off otherwise | Enables useful display features without adding heat on flat pads |
| Low Power Mode During Wireless Charge | Off | Avoids conflicting thermal and background task behavior |
| Background App Refresh | Leave On (or Wi-Fi only) | Prevents iOS from batching heavy tasks that create heat spikes while charging |
| Location for Charger Placement | Hard, flat, ventilated surface, ambient 62-72°F / 16-22°C | Improves heat dissipation and maintains consistent charge rate |
Setting-by-Setting
1. Optimized Battery Charging: On
Exact path: Settings > Battery > Battery Health & Charging > Optimized Battery Charging. Toggle to green/on.
Trade-off: With this on, iOS learns your daily routine and will hold the charge at 80% for hours overnight, then finish to 100% just before you wake. This reduces the time the battery spends at maximum voltage. If your schedule is irregular, it may occasionally still charge to 100% early. For users who need a predictable cap regardless of schedule, the 80% Limit is more aggressive.
What causes delayed 100% charging: This is intended behavior from machine learning of your alarm and usage pattern, not a charger fault. How to check: Look at Settings > Battery > Battery Health & Charging and check for the text under Optimized Battery Charging that shows it is active. What to do: Leave it on for daily overnight wireless charging. How to undo: Return to the same menu and toggle Optimized Battery Charging off, or toggle the 80% Limit off if you enabled that instead.
2. 80% Limit: On for Daily Use
Exact path: Settings > Battery > Battery Health & Charging > Charging Limit > select 80% Limit on iPhone 15 and newer. On iPhone 14 and earlier, this option does not exist; use Optimized Battery Charging instead.
Trade-off: Capping at 80% noticeably extends cycle life and keeps temperatures lower during the final charge phase, but you lose 20% of usable capacity. Ideal for desk or nightstand charging where you can top up anytime. Not ideal when traveling or when you need maximum runtime away from a charger.
What causes the phone to stop at 80% and not proceed: The hard limit is engaged in Battery Health & Charging. How to check: If the lock screen says Charging On Hold or stays at 80% for hours while on the pad, verify the Charging Limit setting. What to do: For long days, temporarily switch from 80% Limit to Optimized Battery Charging or to Fully Charged. How to undo: Set Charging Limit back to 80% Limit after your trip.
3. MagSafe and Qi2 Alignment: Dead-Center with Magnetic Lock
Exact path: No iOS toggle; this is physical. On a MagSafe or Qi2 stand, you should feel the magnets pull and see the charging animation within 1-2 seconds. The iPhone 12 and newer have the magnet ring centered around the Apple logo.
Trade-off: Perfect alignment gives you the full negotiated wattage (up to 15W on MagSafe/Qi2 certified chargers with a suitable adapter) and minimal heat. Even 5-7mm off-center drops efficiency, increases heat, and can trigger thermal throttling that is slower than a correctly aligned 7.5W Qi pad.
What causes slow blinking, intermittent charging, or heat without progress: Coil misalignment or a case that is too thick or non-magnetic. How to check: Remove the case and place the bare iPhone on the charger. If charging immediately stabilizes with the bolt icon in the status bar, the case is the issue. What to do: Use a case labeled MagSafe compatible or Qi2 certified, ensure no PopSocket, metal ring, or cards between phone and charger, and clean both surfaces. How to undo: Reinstall your previous case if you prefer it for non-charging use; no software change is needed.
4. Power Adapter: 20W Minimum USB-C Power Delivery
Exact path: Check the text printed on the adapter brick itself, and check the charger stand manual for Input Requirements. Use a USB-C to USB-C cable rated for 20W or higher.
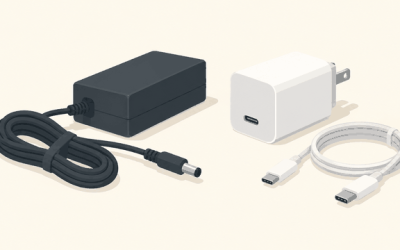
Trade-off: Apple MagSafe and Qi2 chargers require a 20W USB-C PD adapter to deliver up to 15W wirelessly. Using a legacy 5W, 12W USB-A, or 18W adapter will not damage the phone but will limit the stand to 7.5W operation or cause repeated disconnects as the stand renegotiates power. A higher wattage adapter such as 30W does not force extra power into the phone; the iPhone negotiates only what it needs.
What causes the charger to connect and disconnect every few seconds: Insufficient adapter wattage or a non-PD adapter with a USB-A to USB-C cable. How to check: Swap to an Apple 20W USB-C Power Adapter or any USB-IF certified 20W, 30W, or 35W USB-C PD adapter with a known-good USB-C cable. On a Mac, you can also check System Information > Power for accessory draw if testing a MagSafe puck via USB-C. What to do: Replace the adapter and cable as a pair. How to undo: Reconnect the old adapter if you need it for another device; it will simply charge slower.
5. StandBy: Configure Only for Stands
Exact path: Settings > StandBy > StandBy toggle On/Off. Requires iPhone to be charging, angled in landscape, and locked to activate.
Trade-off: StandBy turns your iPhone into a clock, photo, or widget display on a charging stand. On a proper upright MagSafe stand this is useful and does not significantly increase heat. On a flat pad where the screen is face-up and not angled, enabling StandBy provides no benefit and keeps the display active longer than needed.
What causes the display to stay on all night or add warmth: StandBy active on a flat pad with Always On Display, or Display > Night Shift / True Tone interactions. How to check: Place the phone on the charger in landscape on a stand versus flat. Go to Settings > StandBy > Display > turn off Display and set Night Mode to Automatic. What to do: Leave StandBy on for nightstand stands, turn it off for flat pads at Settings > StandBy. How to undo: Toggle StandBy back on at the same path.
6. Thermal Management: Case Off and Ventilation During Fast Wireless Charge
Exact path: No toggle, but monitor via symptoms. If iOS displays the temperature warning or charge pauses at 80%, heat is the limiter. Check Settings > Battery for the charge graph showing a flat line or pause.
Trade-off: Wireless charging is inherently less efficient than wired and generates more heat. Removing a thick rugged case during a long wireless charge session improves heat dissipation and sustains higher wattage longer, but leaves the phone less protected. Keeping the case on is safer physically and acceptable for slow overnight charging.
What causes charge to pause at 80% with a hot device: iOS thermal protection has temporarily suspended charging. How to check: Feel the back near the Apple logo and observe if the lock screen says Charging Paused Due to Temperature. What to do: Move the charger off fabric, bedding, or direct sunlight to a hard surface, remove the case for the duration of the charge, and avoid running navigation or games while on the pad. How to undo: Put the case back on once charging is complete and cool.
By Hardware Tier
Low Tier: Single-Coil Qi Pad (7.5W) with 12W-18W Adapter
This tier covers basic round pads without magnets, often bundled with lamps or furniture. The priority is stability, not speed. Use Optimized Battery Charging On as described at Settings > Battery > Battery Health & Charging. Since there is no magnetic alignment, place the iPhone precisely in the center; use the pad’s LED as a guide and consider a small alignment sticker on the pad. Keep the case thin and non-magnetic. These pads will never exceed 7.5W on iPhone even with a larger adapter, so do not chase wattage by buying a bigger brick; instead ensure the pad gets clean, steady power and good ventilation. For overnight use, this tier is actually ideal for battery health because the slower rate creates less heat.
Mid Tier: MagSafe / Qi2 Certified Stand (15W) with 20W USB-C PD Adapter
This is the recommended balance for most users. A certified MagSafe or Qi2 stand with a 20W or higher USB-C PD adapter and a USB-C cable will deliver the full 15W iPhone wireless rate with reliable magnetic lock. Enable either Optimized Battery Charging or the 80% Limit at Settings > Battery > Battery Health & Charging depending on whether you need full capacity daily. Enable StandBy at Settings > StandBy for nightstand use, and set StandBy > Display > Night Mode to Auto with a red tint to reduce light at night. Keep the stand on a nightstand or desk with open air, not inside a closed cabinet. This tier benefits most from a MagSafe-certified case; generic magnetic cases often use weaker magnets that slip overnight.
High Tier: Qi2 15W Multi-Device Station (iPhone + Apple Watch + AirPods) with 30W-40W Adapter
High-tier 3-in-1 stations can charge iPhone at 15W while also powering Watch and AirPods, but they require more total input power than a single puck. Use the adapter included with the station or a USB-IF certified 30W to 40W USB-C PD adapter as specified in the station manual under Input. Do not power a 3-in-1 from a 20W adapter; it will throttle the iPhone coil to 7.5W or cause all three devices to cycle. Prioritize cable quality: use the included USB-C cable or a certified 60W-rated USB-C cable. For settings, keep the 80% Limit on for daily desk use to avoid holding three batteries at 100% for hours, and turn on Optimized Battery Charging for overnight. Place the station where the Watch and AirPods sections do not trap heat under the iPhone; if the station has a vertical iPhone mount and a flat Watch puck, keep both sections exposed to air.
Common Mistakes
Mistake: Metal accessories or cards between iPhone and charger. What causes it: Magnetic wallet, credit cards, hotel key cards, or a metal kickstand interfering with the Qi coil and MagSafe magnets, causing heat and failed negotiation. How to check: Remove the case and any attached wallet or ring and test charging with the bare phone; if the charge bolt appears instantly, an accessory was blocking. What to do: Remove all metal or magnetic items from between the devices, use a MagSafe wallet that attaches to the outside of a MagSafe case instead of between phone and charger, and never place cards on a wireless pad. How to undo: Reattach the wallet to the back of the case after charging, not during.
Mistake: Using a low-wattage or USB-A adapter with a Qi2/MagSafe puck. What causes it: Power Delivery negotiation failure when the puck requests 15W but the adapter cannot supply it over USB-C PD. How to check: Read the fine print on the adapter; if it says 5V 2.4A or only lists USB-A ports without PD, it is under-powered. What to do: Switch to a 20W or higher USB-C PD adapter and a USB-C to USB-C cable, and ensure the puck is plugged directly into the adapter, not a USB hub or extension. How to undo: Keep the old adapter for legacy devices that do not need PD.
Mistake: Disabling Optimized Battery Charging to force faster charging. What causes it: Users toggle Optimized Battery Charging off at Settings > Battery > Battery Health & Charging expecting higher wattage, but the toggle only affects the dwell time at 100%, not charge speed. How to check: Note that charge speed does not improve after disabling, but the battery stays at 100% for many hours overnight. What to do: Leave Optimized Battery Charging on or use the 80% Limit for daily use, and accept that the final 20% is intentionally slow to protect health. How to undo: Turn Optimized Battery Charging back on at the same menu path.
Mistake: Charging on soft surfaces or while running intensive apps. What causes it: Bed linens, couch cushions, or car dashboard heat traps thermal energy, and navigation, video, or games add internal heat that stacks with wireless charging heat. How to check: If charging pauses, the device feels hot, or the Battery graph at Settings > Battery shows a plateau, heat is the cause. What to do: Move the charger to a hard, flat surface in a 62-72°F room, close intensive apps, and unplug from CarPlay wireless charging if using wired navigation. How to undo: Resume normal app use after the phone is at target charge and has cooled.
FAQ
Should I use the 80% Limit or Optimized Battery Charging for wireless charging?
Use 80% Limit at Settings > Battery > Battery Health & Charging > Charging Limit on iPhone 15 and newer if you charge daily on a desk or nightstand and can top up during the day; it is the most effective for longevity. Use Optimized Battery Charging if your schedule varies or you need a full 100% most mornings, as it will still delay the final charge until just before you wake. On iPhone 14 and earlier, only Optimized Battery Charging is available, so leave it on. Switch temporarily to Fully Charged the night before travel.
Why does my iPhone get hot and stop wirelessly charging at 80%?
iOS intentionally pauses charging when the battery or system temperature exceeds safe thresholds. This is not a defect. Causes include thick cases, direct sunlight, soft bedding, or heavy app use while charging. Check Settings > Battery for a flat charge line and look for a lock screen message about temperature or Optimized Charging. To fix it, move the charger to a ventilated hard surface, remove the case during charging, let the phone cool for 10 minutes before placing it back, and avoid running demanding apps while on the pad.
Do I need a MagSafe case for optimal wireless charging?
For Qi pads without magnets, any thin case under about 2.1mm works, but for MagSafe or Qi2 stands, a MagSafe or Qi2 certified case is strongly recommended. The embedded magnet array ensures perfect coil alignment and prevents slow, heat-generating misalignment. You can test this by charging with and without the case; if charging is faster and more stable without it, the case lacks proper magnets or is too thick. Avoid cases with built-in metal kickstands or battery packs that sit between the phone and the charger.
Is wireless charging slower and worse for battery health than wired?
Wireless charging at 7.5W to 15W is slower than 20W wired charging over USB-C to Lightning or USB-C to USB-C, and it does generate more waste heat, which can accelerate aging if the phone is often hot at 100%. However, with Optimized Battery Charging or the 80% Limit enabled, a cool environment, and good alignment, the difference in long-term health is manageable for overnight and desk use. For the fastest top-up before going out, use a wired 20W or higher USB-C PD adapter with a certified cable; for convenience and overnight health, the optimized wireless setup described above is the better default.