Achieving the perfect ambient environment requires more than just plug-and-play operation. Standard out-of-the-box settings for addressable RGB (ARGB) strips often result in erratic, strobe-like flashing that causes eye strain rather than immersive atmospheric enhancement. To configure the best settings for smart rgb strip music sync, you must prioritize audio capture latency, frequency separation, and signal smoothing.
The core of a high-performance music synchronization engine lies in how it processes sound. Raw audio contains massive spikes in volume and high-frequency noise. If your software translates these spikes directly to your LED strip’s brightness channels, the result is chaotic. By utilizing advanced Fast Fourier Transform (FFT) processing, your synchronization software splits audio into distinct frequency bands (bass, mids, highs) and applies mathematical smoothing filters to control how quickly the lights illuminate (attack) and fade out (decay). Prioritizing these parameters transforms a distraction into a fluid, responsive visualizer that matches the beat of your gameplay or music. The picks below cover the main routes: an addressable 5V PC strip for software sync, a Govee strip with its own built-in music mode, and a WS2812B strip for WLED and LedFx builds.
As an Amazon Associate we earn from qualifying purchases at no extra cost to you.


Our Top Picks
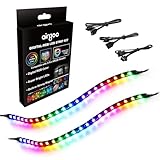
 airgoo 8-Port Magnetic-Mount USB ARGB Controller Support SignalRGBCompact2.66 x 1.39 x 0.47 InchesCheck on Amazon


Top 3 picks at a glance
Quick Recommended Settings
For a reliable starting configuration that balances latency with fluid transitions, apply the values detailed in the table below. These settings are optimized for leading sync platforms, including SignalRGB, Corsair iCUE, Razer Chroma, and open-source solutions like LedFx paired with WLED.
| Setting Name | Recommended Value | Why It Matters |
|---|---|---|
| Audio Capture API | WASAPI (Loopback Mode) | Provides direct, low-latency desktop audio capture without locking the sound card. |
| FFT Block Size | 1024 or 2048 samples | Balances frequency resolution (crisp bass detection) with real-time processing speed. |
| Attack Time (Rise) | 12ms to 18ms | Ensures the LEDs illuminate immediately with a drum hit, avoiding noticeable lag. |
| Decay Time (Fall) | 90ms to 130ms | Prevents immediate, jarring blackouts when sound drops, creating a smooth fade. |
| Bass Frequency Band | 20Hz – 150Hz | Isolates sub-bass and kick drums to prevent mid-range vocals from triggering bass pulses. |
| High Frequency Band | 4000Hz – 16000Hz | Captures crisp high-hats and synthesizers while filtering out high-pitched digital noise. |
| Gain / Sensitivity | Manual (1.2x – 1.5x Multiplier) | Avoids the pumping effect caused by Automatic Gain Control (AGC) during quiet passages. |
| Brightness Ceiling | 80% Maximum | Reduces heat and current draw, and limits visible voltage drop on long 5V runs. |
Setting-by-Setting
Audio Input API (WASAPI vs. DirectSound / Stereo Mix)
Exact Value: WASAPI (Windows Audio Session API) Loopback Mode.
The Trade-off: WASAPI Loopback captures the digital audio stream your PC is already playing, so room noise is excluded and capture latency stays low. The trade-off is compatibility with virtual audio cables. If you run complex software mixers like VoiceMeeter Banana, you must explicitly point your sync software’s input to the specific virtual output channel rather than the default system output. Avoid microphone inputs, which pick up room noise, and treat “Stereo Mix” only as a fallback, since it depends on your sound driver and is not available on every PC.
FFT Block Size (Frequency Resolution)
Exact Value: 1024 Samples (for fast-paced electronic/gaming audio) or 2048 Samples (for orchestral/acoustic music).
The Trade-off: The Fast Fourier Transform block size dictates how many audio samples the software analyzes before updating the lights. A smaller block size (e.g., 512) updates incredibly fast, resulting in ultra-low latency, but has poor frequency resolution, making it difficult for the software to distinguish between low bass and low-mid frequencies. A larger block size (e.g., 4096) offers surgical precision in separating instruments but introduces a noticeable processing delay where the lights lag behind the audio signal.
Smoothing: Attack and Decay Rates
Exact Value: Attack: 15ms | Decay: 110ms.
The Trade-off: Attack determines how fast the LED strip reaches peak brightness once a sound is registered. Setting this too low (under 5ms) causes instant, strobe-like changes that can induce headaches. Decay determines how long the color lingers after the sound stops. Setting this too high (above 250ms) turns your music visualizer into a sluggish, muddy glow where individual beats are lost. Keeping the decay roughly 7 to 8 times longer than the attack ensures a highly dynamic yet comfortable viewing experience.
Frequency Cutoffs and EQ Bands
Exact Value: Bass: 20-130Hz | Mids: 250-2500Hz | Highs: 4000-15000Hz.
The Trade-off: Standard software presets often run overlapping frequency bands (e.g., Mids extending down to 100Hz). This overlap causes your LEDs to flash white or generic mixed colors because multiple frequency bands are triggered simultaneously by a single drum kick. Isolating these bands with clear dead zones (such as leaving 130Hz to 250Hz unmapped or lightly weighted) ensures that your bass strips pulse strictly to low-end kicks, while your desk or monitor backlights dance independently to vocals and high-frequency effects.
Gain Sensitivity & Automatic Gain Control (AGC)
Exact Value: AGC Disabled | Manual Gain: 1.3x.
The Trade-off: Automatic Gain Control dynamically boosts the input signal during quiet moments in a song or game. While this ensures the lights are always moving, it completely destroys the dynamic range; a quiet ambient whisper will flash just as brightly as a massive explosion. Disabling AGC and setting a manual gain multiplier of 1.3x preserves the intended dynamics of your media, though it means you may need to manually bump the gain if you play a highly compressed, low-volume audio source.
By Hardware Tier
Low-End / Motherboard-Driven Sync (e.g., 12V 4-Pin RGB Headers)
This hardware tier relies on basic motherboard software utilities (such as ASUS Armoury Crate or MSI Mystic Light) to drive analog, non-addressable 12V RGB strips. Because these strips change color as a single unit rather than animating individual pixels, complex spatial music visualizers are not possible. Focus your configuration on color-shifting based entirely on amplitude (volume) rather than frequency splitting. If you notice in-game micro-stutters while the lighting software runs, lower its effect speed or update rate and close any other RGB utilities that control the same hardware.
Mid-Range Dedicated USB Controllers (e.g., Corsair iCUE, Razer Chroma Hub)
Mid-range systems utilize dedicated USB-connected hardware controllers running 5V Addressable RGB (ARGB) strips. These controllers have dedicated microcontrollers that handle LED addressing, allowing you to utilize advanced spatial effects like “Wave,” “Spectrum,” or “Pulse.” For this tier, configure your software (such as SignalRGB) to use a 60Hz update rate. Map your physical layout accurately in the software canvas editor to ensure that low frequencies start from the center of your LED strip and expand outward to the edges as the volume peaks.
High-End DIY & Local Network Integrations (e.g., WLED on ESP32 via LedFx)
In 2026, utilizing an ESP32 micro-controller paired with high-density (144 LEDs/meter) WS2812B or SK6812 strips represents the absolute pinnacle of music synchronization. This hardware configuration offloads all audio processing to an external PC server running LedFx, which streams raw color packets directly to the ESP32 over a local network. For these high-end setups, set your output protocol to DDP (Distributed Display Protocol) rather than E1.31 (sACN), since DDP carries pixel data with less protocol overhead. Keep the frame rate at around 60 FPS unless your network handles more without dropped frames, and split a single long LED strip into virtual segments so each zone can react to a different frequency range.
Best Settings for Govee App Music Mode (No PC Required)
The PC-side settings above assume your lights are driven by sync software on a computer. Many smart RGB strips, including the Govee RGBIC strip featured at the top of this guide, also have a standalone music mode that listens through a microphone built into the control box. That mode works without a PC, but it follows different rules, so it needs its own configuration.
Use the Strip’s Built-In Mic, Not Your Phone
In the Govee Home app, open the strip’s detail page and tap Music. Govee recommends syncing from the device microphone rather than the phone microphone. Phone-mic sync only works while the app stays open on that screen, and it adds a wireless hop that can make the lights lag. The control box mic runs continuously and reacts with less delay.
Pick the Right Music Mode
Govee RGBIC strips offer several music modes, though the exact list varies by model. The most common are:
- Energic: fast color changes and flashes on every beat. Best for EDM, parties, and short bursts. Too aggressive for background listening.
- Rhythm: smoother transitions that follow the melody. The most comfortable choice for long sessions and gaming.
- Spectrum: maps frequency ranges to colors across the strip, behaving like a visual equalizer. Great for music with clear bass and treble separation.
- Rolling: color flows along the strip in time with the beat. Works well on long runs around a room or desk edge.
Some modes also have sub-options such as Calm and Dynamic. Calm is the equivalent of a longer decay time in PC software: colors linger and fade instead of snapping off.
Set Sensitivity for Your Room, Not Your Music
The sensitivity slider decides how loud a sound must be to trigger a change. Moving it right makes the strip react to quieter sounds. A practical starting point is the middle of the slider, around 50 to 60 percent. Turn it down if loud games or movies make the strip flicker constantly, and turn it up if quiet music barely moves the lights. Because the microphone hears everything, a room with a loud fan or a noisy keyboard needs lower sensitivity than a quiet bedroom.
Place the Control Box Where It Can Hear
Microphone placement matters more than any slider. Keep the control box in open air, roughly between you and your speakers, not behind a desk, inside a cabinet, or pressed against a subwoofer. Placing it right next to a mechanical keyboard will make every keystroke register as a beat, the same problem described in the microphone feedback section below.
Recommended Govee Starting Settings
| Use case | Music mode | Sub-option | Sensitivity | Brightness |
|---|---|---|---|---|
| Gaming background | Rhythm | Calm | 40 to 50 percent | 50 to 70 percent |
| EDM or party | Energic | Dynamic | 60 to 70 percent | 80 percent |
| Music listening at desk | Spectrum | Calm | 50 to 60 percent | 60 to 80 percent |
| Long room-perimeter run | Rolling | Dynamic | 55 to 65 percent | 70 to 80 percent |
| Movies | Rhythm | Calm | 30 to 40 percent | 30 to 50 percent |
These are starting values, not fixed rules. Adjust sensitivity first, then mode, then brightness. Changing all three at once makes it hard to tell which change helped.
Best Settings for WLED Audio Reactive (On-Board Microphone)
The high-end tier above describes streaming audio analysis from a PC with LedFx. WLED can also analyze sound on the controller itself using an attached microphone, which removes the PC from the chain. In current WLED builds, these options live under Config, then Usermods, in the AudioReactive section.
Squelch: Set the Noise Floor First
Squelch is the minimum level WLED treats as sound. Everything below it is ignored, so the strip stays still in silence. Start high and lower it until the LEDs just stop reacting to room noise. Digital I2S microphones typically settle between about 1 and 20; analog microphones can need much higher values because they pick up electrical noise.
Gain: Match the Input Level
Gain amplifies the signal before analysis. Line-in sources usually need more gain than microphones. A good calibration routine from the WLED documentation is to set squelch low and gain high with AGC off, choose a meter-style effect such as Gravimeter, raise squelch until silence produces no movement, then reduce gain until speaking at normal volume produces a reasonable response.
AGC: Only After Squelch Is Right
WLED’s automatic gain control offers Normal, Vivid, and Lazy modes. Normal follows volume changes smoothly, Vivid reacts quickly for more dramatic dynamics, and Lazy adjusts slowly. This is the one place where AGC is reasonable to enable, because WLED’s AGC is designed around a correctly set squelch. If you prefer the preserved dynamics described in the gain section above, leave it off.
Starting Values by Microphone
| Microphone | Type | Starting squelch | Starting gain |
|---|---|---|---|
| INMP441 | Digital I2S | 6 | 60 |
| ICS-43434 | Digital I2S | 16 | 30 |
| MAX9814 (40dB) | Analog | 10 | 80 |
| MAX4466 | Analog | 16 | 120 |
| Line-in | Analog | 8 | 120 |
These values come from the sound-reactive WLED community documentation and apply to recent releases. Use them as a starting point and fine-tune in your own room.
Choose Effects Marked for Audio
Only effects marked with a music note in the WLED effect list respond to sound. For bass-driven music, Gravcenter and Freqmatrix style effects read clearly. For desk strips viewed up close, slower effects with a higher fall rate are easier on the eyes than full-strip strobes.
Use Audio Sync for Multiple Controllers
If you run several WLED controllers, one can analyze audio and send the results to the others over the network using WLED’s audio sync option. That keeps all strips reacting to the same beat instead of each mic hearing the room slightly differently.
Hardware That Makes These Settings Easier
The settings in this guide work with whatever strip you already own, but some hardware unlocks options that consumer kits do not expose. These three products map directly to the mid-range and high-end tiers described above.
GLEDOPTO Elite ESP32 WLED LED Controller with Built-In I2S Mic

If the WLED audio reactive settings above appeal to you but you would rather not solder an ESP32 board and microphone together, a ready-made controller is the shortcut. The GLEDOPTO Elite is a budget-tier ESP32 controller that ships ready for WLED with a built-in digital I2S microphone, Wi-Fi, and a wired Ethernet port. Ethernet is a meaningful advantage for music sync: it removes the Wi-Fi packet loss that causes jerky animations, the same problem the FAQ below describes for 2.4GHz networks.
GLEDOPTO lists a 5V to 24V input range, a maximum total output of 15A with 10A per channel, two LED outputs, an extra GPIO for custom use, and a relay that cuts power to the strip when it is off. It ships with a 20A fuse and a spare lower-rated fuse so you can match protection to your strip. Supported chips include WS2812B, WS2815, and SK6812, which covers the strips most people use for music sync.
For the microphone, the manual lists Generic I2S (or I2S PDM) with specific SD, WS, and SCK pins to enter in the AudioReactive settings. If sound does not register with one type, try the other. Once the mic is detected, follow the squelch and gain routine above.
Strengths: WLED-ready, built-in digital mic, Ethernet for stable sync, and solid power handling. Drawbacks: requires basic wiring to a power supply and strip, and the setup is more technical than a Govee app. Compared with the Govee strip featured above, it offers far deeper control, at the cost of convenience.
BTF-LIGHTING SK6812 RGBW LED Strip (144 LEDs/m, 5V)

The high-end tier above mentions 144 LEDs per meter WS2812B or SK6812 strips. This BTF-LIGHTING SK6812 strip is a budget-tier way to get exactly that, with one important addition: a dedicated natural-white LED in every pixel alongside red, green, and blue. That RGBW layout matters for music sync because the white channel produces a cleaner, more pleasant white than mixing RGB at full power, which helps when you want a soft ambient base that only adds color on beats.
At 144 pixels per meter, animations such as Spectrum and Rolling look smooth rather than dotted, and frequency-band mapping has enough pixels to show distinct zones on a short desk run. The strip runs at 5V and is supported by WLED and most ESP32 controllers, including the GLEDOPTO above.
The density has trade-offs. A 5V strip with 144 LEDs per meter draws significant current at full white and suffers voltage drop over longer runs, so you need an adequately sized power supply and power injection every meter or two on longer installs. This is also why the brightness ceiling in the quick settings table is worth applying. The 3.28-foot length suits a desk edge or monitor back; longer runs need multiple strips.
Strengths: true RGBW pixels, high density for smooth effects, and broad controller support. Drawbacks: high power demand, short length, and no controller included. Choose it over a Govee strip if you are building a WLED or LedFx setup and want the smoothest possible visualizer.
airgoo 8-Port Magnetic USB ARGB Controller

The mid-range tier above describes dedicated USB controllers running 5V ARGB strips through software like SignalRGB. The airgoo AG-DRGB08 is a budget-tier controller built exactly for that job. It provides eight standard 5V 3-pin ARGB ports, each supporting up to 256 LEDs with independent control, and it connects to the motherboard through an internal USB 2.0 header with SATA power for the LEDs.
Its main appeal for music sync is software support. airgoo states it works with SignalRGB and OpenRGB, not motherboard RGB utilities. That means it pairs with the WASAPI loopback, FFT, and smoothing settings described earlier, and OpenRGB runs on Windows, Linux, and macOS. The SATA power feed keeps the LEDs stable under load, which helps avoid the dimming and flicker that come from drawing strip power through a single header.
The magnetic body attaches to the inside of a steel case without screws, and a self-resetting fuse protects against overloads. Keep in mind the USB bandwidth advice in the common mistakes section: this controller uses an internal USB 2.0 header, so avoid sharing that header’s hub with other high-traffic devices if you see stutter.
Strengths: eight independent channels, SignalRGB and OpenRGB support, SATA power, and tool-free mounting. Drawbacks: no motherboard software support and only useful inside a PC case. It is the logical upgrade if your current strips run from motherboard headers and you want proper frequency-band music sync.
Common Mistakes
Stuttering and Desynchronized LED Animations (USB Bandwidth Bottlenecking)
- What causes it: High-density addressable RGB strips demand significant data bandwidth. When multiple controllers or high-polling-rate gaming mice are plugged into the same internal USB 2.0 controller hub on your motherboard, the data packets carrying the real-time music sync commands get delayed, causing the LEDs to freeze or stutter behind the music.
- How to check: Open your sync software’s performance monitor or Windows Device Manager. Play a track with a fast tempo. If the delay between the audio beat and the LED reaction increases over time, or if your mouse movements cause the lights to lag, you are experiencing USB bus saturation.
- What to do: Shut down your PC. Unplug the USB cable of your RGB controller from the motherboard’s internal header and move it to a dedicated PCIe-to-USB expansion card, or connect it to an active, externally powered internal USB hub (such as an NZXT or Corsair internal hub). This isolates the high-frequency LED data stream from your mouse, keyboard, and external drives.
- How to undo: If you need to revert, simply plug the RGB controller back into its original motherboard USB 2.0 header and reduce the LED frame rate setting in your sync software from 90Hz to 30Hz to lower the data throughput.
Constant Harsh Flickering (Improper High-Frequency Filtering)
- What causes it: High-frequency sounds like drum hi-hats, vocal sibilance, and synthetic white noise have highly chaotic wave patterns. When these frequencies are mapped directly to LED brightness without a low-pass filter, the strip flashes at rates exceeding 30 times per second, resulting in a nauseating strobing effect.
- How to check: Play an acoustic song with prominent cymbals or acoustic guitar strumming. If your LED strip jitters rapidly between white, light blue, and off, your high-frequency band is registering every minor sound fluctuation as a peak volume event.
- What to do: Open your synchronization software’s equalizer or frequency band configuration panel. Locate the “Highs” or “Treble” channel. Change the upper cutoff frequency limit from 20,000Hz down to 12,000Hz, and increase the “Temporal Smoothing” or “Low Pass Filter” value specifically on that channel to 45ms. This blends the high-frequency peaks together into a gentle, continuous glow rather than individual flashes.
- How to undo: To restore default behavior, open your software’s audio configuration tab, click the “Reset to Default” button on the equalizer profile, and set the high-frequency filter slider back to its minimum value.
Inaccurate Bass Triggers (Microphone Feedback Loop)
- What causes it: Setting your sync software’s capture source to a physical microphone instead of a direct system loopback causes the lights to react to mouse clicks, mechanical keyboard strokes, and the physical vibrations of your desk, completely ruining the music synchronization.
- How to check: Mute your PC’s audio completely but leave your music sync software running. Type on your keyboard or tap on your desk. If your LED strip pulses or changes color in response to these physical actions, your software is capturing ambient microphone inputs.
- What to do: Open your Windows Run dialog by pressing Win + R, type
mmsys.cpl, and press Enter to open the Sound Control Panel. Navigate to the “Recording” tab. Right-click your active microphone and select “Properties,” then go to the “Advanced” tab and ensure “Allow applications to take exclusive control of this device” is unchecked. Next, open your RGB sync software’s audio settings (for example in SignalRGB) and switch the audio input from your microphone to your system output or loopback device. - How to undo: To revert this change, return to your sync software’s audio device dropdown menu and select your physical microphone device from the list.
Matching Effects to Music and Content
Even perfect latency and smoothing settings can look wrong if the effect does not suit what you are playing. Use this as a quick reference when switching between games, music, and movies.
| Content | Best effect style | Attack and decay | Brightness | Notes |
|---|---|---|---|---|
| EDM, hip-hop | Bass pulse, Spectrum | Fast attack, medium decay | High | Weight the bass band; keep highs subtle |
| Rock, metal | Energy meter, Rolling | Fast attack, longer decay | Medium to high | Lower sensitivity; dense mixes trigger constantly |
| Acoustic, classical | Slow color wash, Spectrum | Slow attack, long decay | Low to medium | Larger FFT block for better separation |
| Fast-paced games | Ambient color with bass accents | Medium attack, long decay | Low to medium | Avoid strobes that distract from the screen |
| Movies | Gentle pulse or screen sync | Slow attack, long decay | Low | Explosions will spike; cap brightness |
| Podcasts, voice chat | Static ambient | Not applicable | Low | Music sync on speech looks erratic |
Quick Calibration Routine
Whatever platform you use, the same five-step routine gets you to good settings quickly and avoids chasing several variables at once.
- Confirm the audio source. Play silence and tap your desk. If the lights react, you are capturing a microphone or room noise, not system audio. Fix this first.
- Set the noise floor. With silence playing, raise squelch or lower sensitivity until the strip is completely still.
- Set gain with a reference track. Pick a well-mastered song you know, play it at your normal listening volume, and adjust gain until the loudest bass hits just reach your brightness ceiling.
- Tune smoothing last. Adjust attack and decay only after the input level is right. Too much flicker means decay is too short; muddy, laggy color means decay is too long.
- Save a profile per use. Most platforms let you save presets. Keep separate profiles for gaming, music, and movies so you do not recalibrate every time.
Comfort and Safety Considerations
- Avoid rapid full-strip flashing. Flashing faster than about three times per second can be uncomfortable for many people and is a known trigger for photosensitive epilepsy. Longer decay and softer effects reduce the risk.
- Keep lights out of your direct line of sight. Strips behind a monitor or under a desk edge provide atmosphere without glare. Strips facing you directly cause eye strain regardless of settings.
- Size the power supply properly. Long or dense addressable strips can draw several amps at full white. Use a supply rated above your maximum draw and inject power on long runs.
- Lower brightness at night. A 30 to 50 percent ceiling in the evening is easier on the eyes and helps the room feel calmer.
Syncing Multiple Strips to the Same Beat
A single strip behind a monitor is easy to tune. Problems start when you add a second strip under the desk, a third around the ceiling, and each one listens separately. Small differences in microphone position and processing make the strips drift slightly out of step, which reads as messy rather than immersive.
One Listener, Many Outputs
The cleanest approach is to let one device analyze the audio and distribute the result. In WLED, one controller can send its audio analysis to others over the network using the audio sync feature, so every strip reacts to identical data. In PC software, a single engine such as SignalRGB or LedFx drives every connected device from the same audio capture. With Govee products, an external music sync box can coordinate several lights at once instead of relying on each control box microphone.
Give Each Strip a Job
Matching the same effect on every strip is rarely the best look. Assign roles instead: a bass-only pulse on the under-desk strip, a mid-range color wash behind the monitor, and a slow ambient flow on the ceiling run. This mirrors the frequency band separation described earlier and keeps the room from flashing in unison on every kick drum.
Match Brightness Between Strips
Strips of different densities, lengths, or brands produce very different brightness at the same percentage. Set each strip by eye with a static white first, matching how bright they appear from your seat, then save those brightness levels before enabling music sync.
Check Latency on the Slowest Device
The whole setup can only feel as tight as its slowest link. Wi-Fi strips typically lag wired USB controllers slightly. If one strip visibly trails the others, move it to a wired connection, put it on a less congested network band, or reduce its effect complexity so it processes frames faster.
FAQ
Why is there a delay between my music and the RGB strip’s reaction?
This delay, known as latency, is typically caused by audio buffer delays in the operating system or software processing chains. When Windows handles audio through standard DirectSound, it buffers the audio packets to prevent playback stuttering, adding up to 100ms of lag. To fix this, always select WASAPI (Loopback) or ASIO as your capture API in your sync software’s settings. Additionally, lower your software’s audio buffer size to 256 or 512 samples. This forces the processor to analyze smaller chunks of audio data more frequently, dropping visual latency to imperceptible levels.
Should I use Wi-Fi (WLED) or a direct USB connection for the lowest latency music sync?
For the absolute lowest latency, a direct USB serial connection is superior because it avoids network packet overhead and potential Wi-Fi interference. However, a properly configured local Wi-Fi setup using an ESP32 controller running WLED can perform nearly identically. To achieve this, you must use the DDP (Distributed Display Protocol) over a 5GHz Wi-Fi network with your router’s Quality of Service (QoS) configured to prioritize UDP packets. Avoid using older 2.4GHz Wi-Fi bands, as microwave ovens, Bluetooth devices, and neighboring networks will cause packet loss, resulting in jerky animations.
How do I stop my microphone from picking up ambient noise and triggering the lights?
You must completely decouple your hardware microphone from your lighting software’s capture engine. Go into your lighting software’s audio preferences tab and locate the input source selection. Change this from “Default Microphone” or “Realtek Audio Input” to your virtual system loopback driver (such as WASAPI Loopback, VB-Audio Cable, or your dedicated virtual audio interface output). This ensures the software only reads the digital audio stream being sent directly to your speakers or headphones, completely ignoring physical room acoustics, voice chat, and keyboard clacking.
Does enabling music sync impact my in-game frame rates (FPS)?
Yes, real-time music synchronization can impact CPU performance, particularly on high-refresh-rate displays. The software must constantly run Fast Fourier Transform calculations on your audio stream and then map those values to hundreds of individual LED addresses at 60Hz or higher. To minimize this performance hit, configure your sync software to run at a fixed 30Hz or 40Hz update rate, disable unused LED channels, and set the process priority of your lighting engine (e.g., SignalRGB.exe) to “Normal” rather than “High” in the Windows Task Manager.
What are the best Govee music mode settings for gaming?
Use Rhythm mode with the Calm sub-option, sensitivity around 40 to 50 percent, and brightness at 50 to 70 percent. Rhythm follows the melody smoothly instead of flashing on every sound effect, and lower sensitivity keeps gunfire and explosions from turning the strip into a strobe.
Why does my strip react to my voice and keyboard during music mode?
Built-in music modes listen through a microphone, so they hear everything in the room. Lower the sensitivity, move the control box closer to your speakers and away from your keyboard, or switch to PC software that captures system audio directly so only the audio stream drives the lights.
Can I use WLED music sync without a PC?
Yes. An ESP32 controller with an attached or built-in microphone can run WLED’s AudioReactive features on its own. Set squelch first so the strip stays still in silence, then adjust gain until normal music volume produces a full response. A PC with LedFx adds more processing power and system audio capture, but it is not required.
Is an RGBW strip better than RGB for music sync?
For mixed use, often yes. A dedicated white LED produces a cleaner white for an ambient base layer, so the strip can sit at a soft neutral glow and add color only on beats. For pure color effects, a standard RGB strip is fine and usually cheaper.
How many LEDs per meter do I need for smooth music visualizers?
For a strip viewed up close on a desk or behind a monitor, 60 LEDs per meter looks acceptable and 144 LEDs per meter looks smooth. Longer room-perimeter runs viewed from a distance can use 30 to 60 LEDs per meter without looking spotty, and they draw much less power.