If you run two monitors through a KVM switch, you have probably seen desktop icons rearrange themselves, windows jump between displays, or one screen show “No Signal” for ten seconds every time you switch inputs. All of these problems trace back to EDID — the small data block each monitor sends to describe its capabilities. When a KVM sits between your PC and your monitors, it can drop, corrupt, or renegotiate that data, and your graphics driver reacts by rebuilding the display topology from scratch.
The fix is EDID management. Most quality KVMs made for dual-monitor setups include an EDID emulator or a software utility that lets you lock in a fixed EDID profile. Priority order matters: preserve your monitors’ native resolutions first, keep a stable refresh rate second, and only then chase extra features like HDR metadata passthrough. A slightly imperfect EDID that never changes beats a perfect one that disappears every time you press the switch button. This guide walks through the settings that matter, ordered by impact, with the exact values and trade-offs for each.
As an Amazon Associate we earn from qualifying purchases at no extra cost to you.




Our Top Picks


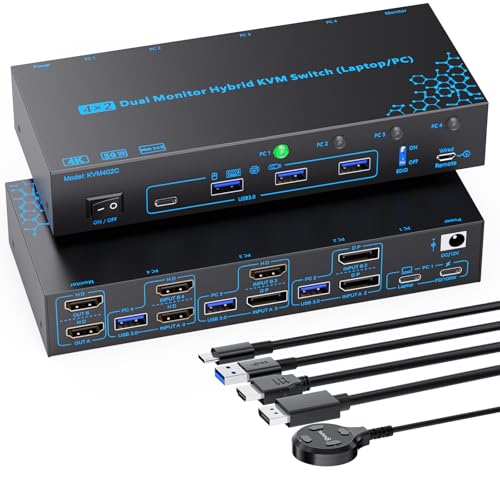

Top 3 picks at a glance
Quick Recommended Settings
| Setting | Recommended value | Why |
|---|---|---|
| EDID emulation mode | Emulated/locked (sometimes called “PASS via” or “Default EDID” off) | Prevents resolution loss and window rearrangement when switching inputs |
| Emulated resolution | Monitor 1: native (e.g., 2560×1440). Monitor 2: native (e.g., 1920×1080) | Guarantees both displays present at full resolution on every switch |
| Emulated refresh rate | Highest refresh each monitor supports over the KVM (60/120/144/165 Hz) | Avoids the driver falling back to 30 Hz after a hot-plug event |
| DDC/CI passthrough | Enabled on both ports | Lets monitor control software (Monitorian, Twinkle Tray, OSD apps) work through the switch |
| HDMI version / EDID version | Match the KVM’s link class: HDMI 2.0-class EDID for 4K60 or 1440p high refresh; HDMI 1.4 only for 1080p or 1440p at 60 Hz | HDMI 1.4 cannot carry 4K60, while advertising more than the KVM can pass produces black screens |
| Hot-plug detection (HPD) | Always asserted / HPD loopback enabled | Keeps the GPU from seeing a “disconnect” during switching |
| Custom EDID loading | Dump from your actual monitor and load to KVM flash memory | Exact match beats any built-in generic profile |
Setting-by-Setting
EDID Emulation Mode: Locked, Not Passthrough
Exact setting: In your KVM’s configuration utility (some units ship a vendor setup utility that runs over USB, while others use button sequences or DIP switches to pick a preset profile; check your manual for the exact labels), choose emulated/custom mode, not passthrough.
The trade-off: Locked EDID means the GPU always sees both monitors as present, even when the KVM’s active input is pointed at another computer. You lose nothing at moderate settings. The only cost: if you physically replace a monitor with a different model, you must re-dump and reload the EDID, because the KVM will keep advertising the old display to the GPU. Passthrough mode gives you automatic adaptation but reintroduces the window-shuffling problem you bought the emulator to solve.
Emulated Resolution: Match Native Exactly
Exact setting: When using a generic built-in profile, pick the one matching your monitor’s native panel resolution — 3840×2160, 2560×1440, or 1920×1080. Never pick a profile “one step up” thinking it gives headroom; the GPU will attempt to output 4K to a 1440p panel.
The trade-off: A generic 4K profile forced onto a mixed 4K + 1080p dual setup means the 1080p monitor’s scaling circuit does the work, adding a frame or more of latency and softening text. With mixed resolutions, you need per-port custom EDID, not a shared profile. Most dual-head KVMs expose this as “EDID 1” and “EDID 2” (or “EDID A/B”) slots — configure each independently.
Emulated Refresh Rate: Set It Explicitly
Exact setting: If the EDID utility offers a refresh selector, set it to the value your monitor actually runs — e.g., 165 Hz for a common 1440p gaming panel. Then confirm on the PC side under Settings > System > Display > Advanced display that the reported refresh matches. In Windows, also verify the “Dynamic refresh rate” option on that same Advanced display page is off for the gaming display, since DRR interacts badly with emulated EDID on some drivers.
The trade-off: A 60 Hz-only emulated profile is the most bulletproof across KVM brands, but caps gaming smoothness permanently. High-refresh emulation (144/165 Hz) demands more KVM bandwidth headroom — if the unit internally caps at HDMI 1.4-class throughput (~10.2 Gbps), emulating 144 Hz at 1440p will produce a blank screen. Match the emulated refresh to what the weakest link in the chain (KVM, not monitor) can carry.
DDC/CI: Enable It
Exact setting: In the KVM utility, look for “DDC/CI” or “DDC passthrough” and set to Enable/On. On the monitor side, confirm DDC/CI is on in each monitor’s OSD (usually under System or Settings; on Dell it is “DDC/CI: Enabled”, on LG “DDC/CI: On”).
The trade-off: DDC/CI passthrough is what lets brightness/volume control software work across the switch. The risk: aggressive DDC traffic during a switch event can occasionally stall input handoff on budget KVMs. If you experience sluggish input switching after enabling it, disable DDC and control monitors via their physical OSD buttons instead. The performance cost is zero either way — this is purely a convenience-versus-reliability dial.
Hot-Plug Detect: Always Asserted
Exact setting: Look for “HPD” in the utility or a jumper labeled HPD. Set to always on / asserted. Some units expose this only on higher-tier models; DIP-switch units sometimes tie HPD behavior to the emulation mode automatically.
The trade-off: With HPD always asserted, the GPU never sees a disconnect, so windows never move. The downside appears when you power a monitor off deliberately — the GPU keeps rendering to it as an active display. If you use a monitor as a secondary only sometimes and want it to vanish from Windows when powered down, you need HPD passthrough instead. For a KVM that stays connected, always-asserted is correct.
By Hardware Tier
Budget KVM (preset-only EDID profiles shared across both outputs)
These units typically offer only preset EDID profiles: 1080p, 4K30, or 4K60, shared across both heads. Set both ports to the highest shared profile that both monitors accept — usually the 4K60 preset if the switch is HDMI 2.0-class, and let the 1080p monitor’s scaler handle the mismatch. Accept 60 Hz everywhere; attempting high-refresh emulation on this tier produces black screens. Do not enable DDC/CI passthrough if the unit exposes it — input-switch stalls are common on this tier with DDC enabled. Compensate with monitor-side scaler tolerance: expect slightly soft text on the lower-res panel, which is the trade-off of a budget-tier switch.
Mid-Range KVM (dual-monitor models with per-port EDID and a vendor setup utility)
Use the vendor’s Windows utility to dump real EDID from each monitor. Enable per-port emulation (“EDID 1” and “EDID 2” independently), set each to native resolution and native refresh up to 144 Hz, and enable DDC/CI. This is the tier where the setup actually performs like the monitors were directly connected. Budget ten minutes: dump both EDIDs, load both, switch inputs a dozen times to verify windows stay put, and check Advanced display on the PC after each switch to confirm refresh rate holds.
High-End KVM (premium DisplayPort or HDMI 2.1 units with custom EDID loading, or a GPU-integrated solution like a KVM-over-USB-C dock with DSC)
At this tier you can load a full 128-byte (or 256-byte CTA) EDID blob edited in a tool like Custom Resolution Utility (CRU) or AW EDID Editor. Practical guidance: dump the raw EDID from each monitor, edit only the Monitor Name string (append “-KVM” so you can verify in Windows which display is which), leave all timing descriptors untouched, and write to the KVM’s flash. Enable HDMI 2.0-class emulation with HDR static metadata if both monitors are HDR-capable and your KVM advertises HDR passthrough — otherwise emulate at HDMI 1.4 and let Windows handle HDR only on the direct connection. Expect to spend thirty minutes and one or two retries; flash writes occasionally need a power-cycle (unplug the KVM’s DC input for ten seconds) before the new EDID takes.
How to Read, Save and Load Your Monitor’s EDID
Every tier above eventually asks you to work from your monitors’ real EDID. The process is simpler than it sounds, and doing it once saves hours of guesswork later.
- Connect each monitor directly to the PC. Bypass the KVM for this step so the PC reads the monitor’s own EDID rather than whatever the switch is currently advertising.
- Read the EDID with a utility. On Windows, Custom Resolution Utility (CRU) can export a monitor’s EDID to a file, and EnTech’s Monitor Asset Manager (MonInfo) shows the decoded contents, including every supported resolution and refresh rate. On Linux, the raw EDID is exposed under the DRM entries in /sys/class/drm and can be decoded with edid-decode.
- Check the details before saving. Confirm the preferred timing matches the panel’s native resolution, and note the highest refresh rate listed in the detailed timings or extension blocks. If you plan to emulate high refresh, that timing needs to be present.
- Save one file per monitor. Name each file after the monitor model and the port it will occupy on the KVM, such as Monitor-Left-EDID1, so you do not load the wrong profile into the wrong slot.
- Load the files into the KVM. Use the vendor’s utility or the learn function. Many KVMs with EDID emulation can also “learn” a profile automatically: connect the monitor to the output, trigger the learn mode described in the manual, and the switch copies the EDID into memory.
- Reconnect through the KVM and verify. Reboot the PC, open the display settings and confirm both monitors report their native resolution and refresh rate. Then switch inputs at least ten times and check that windows stay where you left them.
Keep the saved files. If a firmware update resets the KVM, or you move the switch to a new desk, reloading a known-good EDID takes a minute instead of an evening.
Bandwidth Limits: What Your KVM Can Actually Emulate
An emulated EDID only works if the KVM can carry the signal it advertises. If the switch promises 1440p at 165Hz but its internal link only handles HDMI 2.0-class bandwidth at a lower refresh, you get a black screen rather than a graceful fallback. The table below gives approximate ceilings for uncompressed 8-bit color with standard reduced-blanking timings; HDR at 10-bit and chroma settings reduce these slightly.
| Link class | Max raw bandwidth | Comfortable ceiling | Emulation advice |
|---|---|---|---|
| HDMI 1.4 | 10.2 Gbps | 1080p at 120Hz, 1440p at 60Hz, 4K at 30Hz | Emulate 60Hz profiles only; never advertise 4K at 60Hz |
| HDMI 2.0 | 18 Gbps | 4K at 60Hz, 1440p at 144Hz | Safe for native 1440p high refresh and 4K at 60Hz |
| HDMI 2.1 | 48 Gbps | 4K at 120Hz to 144Hz, 8K at 60Hz with DSC | Use only if every cable and port in the chain is HDMI 2.1 |
| DisplayPort 1.2 | 21.6 Gbps | 4K at 60Hz, 1440p at 165Hz | Good for high-refresh 1440p dual setups |
| DisplayPort 1.4 | 32.4 Gbps | 4K at 120Hz, 4K at 144Hz with DSC | Check that the KVM supports DSC before emulating 4K at 144Hz |
Two practical rules follow from this. First, the KVM is often the weakest link, not the monitor or GPU, so read the switch’s maximum supported resolution and refresh rate carefully. Second, if a KVM’s spec sheet lists its EDID emulator separately, as some do with a lower emulated ceiling than the passthrough ceiling, emulate within that limit and let the active connection negotiate the rest.
KVM Switches With Strong Per-Port EDID Control
If your current switch only offers shared preset profiles, these three dual-monitor models give each input its own EDID handling and enough bandwidth for high-refresh panels. They complement the switches in the quick picks rather than replace them.
TESmart 8K@60Hz HDMI KVM Switch 2 Monitors 2 Computers USB 3.0

This TESmart dual-monitor unit is aimed squarely at the mid-to-high tier described above. It is an HDMI 2.1 switch for two computers and two displays, rated up to 8K@60Hz and 4K at 60, 120 and 144Hz, with HDCP 2.3, DSC, HDR10, Dolby Vision, VRR, FVA and ALLM support according to TESmart. Crucially for this guide, each input port has its own EDID emulator, so both PCs keep seeing two correctly described monitors while the other machine is active.
It also works as a desk dock, with shared USB 3.0 ports, a Gigabit Ethernet port that both computers can use and an audio output. Switching uses front buttons or keyboard hotkeys. Each PC needs two HDMI outputs, so a laptop or a graphics card with a single HDMI port will need an adapter or a different model.
Best for: Dual high-refresh 1440p or 4K gaming monitors shared between two desktops. Watch out for: HDMI-only inputs and outputs, and a premium price tier. Compared with the quick-pick GREATHTEK, it adds per-port EDID emulation and confirmed VRR support.
CKL 8K HDMI KVM Switch with EDID Emulation (4 Computers 2 Monitors, 942HUA-5)

The CKL 942HUA-5 is the four-source option for desks that need dual monitors across more than two machines. CKL lists it as an HDMI 2.1 switch rated for 8K@60Hz and 4K at up to 144Hz, with EDID emulation, dual HDMI outputs for extended or mirrored desktops, an extra USB 3.0 hub port, audio and microphone sharing, and keyboard hotkey switching. It is plug and play on Windows, macOS and Linux, and all required input cables and the power adapter are included.
Do not confuse it with the older 942HUA without the “-5” suffix, which is a 4K@30Hz product. The newer model is the one with the bandwidth headroom this guide recommends for emulating high-refresh profiles.
Best for: Workstations with four computers sharing two monitors. Watch out for: Each source needs two HDMI outputs, and this is firmly a premium-tier product. Compared with the four-port DisplayPort and HDMI switch in the quick picks, it trades DisplayPort inputs for higher HDMI 2.1 bandwidth.
PVBCTCSID KVM Switch 4 Computers 2 Monitors HDMI 4K120Hz EDID Emulation

This PVBCTCSID model offers a lower-cost route to four sources and two displays with EDID emulation. It is listed for HDMI 4K at 120Hz, which gives more headroom than the 4K@60Hz dual-monitor units in the quick picks, and it shares USB peripherals across all four computers.
Budget-to-mid-range four-port switches typically provide fewer configuration options than TESmart or CKL, so treat it as a “set a stable profile and leave it” device: emulate each monitor at its native resolution, start at 60Hz to confirm stability, then step up to 120Hz once switching behaves reliably.
Best for: Four-machine desks on a tighter budget that still want EDID emulation. Watch out for: Fewer published details on per-port EDID handling and VRR than the premium options. Compared with the CKL, it costs less but offers less documentation.
Example Configurations
These three common dual-monitor setups show how the settings above combine in practice. Adjust the numbers to your own monitors.
Setup A: Matching 1440p 165Hz Gaming Monitors, Two Desktops
- Switch requirement: HDMI 2.0-class or DisplayPort 1.2-class bandwidth per output, with per-port EDID emulation.
- Emulation mode: Emulated, with each monitor’s EDID learned or loaded into its own slot.
- Resolution and refresh: 2560×1440 at 165Hz on both ports, or 144Hz if the switch’s emulator caps lower.
- HPD: Always asserted.
- DDC/CI: Enable if you use brightness software; disable if switching becomes sluggish.
- Extra step: Because the monitors are identical, edit the monitor name in one EDID so the operating system can tell left from right.
Setup B: Mixed 4K 60Hz and 1080p Monitors, Work Desktop and Personal PC
- Switch requirement: HDMI 2.0-class bandwidth and separate EDID slots for each output.
- Emulation mode: Emulated per port; do not use a shared profile.
- Resolution and refresh: 3840×2160 at 60Hz on the 4K port, 1920×1080 at 60Hz on the 1080p port.
- Scaling: Set Windows or macOS display scaling once per monitor after loading the EDIDs; locked EDID keeps those scaling choices in place across switches.
- If you only have shared presets: choose the 1080p profile for reliability, or 4K if text clarity on the main monitor matters more than sharpness on the second.
Setup C: Laptop on a USB-C KVM Dock Plus a Desktop
- Switch requirement: A dock-style KVM that supports two displays from one USB-C port, usually via DisplayPort Alt Mode with MST, or a laptop with two video outputs.
- Emulation mode: Emulated for both outputs, so the laptop does not collapse to its internal screen when you switch to the desktop.
- Refresh: Start at 60Hz. Many laptops share USB-C bandwidth between video and data, so high-refresh dual displays may require reducing USB to 2.0 speeds in the dock settings.
- macOS note: Many Apple silicon laptops cannot drive two external displays through MST; check your model’s external display support first.
- Power: Use the dock’s power delivery to charge the laptop, but confirm the wattage matches what your laptop expects to avoid throttling.
Buyer’s Checklist: KVM Features That Make EDID Easy
If your current switch cannot do what this guide recommends, use this checklist when choosing a replacement. Each item maps to a setting covered above.
- Full EDID emulation on every input: Look for wording that says each input port, or each computer, gets its own emulated EDID. Phrases like “smart HPD” or “anti-flicker” alone do not guarantee full emulation.
- Separate EDID per output: For mixed monitors, the switch needs one stored EDID per display output, not one shared profile.
- Learn function or setup utility: A way to copy your monitors’ real EDIDs into the switch, either by a learn button sequence or a software tool, is far better than fixed presets.
- Emulated resolution and refresh ceiling: Check the emulator’s limit as well as the passthrough limit. Some switches pass 4K at 144Hz but only emulate 4K at 60Hz.
- Bandwidth that matches your monitors: HDMI 2.0 or DisplayPort 1.2 class for 1440p high refresh and 4K at 60Hz; HDMI 2.1 or DisplayPort 1.4 class for 4K at 120Hz and above.
- VRR and HDR passthrough: Only matters if you use them, but if you do, the switch must list them explicitly.
- Firmware updates: Vendors that publish firmware and manuals online are easier to troubleshoot with and more likely to fix compatibility issues over time.
- Input count with headroom: Plan for one more computer than you have today; laptops and work machines accumulate.
When a KVM Is Not the Right Tool
If you switch computers only occasionally and your monitors have multiple inputs, using the monitors’ own input buttons with a simple USB switch for the keyboard and mouse can be more reliable than any KVM, because each PC stays directly connected and never loses its EDID. Some monitors also include a built-in KVM feature that pairs an input with a USB upstream port. For high-refresh gaming on one machine and occasional work on another, this direct approach avoids bandwidth limits entirely.
Common Mistakes
Using passthrough mode “because it sounds more accurate.” What causes it: the assumption that the monitor’s real EDID is always best. How to check: switch inputs and watch whether windows migrate between displays or the desktop re-resolves with a flicker. What to do: switch to emulated mode and load a dumped EDID per port. How to undo: flip back to passthrough in the utility or revert the DIP switch.
Emulating 4K for a mixed 4K + 1080p dual setup on shared-profile hardware. What causes it: budget KVMs apply one EDID to both outputs. How to check: look at the 1080p monitor’s image sharpness and check Advanced display — the 1080p panel may report 3840×2160 with GPU scaling. What to do: upgrade to a unit with per-port EDID slots, or accept the scaler. How to undo: change the shared profile back to 1080p; the 4K monitor’s scaler handles down-acceptance more gracefully than the reverse.
Leaving “Dynamic Refresh Rate” or VRR toggles on the PC side while using emulated EDID. What causes it: the driver sees a static EDID but attempts variable refresh, and some KVMs choke on the timing. How to check: black screens of one to three seconds after switching, or stutter that appears only post-switch. What to do: turn off DRR under Advanced display; if you use NVIDIA G-Sync, test with NVIDIA Control Panel > Set up G-SYNC disabled for the KVM-connected display. How to undo: re-enable the toggles if the KVM handles them.
Forgetting the USB-side “fake monitor” problem. What causes it: DisplayLink-style or USB-C video within the KVM creates a phantom display that survives the emulated EDID but confuses window managers. How to check: Device Manager shows a “Generic PnP Monitor” that corresponds to no physical panel. What to do: disable the phantom display in Settings > System > Display by selecting “Remove this display” (or “Disconnect this display” on older builds). How to undo: reconnect and re-enable if you swap the KVM’s video mode.
Quick Troubleshooting Table
| Symptom after switching | Likely cause | First fix to try |
|---|---|---|
| Windows jump to one monitor | Passthrough mode or HPD not asserted | Switch to emulated EDID and enable HPD always-on |
| One screen stays black | Emulated profile exceeds KVM bandwidth | Drop that port to 60Hz, confirm, then raise refresh step by step |
| Refresh rate falls to 60Hz | Generic preset loaded, or wrong port slot | Reload the dumped EDID at native refresh into the correct slot |
| Text looks soft on one monitor | Shared profile forcing non-native resolution | Use per-port EDID or set the shared profile to the lower resolution |
| Monitors swap positions | Both outputs advertise identical EDIDs | Edit the monitor name string in one EDID so the OS can tell them apart |
| HDR toggles off every switch | Emulated EDID lacks HDR metadata | Load the full dumped EDID including the CTA extension block |
| Long “No Signal” delay | HDCP renegotiation or DDC traffic | Disable DDC/CI passthrough and test with HDCP-protected apps closed |
Operating System Notes
Windows
Windows stores a display arrangement per set of connected monitors. If your KVM ever presents the monitors with different identities, Windows treats it as a new arrangement and resets positions. Locked EDID prevents that. After loading new EDIDs, set the arrangement once in display settings, reboot, and confirm it persists across several switches. If you use CRU on the PC side, avoid stacking custom resolutions on top of an emulated EDID; change the KVM profile instead, so only one source of truth exists.
A few Windows-side habits also help. Power the monitors on before the KVM and PCs so valid EDIDs are available when the first handshake happens. Make monitor sleep less aggressive, because some panels drop off the bus entirely in deep sleep. On some AMD systems, the AMD External Events Utility service can treat each switch as a full disconnect and reconnect; disabling it is a known workaround if windows still scatter with emulation enabled. If your current KVM lacks full EDID emulation, a window layout tool such as FancyZones can restore positions as a stopgap, and an inline EDID emulator between the PC and the switch is a cheaper fix than replacing the KVM.
macOS
macOS also remembers arrangements by display identity, and it is particularly sensitive to two monitors reporting identical EDIDs, which can cause the left and right screens to swap after a switch. Per-port EDID with distinct monitor names solves this. Macs with limited external display support may also ignore the second output entirely, so check your model’s external display limit before buying a dual-head KVM.
Linux
Most desktop environments rebuild the layout on hotplug events. With HPD always asserted and a stable EDID, the layout survives switches. If it does not, your compositor’s saved monitor configuration may key on connector names rather than EDID data, so keep each monitor on the same GPU output every time.
A Ten-Minute Verification Routine
- Note each monitor’s resolution, refresh rate and position in display settings.
- Open a few windows on each monitor in distinctive positions.
- Switch to the other computer, wait ten seconds and switch back. Repeat ten times.
- Check that window positions, resolution and refresh rate are unchanged.
- Put the PC to sleep while switched away, wake it and switch back.
- Power-cycle the KVM with both PCs running and confirm both recover without manual changes.
- If HDR or VRR matters to you, confirm both are still enabled after the routine.
If any step fails, change one setting at a time in the order this guide lists them, emulation mode first, then resolution, refresh, HPD and DDC/CI, and rerun the routine after each change.
FAQ
Will locking EDID hurt image quality?
No. The emulated EDID simply tells the GPU what the monitor is, and the monitor still does the actual rendering. As long as the emulated resolution and refresh match the monitor’s native capabilities exactly — dump your real EDID to be sure — the output is pixel-identical to a direct connection. Quality loss only appears when the emulated profile forces a non-native resolution through a monitor’s scaler.
Do I need EDID emulation if I never switch inputs under load?
Less critical, but still useful. Even a cold boot with a KVM can handshake inconsistently, especially if the KVM powers up after the PC. With locked EDID, both monitors come up at native settings on the first boot every time. If you only ever switch while logged in and have never noticed issues, you can leave passthrough on and accept occasional renormalization.
Why does my refresh rate drop to 60 Hz after switching inputs?
The KVM’s emulated profile is likely set to a generic 60 Hz preset, or the emulated profile exceeds the KVM’s internal bandwidth and the driver renegotiated downward. Check Settings > System > Display > Advanced display after a switch. Fix: re-dump and re-load the EDID at your monitor’s actual refresh, or set the shared profile to the highest value that survives a switch without a blank screen.
Can I use one EDID profile for two different monitor models?
Only if both share the same native resolution and refresh. If they differ, you need per-port EDID slots — “EDID 1” and “EDID 2” on mid-range units. Forcing a shared profile on mismatched panels always leaves one monitor running through its scaler, costing sharpness and a small amount of latency on that panel.
What is the difference between EDID passthrough, learning and emulation?
Passthrough forwards the active monitor’s EDID to the active computer only, so inactive computers lose the display. Learning copies a connected monitor’s EDID into the KVM’s memory. Emulation presents a stored EDID to every input continuously, whether that input is active or not. For dual-monitor setups, learning followed by emulation is the most reliable combination.
Do DisplayPort KVMs handle EDID differently from HDMI KVMs?
The EDID data itself is similar, but DisplayPort adds its own link training and, with some monitors, DisplayPort sleep behavior that can make a display drop from the system when it is not active. A DisplayPort KVM with EDID emulation keeps that display present. If your monitors have a deep sleep or auto-input setting for DisplayPort, turning it off often improves switching on any KVM.
Can a firmware update reset my EDID settings?
Yes. Some KVMs return to factory EDID defaults after a firmware update or a full reset. Keep your saved EDID files and recheck the emulation mode after any update.
Will EDID emulation work with G-Sync or FreeSync?
It can, but only if the emulated EDID includes the variable refresh range and the KVM passes VRR through. Many budget KVMs do not. If you need variable refresh, use a switch that explicitly lists VRR support and load the monitor’s full EDID, including its extension blocks.
Should I use an HDMI dummy plug instead of a KVM with EDID emulation?
A dummy plug presents a fixed EDID to one GPU port and can help a headless machine, but it cannot share keyboards, mice or USB devices, and it fixes only one output. For a dual-monitor desk shared by two computers, a KVM with per-port EDID emulation is the cleaner solution.