If you have RGB lighting anywhere near your desk, you already know it can either help you lock in or quietly wreck your concentration. The difference is not the hardware — it is the settings. The right best rgb light settings for focus come down to three priorities: brightness matched to your screen, a neutral color temperature, and eliminating motion and color cycling entirely. Getting this right is easier than most guides suggest, and it costs nothing beyond a few minutes in your lighting software. Most RGB software still ships with defaults tuned for showcase builds, not deep work, so you need to override them deliberately.
Our Top Picks
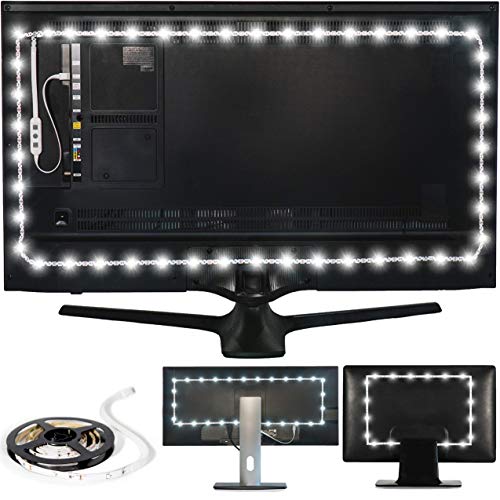
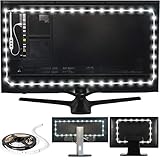
 Quntis Curved Monitor Light Bar 15 RGB BacklightIM 26 inch17.3 x 5.5 x 4 inches2.7 poundsCheck on Amazon




Top 3 picks at a glance
Quick Recommended Settings
Use this table as your baseline. It works for any brand of LED strip, light bar, or bias lighting, whether you control it through proprietary software or an open-source tool.
As an Amazon Associate we earn from qualifying purchases at no extra cost to you.




| Setting | Recommended value | Why |
|---|---|---|
| Brightness | 20–35% for bias lighting, 10–20% for desk-edge strips | Reduces eye strain from screen-versus-room contrast without adding visual noise |
| Color temperature | 4000K–4500K neutral white | Neutral white avoids the melatonin suppression of cool blue and the drowsiness of warm amber |
| Animation/effects | Solid color, no motion | Moving or cycling lights force your peripheral vision to keep re-scanning, which fragments attention |
| Saturation | 0–15% | Near-white light reads as neutral; saturated colors measurably shift mood and alertness |
| Sync/game-reactive mode | Disabled during focus sessions | Screen-reactive lighting is the single biggest concentration killer on an RGB setup |
| Placement | Behind monitor (bias) or bounced off wall — never in direct line of sight | Indirect lighting raises ambient luminance without entering your field of view |
| Auto on/off schedule | On at session start, off or warm-dim after 21:00 | Automates the transition so you are not manually switching modes mid-task |
Setting-by-Setting
Brightness: 20–35% for bias lighting
Exact value: Set your strip or light bar to 25% as a starting point, then adjust ±10% based on your monitor’s peak brightness. If your screen runs at 120 nits or lower (typical for office work in a dark room), 20% is enough. If you game or edit HDR content at 300+ nits, push toward 35%.
Trade-off: Higher brightness genuinely reduces eye strain in a dark room because your pupils are not constantly adjusting between a bright panel and black surroundings. But above roughly 40%, the light itself becomes visible on the wall, and any reflection or texture behind the monitor starts pulling your attention. The goal is a soft wash of light you stop noticing within thirty seconds.
Color temperature: 4000K–4500K
Exact value: In your lighting software, set RGB values to approximately R: 255, G: 230, B: 190, or select the “Neutral White” or “Natural White” preset if your app offers one. Avoid anything labeled “Cool White” (6500K+) or “Warm White” (2700K–3000K) for focus sessions.
Trade-off: Cool blue-heavy white (the default on most strips) suppresses melatonin and can help with short bursts of alertness, but over a two-to-four-hour session it contributes to eye fatigue and hurts sleep if you work late. Warm white is easier on the eyes but nudges you toward drowsiness. Neutral white in the 4000K range is the compromise that works for the widest range of people. If you mostly work evenings, shift to 3500K and drop brightness by 10 points.
Effects: solid color, zero motion
Exact value: Select the “Static” or “Solid Color” effect. In SignalRGB this is Effects → Solid; in Corsair iCUE, add a Static Color lighting effect to each device; in Razer Synapse it is Chroma Studio → Static; in OpenRGB, choose Static from the effect dropdown and pick your color per zone.
Trade-off: Breathe, wave, and rainbow-cycle effects look great on stream and terrible during spreadsheet work. Peripheral vision is extremely sensitive to change, and slow color cycling is precisely the kind of low-level stimulus that causes micro-distractions you never consciously register. The trade-off is purely aesthetic — your setup looks less impressive on camera. If you stream, run a dual profile and switch manually.
Saturation: keep it under 15%
Exact value: If your software has a saturation slider, set it to 10%. If you are setting RGB values directly, keep the channel values within about 25 points of each other — the closer they are, the whiter and more neutral the output.
Trade-off: Fully desaturated white maximizes neutrality but makes your hardware indistinguishable from cheap non-RGB lighting. A faint tint (a touch of warm amber or soft teal) preserves some personality with minimal cognitive cost. Deep reds, blues, and purples are the worst offenders — saturated blue in particular reads as “cool” but keeps your brain in alert mode longer than you want in the evening.
Disable game-reactive and screen-sync modes during work
Exact value: Turn off every reactive layer. In iCUE, disable Lighting Link / Game Integration; in Synapse, untick Chroma Connect → Game Integrations; in Govee Home, disable Music Sync and Scene Sync. For screen-bias lighting apps like Ambilight clones or SignalRGB’s screen capture, stop the screen-cap effect and switch to static.
Trade-off: Screen-reactive lighting adds genuinely impressive immersion for single-player games and movies — that is what it is for. During focus work it is a constant flickering stimulus tied to whatever is on screen. There is no scenario where it helps concentration; the only trade-off is losing the wow factor during work hours.
Placement and diffusion
Exact value: Mount bias lighting on the back of the monitor, top edge preferred, facing the wall, with the LEDs 2–4 inches from the surface. Desk-edge strips should point downward or be diffused with a silicone channel. Never place exposed LEDs where the diodes themselves are visible from your seated position.
Trade-off: Direct line-of-sight LEDs are point sources of light — even at low brightness, your eye keeps resolving them. Diffused and indirect light is uniformly spread and effectively invisible as a source. The cost is a slightly dimmer effect per LED, so you may need an extra strip to cover the same area.
Focus Lighting Schedule: Settings by Time of Day
The settings above are a single baseline, but the ideal values shift through the day as daylight changes and as you move from deep work to winding down. If your software supports schedules (Govee Home, Philips Hue, SignalRGB with automation, or a smart plug for basic strips), program these four profiles once and let them switch automatically.
| Profile | When | Color temperature | Brightness | Effects |
|---|---|---|---|---|
| Day focus | Daytime in a dim room, or overcast days | 4000K to 5000K neutral to cool white | 20 to 30% | Static only |
| Color-critical work | Photo editing, video grading, design | Match the monitor’s white point (usually 6500K) | Around 10% of screen brightness | Static, fully desaturated |
| Evening focus | After sunset, still working | 3000K to 3500K warm-neutral | 15 to 25% | Static only |
| Wind-down or gaming | Off-hours | Any color you like | Your preference | Effects and sync allowed |
The color-critical row deserves a note. Display calibration guidance traditionally recommends bias lighting that matches the monitor’s own white point, most often 6500K (D65), because a warmer or cooler light behind the screen can subtly change how you judge colors on it. For writing, coding and spreadsheets, the neutral 4000K to 4500K range recommended above is more comfortable and the slight mismatch does not matter. Switch to a 6500K profile only when color accuracy is part of the job.
Layer Your Light: Bias, Task and Ambient
RGB bias lighting is one of three layers that together decide how comfortable a desk feels for long sessions. Getting only one layer right rarely works.
- Bias light (behind the monitor): reduces contrast between a bright screen and a dark wall. This is where most RGB strips and light bars belong.
- Task light (on the desk surface): lights notes, keyboards and paperwork without glare on the screen. Monitor light bars with an asymmetric front beam do this best because they angle light down onto the desk and away from the display.
- Ambient light (the room): a ceiling light or floor lamp that keeps the rest of the room from becoming a black void. Without it, even good bias lighting cannot fully stop your eyes from adapting every time you look away from the screen.
A practical rule: the screen should be the brightest thing in your field of view, the bias light should be clearly dimmer than the screen, and the room should be dimmer still, but never completely dark.
Placement for Ultrawide, Dual and Laptop Setups
- Ultrawide and curved monitors: run the strip along the top and both sides of the back panel, not the bottom, which mostly lights the desk. Light bars designed for curved screens or a pair of bars aimed at the wall at either end work well.
- Dual monitors: treat both screens as one surface. Light the outer edges and the top of both displays, and keep both on identical color and brightness so one side never looks warmer than the other.
- Monitor arms and wall gaps: bias lighting needs a wall to bounce off. If your monitor sits more than about 12 to 18 inches from the wall, the effect weakens; use a brighter light bar aimed at the wall rather than a strip stuck to the monitor.
- Laptop on a stand: a small light bar placed behind the laptop and aimed at the wall gives the same benefit as a full strip.
Checking Your Brightness Without a Light Meter
Percentages in lighting apps are not consistent between brands, so 25% on one strip can be twice as bright as 25% on another. These quick checks get you close without special equipment:
- The glance test: look at the screen for a minute, then glance at the wall beside it. If your eyes need a moment to adjust, the wall is too dark. If the wall draws your attention more than the screen edge, it is too bright.
- The white document test: open a blank white page at your normal screen brightness. The wall glow behind the monitor should look clearly dimmer than the page, roughly a tenth to a fifth as bright.
- A phone lux app: free light meter apps use the phone’s ambient sensor. They are not precise, but they are consistent, so you can record a reading for a setup that feels right and return to it after moving or changing bulbs.
- The camera check for tint: take a photo of the wall with your phone’s white balance locked or set to daylight. Strong blue, green or pink casts in the photo reveal tints your eyes have adapted to.
Turning Lighting Into a Focus Routine
The most useful thing RGB lighting can do for concentration has less to do with color science and more to do with habit. A consistent lighting change at the start of a work block acts as a cue, just like putting on headphones or closing a door.
- Create one focus profile and one off-duty profile. Keep it to two. Too many profiles invite tinkering, which becomes its own distraction.
- Bind the focus profile to a single action. A keyboard shortcut, a stream deck button, a smart home scene or a voice command all work. The goal is to switch in under two seconds without opening an app.
- Pair it with a timer. If you use work sprints such as 25 or 50-minute blocks, switch the focus profile on when the timer starts. Some smart lighting apps can trigger a brief, gentle color change at the end of a block as a break reminder; keep this subtle and short so it does not become a new distraction.
- Automate the evening shift. A schedule that warms and dims the lights after sunset removes one more decision and signals the end of the workday.
- Lock peripheral lighting too. Keyboards, mice, headsets and case fans should follow the same focus profile. A single rainbow-cycling mouse in your peripheral vision undoes the rest of the setup.
Peripheral and PC Case Lighting During Focus Sessions
Desk strips get most of the attention, but the lights closest to your hands and eyes are often the most distracting. Per-key keyboard lighting is useful when it helps you find keys in the dark: set it to a single dim static color, or light only the keys you need, such as WASD for games or shortcut clusters for editing software. Mouse and headset lighting rarely serves any purpose during work and can be turned off entirely.
PC case lighting depends on where the case sits. A case on the desk beside the monitor sits in your peripheral vision, so it should follow the focus profile at low brightness or switch off. A case under the desk can stay on its own effect if you cannot see it from your seat. Most motherboard and case lighting software lets you save a lighting state to the hardware, which keeps the case static even before the software loads.
By Hardware Tier
Budget tier (USB strips, no software, remote control)
With a basic 5V USB strip and an IR or button remote, you cannot set exact color temperatures, so approximate them. Cycle through the white presets and pick the one that looks neither blue nor yellow — that is usually a 4000K-equivalent diode mix. Set brightness to the second-lowest step, not the lowest (lowest often introduces PWM flicker on cheap controllers). Disable any “auto” or “flash” mode by holding the mode button until it locks on static. If your strip has a memory function, confirm it powers on in your saved state — cheap controllers sometimes reset to rainbow on every boot, in which case re-save the static setting with the strip plugged into an always-powered USB port or a smart plug that stays on.
Mid tier (Govee, standard brand software)
Use the full app. In Govee Home, apply the DIY → Static effect with custom RGB 255, 230, 190, brightness 25%, and enable Schedule for an evening shift to 3500K after 21:00. Disable Music Mode and any scene presets. If the app supports segment control, set only the segments behind the monitor and set unused segments to off — every lit segment you never see is just reflected noise on your desk. Enable Sync to sunrise/sunset if available so the color temperature tracks ambient light automatically.
High tier (addressable strips, SignalRGB, OpenRGB, full ecosystem)
With addressable (ARGB) hardware you control zones individually. The best configuration: a single static profile called “Focus” with all zones set to neutral white at 25% brightness, applied through a global profile rather than per-device effects. In SignalRGB, create it under Effects → My Effects → New, add a single Solid layer, and bind it to a hotkey (shortcut options vary by version, so a macro key or stream deck button works as a fallback). Use OpenRGB’s profiles (Profile → Save, stored in the OpenRGB config directory) if you prefer open-source control, and set it to load the focus profile on startup with the --profile Focus command-line flag. Keep a separate high-saturation profile for gaming and switch with the hotkey, not by opening the app — friction kills profile discipline.
Lighting Hardware That Makes Focus Settings Easy
Any light can be tuned toward the settings above, but some hardware makes it far easier. The key features to look for are true tunable white (separate warm and cool white LEDs rather than white mixed from red, green and blue), smooth low-end dimming without flicker, scheduling, and placement designed for the back of a monitor or a wall. These four options cover the most common desk setups.
Philips Hue Play Light Bar (2-Pack Base Kit)

The Hue Play light bars are compact, stand-alone bars that you place behind a monitor or TV, either standing up, lying flat or fixed to the back of the display with the included mounting hardware. Each bar produces up to roughly 500 lumens and covers a white range from 2000K warm white to 6500K cool daylight, plus full color. That wide, true white range is exactly what a focus setup needs: you can dial in 4000K for daytime work, drop to 3000K in the evening and switch to 6500K for color-critical editing, all from the same hardware.
The base kit includes a power supply that can run up to three bars. Philips lists the Hue Bridge as required, and it is what unlocks schedules, routines and integration with Apple Home, Google Home and Alexa. With the bridge and the Hue Sync app, the bars can also follow on-screen colors for games and films; just make sure that mode is off during work, as covered above.
Best for: users who want precise, reliable white tuning and automation, or who already own Hue lights.
Strengths: wide tunable white range, strong output for wall bounce, excellent scheduling and smart home support.
Drawbacks: requires the Hue Bridge, and the ecosystem sits in the premium tier compared with strip-based options.
Govee RGBICWW Smart Light Bars

Govee’s RGBICWW light bars (sold as the Flow Plus) add dedicated warm and cool white LEDs to the usual RGB chips. That “WW” in the name matters for focus: instead of approximating white by mixing colored diodes, the bars can produce a cleaner white across a 2200K to 6500K range, which looks less tinted on the wall. They are rated at around 400 lumens and suit monitors and TVs under about 45 inches.
Control runs through the Govee Home app over Wi-Fi and Bluetooth, with support for Alexa and Google Assistant (Matter support varies by region and hardware version). The app’s DIY and scene modes make it simple to build a static neutral-white profile, and schedules can shift to a warmer setting in the evening, matching the mid-tier workflow described earlier in this guide. Segment control lets you light only the parts of the bar that face the wall.
Best for: mid-range setups that want good-quality white light without a hub.
Strengths: dedicated white LEDs, no bridge needed, scheduling and segment control.
Drawbacks: sized for smaller screens, and the app’s many effect presets make it easy to drift away from a disciplined focus profile.
BenQ ScreenBar Halo 2

The ScreenBar Halo 2 is not an RGB light, but it solves both the task and bias layers in a single device, which is why it fits a focus-first desk so well. It clamps to the top of the monitor, including curved models, and has two light sources. The front light angles down onto the desk with an asymmetric beam that avoids glare on the screen, and a tri-zone backlight washes the wall behind the monitor. Both lights tune steplessly from 2700K to 6500K and adjust in brightness independently.
A wireless dial controller handles brightness, color temperature and zones, with a favorite-mode button to recall your settings. Auto-dimming targets a recommended desk brightness based on room conditions, and a motion sensor turns the light on as you sit down and off after you leave. BenQ lists the light as flicker-free, which addresses the low-brightness flicker problem described in the common mistakes section.
Best for: people who mainly work at their desk and want a clean, glare-free setup rather than colorful effects.
Strengths: combined task light and backlight, full color temperature range on both, flicker-free output, motion sensor and auto-dimming.
Drawbacks: no RGB color for gaming mood, premium tier, and powered by a fixed USB-C cable.
Govee Gaming Light for Monitor G1

For gamers who want screen-reactive lighting during play and a calm static profile during work, the Govee G1 is a monitor backlight strip designed for 27 to 34-inch screens, including curved models. It mounts around all four sides of the back of the monitor with included clips. Instead of a camera, it reads colors from the screen through Govee’s desktop software, and it can join Govee’s DreamView group and Razer Chroma setups.
The strip offers dozens of scene and music modes, but for focus work the important part is the ability to save a static profile and switch back to it quickly. Use the app or desktop software to set a single neutral white or a lightly tinted color at low brightness, and save the screen-matching mode for games and movies. Because it lights all four edges evenly, it delivers a uniform bias glow on monitors that sit close to the wall.
Best for: gaming desks that need to switch between immersive screen sync and a distraction-free work mode.
Strengths: four-edge coverage, PC-based screen sync without a camera, Razer Chroma compatibility, budget-friendly entry.
Drawbacks: RGBIC-only white is less clean than dedicated white LEDs, 2.4GHz Wi-Fi only, and copy-protected streaming content cannot be color-matched.
Focus Lighting Hardware Compared
| Product | Type | Tunable white | Hub needed | Best for | Price tier |
|---|---|---|---|---|---|
| Philips Hue Play Light Bar | Light bars behind monitor | 2000K to 6500K | Yes, Hue Bridge | Precise white tuning and automation | Premium |
| Govee RGBICWW Light Bars | Light bars behind monitor | 2200K to 6500K | No | Good white without a hub | Budget to mid-range |
| BenQ ScreenBar Halo 2 | Monitor light bar with backlight | 2700K to 6500K (front and back) | No | Work-first desks, glare-free task light | Premium |
| Govee Gaming Light G1 | Monitor edge strip | Mixed from RGB | No | Switching between gaming sync and focus | Budget |
Common Mistakes
Rainbow cycling left on by default. What causes it: almost every RGB device ships with a demo effect burned into the controller. How to check: power cycle the device with software closed — if it boots into rainbow, the default effect is stored on the hardware. What to do: set static in software, then look for a “save to device” or “hardware mode” option (iCUE: Hardware Lighting; Synapse: On-Board Memory mode; OpenRGB: save mode to slot). How to undo: simply re-open software and apply a different effect; hardware defaults return via the app’s restore option.
Screen-reactive lighting during work. What causes it: screen-sync effects stay enabled from a previous movie or gaming session. How to check: watch whether the wall color changes when you scroll or switch windows. What to do: stop the screen-capture effect in your lighting app and re-apply the static profile. How to undo: re-enable the reactive effect when you actually want it for media.
Too much total light output. What causes it: stacking bias lighting on top of a bright desk lamp and monitor glow. How to check: hold your hand against the wall behind the monitor — if you can see a sharp shadow, ambient output is too high. What to do: drop strip brightness to 20% or turn off one source. How to undo: restore brightness per the table above if the room feels too dim.
Cool-white default color. What causes it: “White” on most RGB strips is actually 6500K blue-heavy white. How to check: photograph the wall in auto-white-balance-off mode; if it photographs blue, it is too cool. What to do: set a custom color around 255/230/190 rather than using the white preset. How to undo: restore the default white preset if you prefer it for daytime.
PWM flicker from ultra-low brightness. What causes it: cheap controllers dim by rapid switching, which becomes visible below ~10%. How to check: wave your hand in front of the strip at minimum brightness — a strobing effect on your hand means visible flicker. What to do: never run below 10–15%, or replace the controller with a better-dimming one. How to undo: return to your previous brightness setting.
FAQ
What color RGB light is best for concentration?
Neutral white around 4000K–4500K. There is no magic “focus color” — saturated greens or blues marketed as productivity boosters mostly add visual noise. Neutral white raises ambient luminance evenly, reduces the contrast between your bright screen and dark room, and stays cognitively invisible. If you want a tint for personality, keep saturation under 15%.
Should RGB lights be on or off while working?
On, in a dark or dim room — that is the entire point of bias lighting. Your eyes strain when a bright monitor sits against a black background, because pupils must constantly adapt. A soft, indirect backlight brings the surrounding luminance closer to the screen’s, which reduces fatigue over long sessions. In a bright daylit room, the strips add nothing; turn them off.
How bright should RGB lighting be for desk work?
Start at 25% brightness for back-of-monitor bias lighting and 15% for desk-edge strips, then adjust by eye: you should stop noticing the light within a minute of sitting down. If you can see distinct LED hotspots or the wall behind you is brightly lit, it is too high. If the room still reads as pitch black around the monitor, it is too low.
Do RGB lights affect eye strain?
Used correctly, they reduce it — the bias-lighting effect is well established for viewing environments where a bright screen dominates a dark room. Used poorly (bright saturated colors in your line of sight, moving effects, visible flicker below 10% brightness), they add fatigue rather than removing it. Neutral color, low brightness, static output, and indirect placement are what convert RGB from decoration into a genuine ergonomic improvement.
Should bias lighting be 6500K or 4000K?
It depends on the work. Display calibration guidance favors 6500K bias lighting because it matches the white point of most monitors, which matters for photo, video and design work. For general productivity, a neutral 4000K to 4500K light is more comfortable over long sessions and the small mismatch does not affect reading or coding. Many people keep two saved profiles and switch based on the task.
Is a monitor light bar better than an RGB strip for focus?
For pure work, often yes. A monitor light bar lights your desk without glare on the screen, and models with a backlight also provide bias lighting. RGB strips and light bars are better if you also want gaming effects. Many desks end up using both: a light bar for task light and a strip or bar behind the monitor set to static neutral white.
Do I need a smart hub for scheduled lighting?
Not necessarily. Many Wi-Fi lights, including Govee’s, schedule directly from their app. Philips Hue Play bars need the Hue Bridge for full features. For cheap USB strips with only a remote, a smart plug with a timer can switch them on and off at set times, though it cannot change color temperature.
Can RGB lighting help with ADHD or staying on task?
There is no reliable evidence that a particular RGB color improves attention. What does help many people is reducing distractions, and that means static, low-saturation light, nothing moving in peripheral vision and a consistent routine. Some people use a specific color as a cue that a focus session has started, which works as a habit signal rather than an effect of the color itself.
Why does my white light look slightly pink or blue on the wall?
Most RGB-only strips create white by mixing red, green and blue diodes, which rarely produces a perfectly neutral result. Lower the strongest channel slightly, or choose hardware with dedicated white LEDs (often labeled RGBW, RGBWW or RGBICWW) for cleaner white. Wall paint color also tints reflected light, so a neutral white or light gray wall works best.
Does blue RGB light really keep you awake?
Light with a strong blue component is linked to suppressed melatonin and increased alertness, which is why cool white and saturated blue are best avoided late in the evening. The effect depends on brightness and duration, so a dim bias light matters far less than a bright overhead light or the monitor itself. Combine a warm evening lighting profile with your operating system’s night mode for the most consistent result.
Can I use the same lighting profile for gaming and work?
You can, but most people get better results with two. A focus profile should be static, neutral and dim. A gaming profile can use higher saturation, effects and screen sync because immersion is the goal. Keeping them separate and switching with a single shortcut means you never have to compromise either one.
Is it worth replacing cheap RGB strips for focus work?
Only if they cause problems. If your current strip can hold a static near-white color at low brightness without visible flicker, it already does the job. Upgrade if the strip flickers at low brightness, cannot produce a clean white, resets to rainbow after power cuts, or lacks scheduling you would actually use.