Dust seems harmless until you wipe down an RGB light bar the wrong way. One quick swipe with a dry paper towel or a spritz of the wrong cleaner can leave fine hairline scratches across the acrylic diffuser, trap dust inside the seam, or smear oils that dull the color diffusion. On black housings and clear light guides, those micro-scratches catch and scatter the LEDs, so your smooth gradient turns cloudy and uneven. Worse, pushing dust into vents or USB ports can cause flickering, overheating, or a sticky coating if you use an ammonia-based spray. Done correctly, cleaning takes less than ten minutes and keeps the color accurate, the brightness even, and the finish looking new.
Our Top Picks

What You Need
Gather everything before you unplug the bar. RGB light bars are lightweight, low-voltage accessories, usually 10 to 16 inches long, 1.5 to 2 inches wide, and weighing 3 to 7 ounces, so they don’t need heavy tools. Stick to soft, non-abrasive materials and avoid anything gritty or dripping wet.
As an Amazon Associate we earn from qualifying purchases at no extra cost to you.

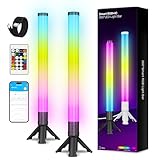
| Item | Why | Optional? |
|---|---|---|
| Microfiber cloths, 2-3 pack (300 GSM or higher) | Lifts dust without scratching the acrylic diffuser or painted housing | No |
| Soft-bristle brush or clean makeup brush | Sweeps dust from seams, end caps, and button crevices without pressure | No |
| Manual air blower or canned air (30-50 PSI max) | Blows dust out of vents and joints before wiping | Yes, but highly recommended |
| Distilled water | Dampens cloth safely with no mineral residue; safe for lenses and diffusers | No |
| 70% isopropyl alcohol (small amount) | Removes oily fingerprints on hard plastic; use diluted and sparingly | Yes |
| Cotton swabs | Cleans around USB connectors, control buttons, and mounting clips | Yes |
| Mild dish soap | For occasional deeper clean on removable stands or silicone feet | Yes |
Skip paper towels, tissues, terry cloth, eyeglass wipes with additives, and any cleaner labeled ammonia, bleach, or abrasive. Most USB-powered light bars draw only 5 to 10 watts at 5 volts, so there is no need to use electronics contact cleaner or powered vacuums that create static.
Step-by-Step
Step 1: Power Down and Cool Off (1 minute)
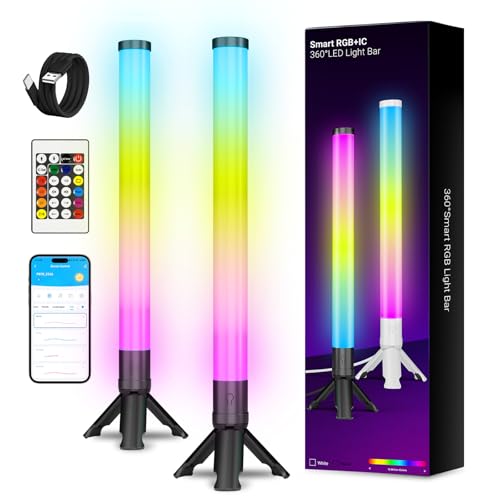
Turn off the light bar with its button or app, then unplug the USB cable from the TV, monitor, or power adapter. Let the bar sit for 2 to 3 minutes. LEDs run cool, but the housing can hold slight warmth that makes dust cling. Place the bar on a clean microfiber cloth on a desk or table so it won’t roll or pick up more grit. If your bar is mounted with clips or stands, like many 12 to 15-inch models in the around $9 to around $14 range such as the DAYBETTER 360° Smart LED Light Bars or the APP Control USB Powered TV backlight bar, remove it gently and set the mount aside.
Step 2: Dry Dust With Air and a Soft Brush (2 minutes)
Hold the bar with the diffuser facing down so dislodged dust falls away. Use a manual blower or short bursts of canned air held 6 to 8 inches away to clear the length of the bar, the end caps, and any rear vents. Keep the can upright to avoid propellant spray. Follow with a soft-bristle brush using light, one-direction strokes from the center outward. Pay attention to the seam where the clear diffuser meets the housing, around the control dial or buttons, and along the cable entry point. This dry step removes 80 to 90 percent of loose dust so you are not grinding particles into the surface in the next step.
Step 3: Wipe the Diffuser With a Dry Microfiber (2 minutes)
Fold a fresh microfiber cloth into quarters to create a flat, cushioned pad. With almost no pressure, wipe the acrylic diffuser in straight lines, not circles. Lift and refold to a clean side frequently. For a typical 14-inch bar, 3 to 4 light passes is enough. If you see streaks, you are pressing too hard or the cloth is dirty. Do not use the same cloth you just used on a dusty desk. For matte black rear housings, use a separate dry microfiber and the same straight-line technique to avoid swirl marks.
Step 4: Spot-Clean Stubborn Marks With Damp Microfiber (2 minutes)
Lightly dampen, not soak, a new microfiber corner with distilled water. Wring it until no drips form. Gently wipe only the areas with fingerprints or greasy dust, again in straight lines. For an oily spot on the housing that water won’t lift, mix a 1:1 solution of distilled water and 70% isopropyl alcohol, dab the cloth so it is barely damp, and wipe the housing only. Avoid getting moisture into seams, button gaps, or the USB-C or USB-A port. Immediately follow with a dry microfiber to remove any remaining moisture. Never spray liquid directly on the bar.
Step 5: Detail the Edges, Buttons, and Ports (1 to 2 minutes)
Lightly moisten a cotton swab with distilled water and run it along the diffuser seam, around the power and color buttons, and around the base of the stand. Use a dry swab to pick up what the damp one loosened. For the USB connector and port, use a dry swab or a quick puff of air only. No liquids inside ports. If the stand or silicone feet have collected dust, wash those parts separately with a drop of mild dish soap and warm water, rinse, dry completely, and reattach.
Step 6: Final Buff and Reassemble (1 minute)
Give the diffuser one last buff with a clean, dry microfiber using feather-light pressure. Hold the bar up to a light and check at an angle for any remaining haze or streaks. Reattach the stand or clips, route the USB cable so it doesn’t drag on the floor and collect dust, and plug back in. Test the colors and brightness through the app or remote to confirm no dust is casting shadows inside the diffuser.
Mistakes to Avoid
Most scratches come from technique, not the dust itself. Avoid these common errors:
- Wiping a dusty diffuser with a dry paper towel, tissue, or shirt sleeve. Those fibers are abrasive on acrylic and will leave permanent swirls.
- Using Windex, all-purpose cleaners, or vinegar. Ammonia and acids cloud clear plastics and can strip the matte coating on the housing.
- Spraying liquid directly on the bar or soaking the cloth. Moisture seeps into the end caps and can corrode the LED strip or diffuse film.
- Scrubbing in circles with pressure. Circular motion makes micro-scratches more visible under RGB light. Use straight, light passes.
- Cleaning while plugged in. Even at low wattage, you risk shorting the USB port if moisture is present, and static can attract more dust.
- Using a vacuum brush attachment close to the diffuser. The plastic edge can scratch, and strong suction can pull at the end caps.
If you already have light swirls, do not try to polish them out with toothpaste or plastic polish. Those products are too aggressive for thin diffusers and often make the haze worse.
How Often
For a bedroom, office, or gaming desk, dust the bar every 7 to 14 days with dry air and microfiber. That quick 2-minute dusting prevents buildup that requires pressure to remove. Do the damp spot-clean once a month, or sooner if the bar sits near a window, a kitchen, or on the floor behind a desk where dust and pet hair accumulate faster. In low-dust, enclosed setups where the bar is mounted behind a monitor, you can stretch the damp clean to every 6 to 8 weeks. As of 2026, many users run their bars 4 to 8 hours daily on music sync or ambient modes, so a consistent schedule keeps heat vents clear and color output consistent without ever needing harsh scrubbing.
When to Call a Pro or Replace
RGB light bars are sealed, low-cost accessories. If you notice dust trapped inside the diffuser that doesn’t move with air, a cracked or yellowed lens, flickering after cleaning, or moisture under the acrylic, do not open the housing. The diffuser and LED strip are not user-serviceable and prying them apart usually breaks the clips and voids any warranty.
Consider replacement if the bar is a budget model in the around $9 to around $19 range and repair would cost nearly as much. Look for a replacement with a frosted diffuser that resists fingerprints, a detachable USB cable for easier cleaning, and a stable weighted base if your current stand tips easily. If the bar is hardwired into furniture or part of a larger smart lighting system and it shows electrical issues such as a hot USB plug, buzzing, or intermittent power loss, unplug it and consult the manufacturer or a qualified electronics technician rather than continuing to clean and use it.
FAQ
Can I use lens wipes or eyeglass cleaner on the diffuser?
Most pre-moistened lens wipes contain isopropyl alcohol, surfactants, or fragrances that can haze acrylic. Use a dry microfiber for routine dusting and distilled water on a microfiber for spots. If you must use a wipe, choose one labeled safe for acrylic and test on the back edge of the housing first, never on the clear diffuser.
How do I clean without removing the bar from my monitor?
You can, but you will get better results by removing it. If you leave it mounted, power off and unplug, then use a blower and a soft brush to sweep dust downward. Wipe with a folded microfiber using light, straight strokes while supporting the bar with your other hand so you don’t flex the mount. Avoid any damp cleaning while it is mounted to keep moisture out of the clip area. For stands that weigh only a few ounces, removal takes seconds and prevents accidental scratches from working at an awkward angle.
Why does my light bar look scratched only when the lights are on?
Micro-scratches are hard to see when the bar is off but become obvious when LEDs shine through the diffuser. The light refracts off each tiny groove, creating cloudy lines or bright spots. This usually means dust was wiped across a dry surface with pressure or with an abrasive cloth. Switch to the dry-air-first method and fresh high-GSM microfiber, and the new scratches will not get worse. Existing fine swirls on acrylic cannot be safely buffed out at home.
Is canned air safe for RGB light bars?
Yes, if used gently. Hold the can upright, keep 6 to 8 inches of distance, and use short bursts rather than a long blast. Do not shake the can or tilt it, which can expel freezing propellant and leave residue on the diffuser. A manual rubber blower is even safer for regular use and costs about $6 to $12, with no risk of moisture or chemical spray.