
Bias lighting — the soft glow you place behind a monitor or TV — is one of the cheapest upgrades for both comfort and perceived contrast, yet most people set it up wrong. The two things that actually matter are color temperature and brightness relative to your panel. Get those right and your eyes stop over-adjusting every time the scene changes, dark-room viewing becomes dramatically more comfortable, and the halo around your display makes colors appear richer. Get them wrong — typically by running a rainbow-cycling mode at full blast — and you introduce eye strain and wash out your image instead of improving it. This guide walks through the settings that matter, tier by tier, for both standalone LED strips and software-synced setups.
Our Top Picks
 BenQ ScreenBar Halo 2 LED Monitor Light Bar50 cm x 14.38 cm x 10.91 cm5.6 x 19.7 x 4.3 inches1.8 poundsCheck on Amazon
 Quntis RGB Monitor Light Bar with Remote20 inches20.08 x 0.78 x 0.78 inches2.1 PoundsCheck on Amazon
 Maylit 8.2 Ft RGB TV LED Backlight for8.2FT for 40''-60'' TV7.87 x 4.17 x 0.67 Inches0.2 PoundsCheck on Amazon


Top 3 picks at a glance
Quick Recommended Settings
| Setting | Recommended value | Why |
|---|---|---|
| Color temperature | 6500K (white) | Matches the D65 white point of sRGB content, so bias light and display agree |
| Brightness | 10–20% of panel luminance | Reduces perceived eye strain without washing out contrast |
| Hue (Govee/Philips apps) | Use the white or color-temperature mode rather than a hue value, or lock one static color | Prevents hue-shift fatigue during long sessions |
| Saturation | 0–5% | Full saturation defeats the purpose of bias lighting |
| Sync/ambient mode | Off for single-player immersion, on only for casual/party use | Dynamic color sync reduces the contrast benefit |
| Placement | Full perimeter, rear-facing, 30–50 mm gap from panel edge | Even glow with no direct LED visibility or hot spots |
| Refresh/game mode latency | Disable ambient sync during ranked play | Built-in TV ambient processing can add input lag; PC software and camera kits sit outside the video path |
Setting-by-Setting
Color Temperature: 6500K, Always
Set the strip to 6500K white (in Govee Home: Color mode → White → drag the temperature slider to the “Cool white” end, roughly 6500K; in Philips Hue: White ambiance → set temperature to “Cool white” or the 6500K mark). The trade-off: 6500K looks slightly clinical compared to warm 3000K options, and some people find it initially harsh. Resist the urge to warm it up — your display’s white point is D65, and a mismatched bias light forces your eyes to constantly re-adapt, which is precisely the eye strain you’re trying to eliminate. If 6500K genuinely bothers you, 5000K is the floor; anything warmer and you’ve traded comfort for a color cast on everything at the screen edges.
Brightness: 10–20% of Your Panel’s Peak
Measure roughly: if your monitor runs at 300 nits in SDR, aim for 30–60 nits of bias light output at the wall. In practice this means 20–35% brightness in Govee Home (Device page → Brightness slider) or roughly 20–35% on the Hue brightness slider. Check your result by pausing a dark scene — the wall behind the display should be clearly lit but the black bars of a letterboxed video should still read as black. The trade-off: too dim and you get zero fatigue benefit; too bright and the reflected light raises your display’s effective black level, crushing shadow detail in games with dark interiors like horror titles. Start at 25% and drop until blacks look right.
Saturation: Near Zero for Bias, Full Only for Accent Lighting
Keep saturation at 0–5% when the strip is functioning as bias lighting. Full-saturation red or blue casts that color onto your wall and your peripheral vision, which skews your perception of on-screen whites. Use saturated colors only when the strip is deliberately acting as desk accent lighting with the display off or dimmed.
Ambient Sync / Screen Mirroring
Software sync (Govee DreamView with the desktop app, Hue Sync, Adalight with Prismatik or Hyperion) samples the screen edge and mirrors it. The exact setting: in Hue Sync, use Entertainment area → Game mode with intensity set to “Intense” only for casual games; in Govee’s desktop app, set FPS at 30 and sampling rate at Medium to cut CPU overhead. The trade-off: sync modes are fun but they destroy the contrast benefit — when the screen is bright, the wall is bright, so your pupils get no stable reference. Run sync for party games and racing titles; lock a static 6500K for anything story-driven or competitive. On TVs with built-in ambient modes, disable it entirely during fast-paced play because the edge-sampling pipeline adds measurable input lag.
Placement and Coverage
Mount strips so they fire at the wall, not your eyes, with a 30–50 mm gap between the panel edge and the strip. On a monitor, a three-sided U-shape (top and both sides) is the sweet spot; a full perimeter on a small monitor creates overlapping hot spots at the corners. On 27″ and smaller panels, skip the bottom strip entirely — it reflects off your desk and can appear in your peripheral vision. The trade-off: less coverage means a dimmer overall glow, so compensate by raising brightness one or two steps rather than adding a bottom strip.
Settings by Use Case
The quick settings table above is a good default, but the best bias lighting setup changes with what you are doing at the screen. Use this table as a starting point for each situation, then fine-tune by eye with the dark-scene check described earlier.
| Use case | Color temperature | Brightness | Mode | Notes |
|---|---|---|---|---|
| Competitive FPS or ranked play | 6500K | Low (around 10% of panel output) | Static | No sync, no effects; a steady field helps you keep track of dark corners |
| Single-player and story games | 6500K | Low to medium | Static, or gentle sync for casual titles | Lock static for horror and dark games so shadows keep their depth |
| Movies in a dark room | 6500K | Low | Static | Letterbox bars should still look black; this is where bias lighting helps most |
| HDR content | 6500K | Set from SDR white, not HDR peak | Static | Do not raise the strip to match HDR highlights; brief peaks are meant to stand out |
| Daytime office work | 5000-6500K | Medium, or off | Static | In a bright room the benefit is small; switch it off if the wall is already well lit |
| Streaming on camera | 6500K base | Medium | Static or a single brand color at low saturation | Keep the wall from clipping on camera; strong colors tint your face |
| Party and racing games | Any | Medium | Screen sync | Fun and immersive, but you give up the contrast and comfort benefit |
CRI and Flicker: What Settings Cannot Fix
Two hardware properties decide how well a strip can work as bias lighting, and no setting in an app can change them. The first is color rendering. Professional bias lights advertise a high CRI (often 90 or higher) and a light that is actually close to 6500K. Most RGB strips create white by mixing red, green and blue chips, which usually gives low color rendering and a white that can lean blue, green or magenta. Strips with a dedicated white chip, sold as RGBW, RGBWW or RGBICW, produce a cleaner white. If neutral color matters to you, that dedicated white channel is the most important spec to look for.
The second is flicker. Many cheap LED controllers dim with low-frequency PWM, switching the LEDs on and off quickly. At the low brightness levels recommended for bias lighting, that flicker can be at its worst, and some people find it tiring even when they cannot see it. A simple check is to point a phone camera at the strip at low brightness: dark bands rolling across the image suggest low-frequency PWM. If you see them, a strip or light bar with higher-frequency or DC dimming will be more comfortable.
Wall Color, Monitor Distance and Room Light
Bias lighting is reflected light, so the wall behind your screen is part of the system. A white or light gray wall reflects the strip’s color most accurately. A colored wall tints the glow, so a 6500K strip on a beige wall looks warm and on a blue wall looks cold. If you cannot repaint, a sheet of white foam board behind the monitor gives the strip a neutral surface.
Distance matters too. With the display only a few inches from the wall, the glow is concentrated in a narrow halo. With a deep desk that leaves the monitor far from the wall, the light spreads and fades before it reaches you. If your desk stands in the middle of a room with no wall behind it, bias lighting loses most of its value. A monitor light bar with a rear backlight is the better tool in that case. Finally, consider the rest of the room. Bias lighting is meant to replace darkness, not compete with a ceiling light. If the room is already bright, turn the strip down or off rather than fighting the room light.
Choosing Strip Length for Your Screen
Buying the wrong length is one of the most common bias lighting problems. A strip that is too short leaves a dark side, and one that is too long forces you to fold or cut it. The lengths below are approximate for 16:9 screens (21:9 for the ultrawide). They assume the strip runs about 30 to 50 mm in from the edge, as recommended in the placement section. Measure your own display before ordering, because bezels and stands vary.
| Screen | Layout | Approximate strip length | Notes |
|---|---|---|---|
| 24 inch monitor | Top and both sides | About 3.5 ft | A short USB strip is usually enough |
| 27 inch monitor | Top and both sides | About 4 ft | Skip the bottom edge, as covered above |
| 32 inch monitor | Top and both sides | About 4.5-5 ft | A bottom run is optional on high-mounted screens |
| 34 inch ultrawide (21:9) | Top and both sides | About 4.5-5 ft | Most of the length goes along the top |
| 55 inch TV | Full perimeter | About 11.5-12.5 ft | Kits sold for 55-65 inch TVs fit this range |
| 65 inch TV | Full perimeter | About 14-15 ft | Check the kit’s stated TV size, not just the length |
LED density matters too. Strips with more LEDs per meter give a smoother glow with fewer visible hot spots on the wall, which is most noticeable when the monitor sits close to the wall. A low-density strip can still work well if you mount it a little further from the edge and keep brightness low, since the light has more distance to blend.
Special Cases: Laptops, Vertical Monitors and Wall-Mounted TVs
Laptops on a stand. A laptop screen is small and its lid is thin, so a short USB strip stuck to the back of the lid can catch the hinge or come loose. A better approach is a small strip or a light bar on the wall or shelf behind the laptop, aimed at the wall and kept very dim. The goal is the same: a soft field behind the screen, not light on the screen itself.
Vertical monitors. If you run a second monitor in portrait mode, treat it as part of the main display’s glow rather than giving it its own colored strip. Run the strip along the outer edge and top of the vertical screen, and use the same 6500K and brightness as the main monitor so the wall reads as one even field.
Wall-mounted TVs. Flush wall mounts leave only a small gap between the TV and the wall, which concentrates the glow into a bright, narrow halo. Mount the strip closer to the center of the TV’s back panel so the light has room to spread, and lower brightness more than you would on a stand-mounted set. Tilting mounts with a bigger gap give a softer, wider result.
By Hardware Tier
Low Tier: Fixed-Color USB Strips (Budget)
These strips have no app — you get a controller with preset colors and brightness steps. Settings: select the white preset (often labeled “W” or a white button on a 24-key RF remote; note that on cheap RGB strips this is usually a composite of R+G+B, roughly 6500–7000K, which is acceptable), and set brightness to step 2–3 of 4. Power from a monitor’s USB-A port (5V) or a phone charger so the strip dies with the display instead of glowing all night. Trade-off: composite white on cheap strips often leans slightly blue or magenta — if it does, use a dim cyan preset instead, which reads more neutral at low brightness.
Mid Tier: App-Controlled Strips (Govee, Wyze, TP-Link Kasa)
You get real temperature control and scheduling. Settings: static 6500K at 25–30% brightness, plus an automation — in Govee Home, create a Schedule (Profile → Schedule) to dim to 10% after midnight; in Kasa, tie the strip to your monitor smart plug so both power on together. Skip the music-sync and scene modes for bias duty. Trade-off: app-only control means a phone is required for adjustments; budget an extra minute during setup to set schedules so you never touch it again.
High Tier: Screen-Sync Ecosystems (Philips Hue Play/Hue Sync box, Govee DreamView G1 Pro, DIY Adalight)
Settings: create a dedicated entertainment area or calibration profile at 6500K baseline, sync intensity Medium, and map the strip zones to match your panel’s aspect ratio (in the Govee desktop app, drag the zone markers to align with a screenshot of your desktop; in Hyperion, edit the LED layout in the web configuration (default port 8090) → Configuration → LED Hardware, setting the layout to match your physical winding direction). Trade-off: sync systems cost real money and add a small layer of latency and CPU load; the payoff is a bias light that still looks correct during bright HDR scenes, where fixed strips fall behind.
Hardware That Makes These Settings Easier
You can apply the settings in this guide to almost any strip, but some hardware makes it much easier to get a clean 6500K field, a low and steady brightness, and an optional sync mode for casual play. These three products cover the main approaches: a camera-sync TV kit, a premium monitor light bar with a dedicated white backlight, and a more affordable RGB monitor light bar.
Govee TV Backlight 3 Lite (Camera Sync, 55-65 Inch TVs)
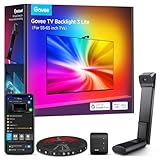
The Govee TV Backlight 3 Lite is the easiest way to get both modes on a TV or a large monitor: a static white bias light for serious viewing, and a camera-based sync mode for party games and sports. The kit includes an 11.8 ft strip for 55 to 65 inch TVs, a control box, a power adapter and a small camera that hangs on the top of the screen. The camera uses fisheye correction to flatten its wide view of the screen, which helps it match edge colors more accurately than older camera kits. Govee also sells shorter and longer versions for other screen sizes.
For bias lighting, the important detail is the RGBICW LED design. Each LED combines red, green and blue with an added white chip, which gives a much cleaner white than strips that mix it from RGB alone. Set it to a static white at the cool end of the temperature slider, drop brightness to the range in our quick settings table, and turn sync on only when you want it. Because the camera watches the screen from outside, sync does not sit in the TV’s video path. The trade-off is that sync accuracy depends on the camera angle and room lighting. Features like black bar detection and blank-screen detection help with letterboxed movies and turn the lights off when the screen goes dark.
Strengths: a dedicated white chip for cleaner bias light, camera sync without an HDMI box, app scheduling, and Matter and voice assistant support.
Drawbacks: it is sized for TVs rather than desk monitors, the camera is visible on top of the screen, and it costs more than the plain USB strips in our low-tier section (mid-range).
BenQ ScreenBar Halo 2 Monitor Light Bar

The BenQ ScreenBar Halo 2 is a different take on bias lighting. Instead of a strip stuck to the back of the panel, it is a light bar that sits on top of the monitor. It has a front light for your desk and a separate rear backlight that washes the wall behind the screen. Both lights are white only and adjust from 2700K to 6500K, and each can be set separately. That means you can run the backlight at exactly 6500K for neutral bias lighting while keeping the desk light warmer late at night. BenQ lists a CRI above 95, among the highest in this category.
The rear light uses a wide, curved design that spreads light up, down and to the sides, giving a broad halo instead of a thin line. Brightness is adjusted with a wireless puck controller, so dimming to the low levels this guide recommends takes a quick turn of the dial instead of an app. It clamps to flat and curved monitors roughly 0.17 to 2.36 inches thick, with no adhesive on the panel.
Strengths: true tunable white with high CRI, separate control of desk and wall light, no adhesive, a physical controller, and support for curved monitors.
Drawbacks: premium tier, white only with no RGB or screen sync, and it covers the wall above and around the top of the monitor rather than a full perimeter.
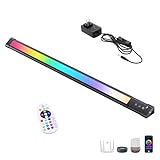
Quntis RGB Monitor Light Bar with Remote

The Quntis RGB monitor light bar is a more affordable way to combine a desk light with a colored backlight in one clip-on unit. It fits flat, curved and ultrawide monitors and comes with a remote, so changing modes does not require an app. The front light handles desk lighting, while the rear RGB backlight can play the role of a bias light.
To use it for bias lighting, choose the white or near-white setting on the backlight and keep brightness low. Avoid the cycling RGB effects for anything other than accent lighting, for the reasons covered in the saturation section above. Because the backlight is RGB, its white may not be as neutral as the BenQ’s dedicated white channel. Judge it against a white piece of paper on screen and adjust if it looks tinted. For gamers who want a little color on stream and a working desk lamp in one product, it is a practical mid-range option.
Strengths: desk light and RGB backlight in one unit, remote control, fits ultrawide and curved screens, mid-range tier.
Drawbacks: an RGB backlight is less accurate for neutral bias lighting than a dedicated white channel, and it does not sync to on-screen content.
Which approach fits your setup
If you game mostly on a TV and want sync for party games, the camera kit is the most flexible. If you work and game at a desk monitor and care most about eye comfort and neutral color, a light bar with a tunable white backlight is the most accurate choice, and you will not stick anything to the panel. If you want color for streaming and a desk light on a budget, an RGB light bar is a reasonable compromise. Whatever you choose, the settings matter more than the hardware: 6500K, low brightness and a static mode for focused play.
Step-by-Step Setup Checklist
- Clean the mounting surface. Wipe the back of the monitor or TV with isopropyl alcohol and let it dry so the adhesive bonds properly. Do this with the display off and cool.
- Dry-fit the strip before peeling the backing. Lay it out along the top and sides about 30 to 50 mm in from the edge, and check that the corners and the controller box sit where you want them.
- Power it from the display where possible. A USB port on the monitor or TV turns the strip off with the screen. If the strip needs a wall adapter, use a smart plug or a schedule so it does not glow all night.
- Set color first, then brightness. Choose static white at 6500K, or the coolest white preset on basic strips. Then lower brightness until a dark scene still shows true black at the screen edges.
- Turn off the effects. Disable music sync, demo cycles and auto scenes. Save your bias setting as a favorite or scene so you can return to it in one tap.
- Add sync last, if at all. If your kit supports screen sync, set up a separate scene for it so switching between static bias lighting and sync takes a single step.
Calibrating by Eye: A Five-Minute Test
You do not need a meter to get bias lighting close enough. Use these three checks in your normal viewing conditions, with the room lights set the way you usually game or watch.
White check. Open a full-screen white image or a blank document and look at the wall next to the screen. The glow should look neutral, neither noticeably orange nor blue compared with the on-screen white. If it looks warm, move the temperature slider cooler. If it looks blue or purple on a basic RGB strip, try a different white preset or lower the brightness, which often reduces the tint.
Black check. Play a dark scene or a letterboxed film. The bars above and below the picture should still look black, not gray. If they look washed out, the strip is too bright or light is spilling onto the front of the screen. Lower the brightness or move the strip further from the panel edge.
Comfort check. After 20 to 30 minutes of normal use, look away from the screen into the room and back again. If your eyes feel like they are re-adjusting each time, the room is too dark and the strip can go up a step. If the glow catches your attention while you play, it is too bright. The right setting is the one you stop noticing.
Basic RGB Backlight Kits
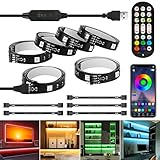
If you just want an affordable starting point, the USB-powered RGB backlight kits below cover common TV and monitor sizes. They are low-tier hardware, so use their white preset at low brightness as described in the hardware tier section, and skip the color-cycling modes.
As an Amazon Associate we earn from qualifying purchases at no extra cost to you.



Common Mistakes
Rainbow/cycling mode as bias lighting. What causes it: the cycling modes are the default demo mode on most strips. How to check: your wall changes color every few seconds. What to do: open the app or use the controller to select a static color or temperature — in Govee, DiY → Static → white 6500K; on IR-remote strips, press the white key once. How to undo: nothing to undo; the static setting persists. If you want the demo mode back later, the “Mode” button on the remote cycles through it.
Direct LED visibility. What causes it: strips mounted flush against the panel edge or facing outward. How to check: you can see individual LED dots from your seat. What to do: remount with the 30–50 mm rear gap using the strip’s adhesive or added clips, and confirm the diffuser (if present) faces the wall. How to undo: peel and re-stick; residue comes off with isopropyl alcohol on the panel bezel.
Brightness turned all the way up. What causes it: assuming more glow equals more benefit. How to check: letterbox bars in a movie no longer look black. What to do: drop brightness until blacks read black again — usually 20–35% in-app or two steps down on a remote. How to undo: raise it back; there’s no stored profile to reset.
Ambient sync left on during competitive play. What causes it: forgetting the mode you enabled for a party game. How to check: the wall flashes on every muzzle flash or explosion. What to do: switch the strip to static in the app, or toggle sync off with the Hue Sync desktop app’s power button (system tray icon). How to undo: re-enable the scene when you want it.
Powering from a port that never sleeps. What causes it: plugging into a charger or a motherboard USB header instead of the monitor. How to check: the strip glows after shutdown. What to do: move the USB plug to a monitor port, or enable ErP/EuP in BIOS (usually under Advanced → APM or Power Management) so header power cuts at shutdown. How to undo: revert the BIOS setting if other devices need standby power.
FAQ
Does bias lighting actually reduce eye strain?
Yes, in the specific case of dark-room use. The mechanism is real: in a pitch-black room, a bright display forces your iris and retina to constantly adjust as scene luminance swings. A dim 6500K field behind the panel raises ambient luminance enough that your visual system has a stable reference. In a normally lit room the benefit is mostly cosmetic — don’t expect it to fix discomfort caused by an over-bright monitor or poor seating distance.
Is 6500K or warm white better behind a monitor?
6500K, because your display’s white point is D65 and matching it prevents constant color adaptation. Warm white looks cozy for the first ten minutes but skews your perception of on-screen whites cooler, and it defeats the contrast benefit in the same way brightness mismatch does. If you find 6500K unpleasant, 5000K is the compromise point.
Will ambient sync modes hurt my FPS or add input lag?
Software sampling costs a little CPU — typically a few percent when the app is set to 30 FPS sampling rather than max. Real input lag is only a concern on TVs with built-in ambient processing, where the edge-sampling pipeline sits in the video path; disable it there for gaming. PC software solutions like Hue Sync and Govee’s desktop app work outside the video pipeline and add no display latency, only minor CPU load.
How do I bias-light an ultrawide or multi-monitor setup?
For ultrawides, use a single strip run the full top edge plus both verticals if the strip supports zone addressing — on zone-capable strips, map each zone to its physical position in the app so gradients stay smooth. For dual monitors, treat the outer perimeter of the pair as one display: one strip up the outer left, across the tops, and down the outer right, mounted on the rear of both panels. Don’t run separate strips per monitor with independent colors; a single continuous color field is what makes the setup read as one coherent glow. Set each monitor’s bezel gap positions in the sync software’s layout editor so zone colors stay aligned with on-screen content.
Is bias lighting worth it on an OLED monitor or TV?
Yes, but for comfort more than contrast. OLED panels already produce true black, so bias lighting does not improve how deep the blacks look. It still gives your eyes a stable reference in a dark room, which reduces the strain of big brightness swings between dark and bright scenes. Keep the strip dim and at 6500K, because any light that reaches the front of a glossy OLED panel can show up as a reflection.
How should I set bias lighting for HDR?
Base it on the screen’s normal white level, not its HDR peak. HDR highlights are brief and meant to stand out, so raising the strip to match them would make it far too bright for most of the picture. Set the strip as you would for SDR content in the same room, then do the black check with a dark HDR scene. If shadow detail looks flat, lower the strip a step.
Can I use a smart bulb or desk lamp instead of an LED strip?
You can, as long as the light hits the wall behind the screen and not your eyes or the front of the display. A 6500K bulb in a small lamp placed behind the monitor and aimed at the wall works as a simple bias light. It will not spread as evenly as a strip, and many bulbs are hard to dim low enough, so choose one with a wide dimming range.
Is a monitor light bar the same as bias lighting?
Not by default. A standard monitor light bar lights your desk and keyboard from above. Only models with a rear backlight, like the BenQ ScreenBar Halo 2 or the Quntis RGB bar, also light the wall behind the screen. Those models can work as bias lighting, and a light bar with a tunable white backlight is one of the most accurate options because it avoids the color tint of RGB-mixed white.
Should bias lighting stay on during the day?
Usually not. Bias lighting helps most in dim or dark rooms. In a room lit by daylight or ceiling lights, the wall behind your screen is already bright and the strip adds little. Many people schedule the strip to turn on in the evening, or tie it to the monitor’s power so it is only on when the screen is.


