
A desk mat looks like a purely aesthetic purchase, but where you put it changes aim consistency, wrist health, cable noise, and even how stable your mouse sensor readings feel. Treat placement like any other in-game setting: there are defaults that work for most people, and there are deliberate deviations based on your monitor arm, keyboard row, and dominant hand. This guide walks through those values setting by setting, then gives hardware-tier adjustments so you can dial it in without trial and error for weeks.
The priority order is simple: sensor tracking surface first, wrist alignment second, edge clearance third, aesthetics last. A mat that tracks flawlessly but sits an inch too low will cost you more ranked games than an ugly one ever will.
As an Amazon Associate we earn from qualifying purchases at no extra cost to you.


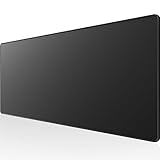


Our Top Picks
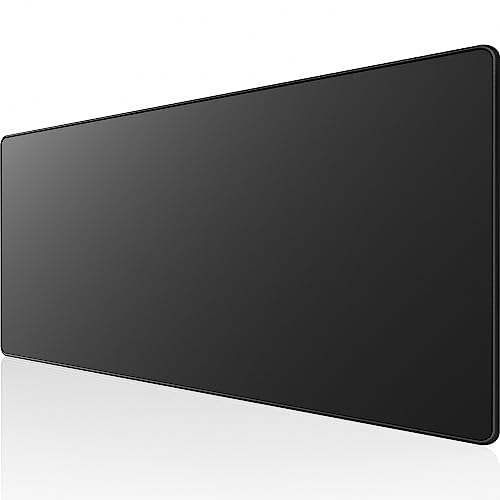 KTRIO Large Gaming Mouse Pad Desk Mat for31.5l X 11.8w Inches31.5 x 11.8 x 0.1 Inches0.84 poundsCheck on Amazon


Top 3 picks at a glance
Quick Recommended Settings
| Setting | Recommended value | Why |
|---|---|---|
| Mat center point (horizontal) | Centered 2–5 cm to the side of your dominant hand | Keeps the full swipe range inside the mat even during fast flicks |
| Mat front edge distance from desk edge | 5–10 cm back from the desk’s front lip | Leaves palm support on the desk, prevents the mat curling over the edge |
| Keyboard overlap | Tenkeyless or 60% boards: bottom row 2–3 cm onto the mat; full-size: mat edge flush with keyboard feet | Prevents keyboard rock and keeps wrist height consistent across mouse and keys |
| Mat orientation (stitched edge) | Stitched front border kept off your wrist crease: wrist fully on the mat or fully on the desk | Stitching runs around the whole edge, so position, not rotation, decides where it meets your wrist |
| Clearance to monitor stand base | Minimum 3 cm gap | Prevents mouse cable snag and lets the mat lie completely flat |
| Wireless receiver placement | Close to the mouse, away from USB 3.0 ports and drives | USB 3.0 devices are a known source of 2.4 GHz interference |
| Surface prep underneath | Wipe desk with isopropyl alcohol, then apply mat | Dust under the mat creates micro-bumps that show up as jitter in slow tracking |
Setting-by-Setting
Horizontal Centering: 2–5 cm Toward Your Dominant Side
The exact value: shift the mat’s centerline 2–5 cm toward your mouse hand relative to your body’s midline (or your monitor’s center if you’re a centered-posture player). The trade-off: too little offset and low-sensitivity players run off the mat’s inner edge mid-swipe; too much and your shoulder rotates inward, which fatigues over long sessions. Check it by placing your mouse at the mat’s center, then performing your widest comfortable 180-degree swipe — both ends of the swipe should land with at least 3 cm of mat remaining. If your hand drifts off one side, increase the offset by 1 cm at a time. To undo, realign the mat’s center with your monitor’s centerline.
Front Edge Position: 5–10 cm From the Desk Lip
The exact value: the mat’s front edge sits 5–10 cm behind the desk’s front edge. The trade-off: closer to the lip gives your forearms more desk contact, but the mat can lift or curl where the desk edge rounds off, creating a tracking dead zone. Check by pressing down firmly along the mat’s front third — any visible lift or wave means you’re too close to the edge. Slide the mat back in 1 cm increments until it lies dead flat under firm palm pressure. To undo, pull it forward again; there’s no permanent change to either the mat or desk.
Keyboard Overlap: 2–3 cm for Compact Boards, Flush for Full-Size
The exact value: with a tenkeyless or smaller board, place the bottom keyboard row 2–3 cm onto the mat so your mouse-side wrist and keyboard-side wrist rest on the same surface height. Full-size boards with flip-out feet should sit with the mat’s edge exactly at the keyboard’s front feet. The trade-off: overlap improves wrist continuity but slightly shrinks your horizontal mouse real estate; going flush maximizes mouse room but creates a 2–3 mm height step at the wrist. Check by resting both palms flat — if one wrist sits noticeably higher, adjust. Fix it by sliding the keyboard, not the mat, since the mat position was set by the previous two steps. To undo, return the keyboard to its prior mark (tape a small reference line on the desk if you experiment often).
Stitched Edge Position: Keep the Front Border Off Your Wrist
The exact value: position the mat so its stitched front border sits clearly ahead of or behind your wrist contact point, never directly under the wrist crease. Stitched edges usually run around the entire perimeter, so rotating the mat does not help; the fix is moving it forward or back. The trade-off: small, since this mostly fine-tunes the front edge setback from the previous step. Check by sliding your wrist gently across the front border; you’ll feel the raised stitching immediately. If it sits under your wrist, slide the mat 1 cm at a time until your wrist rests fully on the mat surface or fully on the desk. To undo, slide the mat back to its previous mark.
Monitor Stand Clearance: 3 cm Minimum Gap
The exact value: keep at least 3 cm between the mat’s rear edge and the monitor stand’s footprint. The trade-off: a mat tucked under a stand lies flatter (the stand’s weight pins it), but the mouse cable catches on the stand base during wide swipes, and repositioning for cleaning becomes a chore. Check by pulling the mat rearward 5 cm with one finger — if it snags on the stand, you’re under it. Slide the mat forward until the gap clears. To undo, tuck it back under; the stand will re-flatten any curl overnight.
Wireless Receiver Positioning: Close to the Mouse, Away From USB 3.0
The exact value: keep a 2.4 GHz wireless mouse receiver within roughly 20 to 30 cm of the mat’s mouse area, with a clear line of sight, and away from USB 3.0 ports, USB 3.0 drives, and hubs, which can interfere with the 2.4 GHz band. Wired mice are unaffected by this step. The trade-off: a rear-panel port under the desk is convenient but often blocked and close to other USB 3.0 devices, so use a short extension cable or the mouse’s own dock to bring the receiver up near the mat. Check by watching for cursor stutter in a paint app while a USB device transfers a large file nearby. To undo, return the mat and dongle to original positions.
Surface Prep: Isopropyl Wipe, Full Flatten
The exact value: clean the desk with 70% isopropyl alcohol and a lint-free cloth, let it dry 60 seconds, then unroll the mat and place heavy books on each corner for 30 minutes if it arrives curled. The trade-off: none for the desk itself; the only cost is 30 minutes of setup time. Check for problems by running a slow, deliberate crosshair trace across the mat in a training map — micro-bumps under the mat show up as consistent jitter at the same screen location. To undo prep, simply wipe the desk with water to remove any alcohol residue.
By Hardware Tier
Low Tier: Cloth Mat, Office Desk, Wired Mouse
Prioritize flatness and clearance over everything else. On a budget setup the mat is often on a hollow or slightly bowed desk — press the desk surface first; if it flexes, position the mat over the desk’s frame rail (usually 20–25 cm from the front edge) where it’s rigid. Keep the mat clear of any monitor stand entirely, since budget stands are the heaviest snag risk. Route the mouse cable through or behind the mat’s rear edge with a 5 cm slack loop so pulls never drag the mat.
Mid Tier: Control or Hybrid Mat, Sit-Stand Desk, Wireless Mouse
On a sit-stand desk, add one setting: mat position must keep the mouse area at least 10 cm inside the desk’s perimeter on all sides, because standing posture widens your swipe arc and the mat slides more at standing height. Consider a low-tack anti-slip layer (a sheet of grippy shelf liner cut 1 cm smaller than the mat on each side) if the desk surface is laminate. For wireless mice, keep the receiver close to the mat on a short extension and away from USB 3.0 ports and drives.
High Tier: Hard or Glass Mat, Monitor Arm, Ultrawide
Hard and glass mats remove the “flatten it with books” step but add an edge-awareness problem: their edges are sharper and a wrist crossing them at speed is noticeable. Set the mat so your full swipe range ends 4–5 cm inside the border rather than 3 cm, since hard surfaces punish edge contacts more. With a monitor arm, reclaim the stand-base footprint entirely — center the mat under the monitor’s centerline with zero stand interference. Ultrawide players should bias the mat 5 cm toward the mouse hand, because ultrawide setups encourage more body rotation and a larger swipe envelope on the dominant side.
Cable, Dongle, and Desk Clutter Layout
Once the mat is placed, everything around it should be arranged to protect your swipe envelope, the area your mouse and forearm cover during your widest movements. A clean envelope keeps the mat from being dragged and prevents snags that throw off aim mid-fight.
- Wired mice: route the cable over the rear edge of the mat on the mouse side, ideally through a mouse bungee or a clip on the monitor stand, so the cable lifts off the surface rather than dragging across it.
- Wireless mice: place the receiver within roughly 20 to 30 cm of the mouse with a clear line of sight, using a short USB extension if the PC is under the desk. Keep the charging dock or cable off the mat when not in use.
- Keyboard cable: run it straight back from the keyboard and off the rear edge of the mat on the non-mouse side, so it never crosses the mouse zone.
- Drinks, phone, and headset stand: keep them at the rear corner on your non-mouse side or off the mat entirely. A drink inside the swipe envelope is both an aim distraction and a spill risk for cloth mats.
- Speakers and lighting: position them behind the mat line. Light strips and RGB under-glow should never sit beneath the mat, where they create bumps.
Cleaning and Maintenance by Mat Type
Placement only stays correct if the surface stays consistent. Oils, dust, and crumbs change glide over time and can make a perfectly positioned mat feel slow in one area and fast in another.
| Mat type | Routine care | Deep clean | Replacement signs |
|---|---|---|---|
| Cloth | Lint roller or soft brush weekly | Hand wash in lukewarm water with mild soap, rinse well, air dry flat away from heat | Shiny worn patch in the mouse zone, frayed stitching, or a base that no longer grips |
| Hybrid or coated | Wipe with a damp microfiber cloth | Gentle wipe with diluted mild soap, then dry completely | Peeling coating, sticky spots, or noticeable speed differences across the surface |
| Hard or glass | Dry microfiber wipe to remove dust and fingerprints | Glass cleaner or a little isopropyl alcohol on a cloth, never sprayed directly on the base | Chips near edges, deep scratches in the mouse zone, or a degraded rubber base |
| Leather or PU | Dry cloth wipe | Damp cloth with a small amount of mild soap, then dry | Cracks, peeling, or permanent curling corners |
After any deep clean, let the mat dry fully before putting it back, and re-check the front edge and keyboard overlap marks. Washing can shift a cloth mat’s shape slightly, and a damp base can trap moisture against wood desks.
Five-Minute Placement Checklist
- Sit normally and confirm your elbow rests at about 90 to 100 degrees with the mouse at the mat’s center.
- Perform your widest 180-degree swipe and confirm at least 3 cm of mat remains at both ends, or 4 to 5 cm on hard mats.
- Press firmly along the front third of the mat and look for lift or waves.
- Rest both palms and check that both wrists sit at the same height.
- Press each keyboard corner and listen for rocking.
- Drag a fingertip along your wrist path and check for seams or edges.
- Pull the mat rearward slightly to confirm it clears the monitor stand base.
- Trace a slow line in an aim trainer or paint app and watch for jitter at the same spot.
Common Mistakes
Mat Curling at the Front Edge
What causes it: the mat extends past the desk’s flat surface onto the rounded front lip, and material memory holds the curl. How to check: sight across the mat’s front edge at desk level; a visible upturn confirms it. What to do: slide the mat back until the front edge is 5–10 cm inside the desk lip, then weight the front edge with books overnight to retrain it. How to undo: pull the mat forward if you prefer the old position, though the curl will likely return.
Wrist Riding the Stitched Seam
What causes it: the mat’s front edge was set without checking where the wrist rests. How to check: run a fingertip along your usual wrist contact path and feel for raised stitching. What to do: slide the mat forward so your wrist rests fully on the mat surface, or back so it rests on the desk, while keeping the front edge setback. How to undo: slide the mat back to its previous mark; there’s no lasting effect.
Keyboard Rocking on the Mat Edge
What causes it: the keyboard straddles the mat’s edge so one half sits on the 2–3 mm mat thickness and the other on bare desk. How to check: press each corner of the keyboard and listen for click-clack rocking. What to do: either fully overlap the mat (bottom row 2–3 cm past the keyboard’s front edge) or go fully flush — never half-on. How to undo: slide the keyboard back to its previous mark.
Slow-Aim Jitter That Moves With the Mat
What causes it: dust, crumbs, or a warped desk spot under the mat, or a sensor struggling with a textured or glossy mat surface. How to check: in any aim trainer’s static grid, trace one crosshair-width to the right at the slowest speed you can manage; note whether jitter repeats at the same mat location (surface problem) or the same screen location (sensor/angle problem). What to do: lift the mat, clean the desk and mat underside, and re-place it 2–3 cm to one side to test a fresh desk zone. How to undo: return it to the original spot if the jitter was environmental and unrelated.
Placement Order: Set Up the Desk Before the Mat
Most placement problems come from positioning the mat first and fitting everything else around it. The mat should be the last large item you place, because its ideal position depends on where your body, screen, and keyboard already sit. Work through the desk in this order and the settings above fall into place naturally.
- Chair and desk height. Sit with your feet flat and adjust the chair or desk so your elbows rest at roughly 90 degrees with forearms close to parallel to the floor. If the desk is fixed and too high, raise the chair and add a footrest.
- Monitor position. Center your primary monitor on your seated position, about an arm’s length away, with the top of the screen at or slightly below eye level.
- Keyboard position. Center the keyboard on your body, not on the desk. For most players that means the keyboard’s home row sits in front of your sternum, or the left half of the board does if you use a full-size keyboard with a number pad.
- Mouse zone. Now measure the space beside the keyboard where your mouse hand naturally rests with your elbow bent and close to your side. That point becomes the center of your swipe range.
- Mat last. Place the mat so the mouse zone sits near its center, then apply the horizontal offset, front edge, and keyboard overlap values from the table at the top of this guide.
- Cables and extras. Route cables and position the dongle, drinks, and phone only after the mat is fixed, keeping them outside your swipe envelope.
Mat Size vs Desk Depth
Mat dimensions and desk depth decide whether the front edge rule is even achievable. If the mat is deeper than the free space between the desk lip and your monitor base, you will be forced to choose between edge overhang and stand interference. Use this table to pick a size that fits, or to plan a monitor arm if your desk is shallow.
| Desk depth | Recommended mat depth | Placement approach |
|---|---|---|
| Under about 60 cm (24 in) | 30 cm or less | Use a separate mouse pad rather than a full desk mat, or move the monitor to an arm to reclaim depth |
| About 60 to 70 cm (24 to 28 in) | 30 to 40 cm | A standard extended mat works, but keep the monitor stand base behind the mat with the 3 cm gap rule |
| About 75 cm (30 in) and deeper | 40 cm or more | Full XXL mats fit comfortably with the 5 to 10 cm front edge setback and room for a monitor stand |
Width follows the same logic. A low-sensitivity FPS player benefits from 80 to 90 cm of mat width so the keyboard and a full swipe range share one surface, while a high-sensitivity player can often use a 45 cm mouse pad and keep the keyboard on the desk.
Ergonomic Checkpoints Before You Lock It In
A placement that works for aim but strains your arm will not last. Run through these quick checks once the mat is in position.
- Elbow angle: with your hand on the mouse at the mat’s center, your elbow should sit close to your side at roughly 90 to 100 degrees. If your arm is reaching forward or out to the side, move the mat closer and reduce the horizontal offset.
- Shoulder level: both shoulders should be relaxed and level. A raised mouse-side shoulder usually means the desk is too high or the mat is too far to the side.
- Wrist line: your wrist should stay roughly straight in line with your forearm, not bent upward or angled sharply outward. Thick mats and tall keyboards both increase upward bend.
- Forearm support: low-sensitivity arm aimers should have the forearm resting on the mat or desk, not hanging off the edge, which is one reason the front edge setback matters.
- Pain signals: outer elbow ache usually means you are reaching too far, while wrist pain often comes from resting on a hard edge or the stitched seam.
Placement by Aim Style and Game Genre
Low-Sensitivity FPS: Arm Aiming
Players in tactical shooters such as Counter-Strike 2 and Valorant often run sensitivities that need 40 cm or more for a 180-degree turn. Arm aiming pivots from the elbow and shoulder, so give priority to mat width and the horizontal offset toward your mouse hand. Angle the keyboard slightly, with its left side further from you, if it crowds your mouse arm, which frees space without moving the mat.
High-Sensitivity and Wrist Aiming
Fast-paced shooters, battle royales, and wrist aimers need far less space. A centered mouse zone with a smaller offset is fine, and the critical value is wrist alignment. Keep the edge or seam clear of your wrist pivot point, and consider a medium or small mouse pad on top of a protective desk mat if you prefer a specific surface.
MOBA, MMO, and Strategy
These genres mix mouse movement with heavy keyboard use, so keyboard overlap and wrist height continuity matter more than swipe room. Overlap the keyboard as described above so both hands stay at the same height, and keep the mat flat under the keyboard to prevent rocking during fast key presses.
Left-Handed, Dual-Monitor, and Laptop Setups
Every setting in this guide mirrors cleanly for left-handed players: offset the mat toward the left, place the dongle on a left-side port, and route the mouse cable along the left rear edge. On a dual-monitor desk, center your keyboard and mat on the primary screen you game on, not on the gap between screens, because your aim reference is the crosshair on that monitor. If both screens are used equally, center on the seam but expect more neck rotation. For laptops used with an external monitor, place the laptop to the side on a stand so the full desk depth in front of you is available for the mat.
Mats and Accessories That Suit Each Placement Style
The mats listed at the top of this guide cover cloth and decorative desk pads. If you are building toward the mid or high tier setups described above, these additions fit specific placement scenarios.
Logitech G840 XL Cloth Gaming Mouse Pad

The G840 XL is a straightforward choice for the low and mid tier setups in this guide. At 900 by 400 mm and 3 mm thick, it is wide enough to hold a tenkeyless or full-size keyboard plus a generous low-sensitivity swipe range, and deep enough to follow the 5 to 10 cm front edge setback on desks around 70 cm deep or more. The cloth surface is tuned for consistent, moderate friction that works well with optical gaming sensors, and the rubber base holds steady on most laminate and wood desks.
The 3 mm thickness is a good middle ground: thick enough to smooth out minor desk imperfections and provide some forearm cushioning, but thin enough that the height step at the keyboard overlap stays small. It is a plain black mat, so it fits setups where you want function over decoration. Its main limitation is that cloth mats can curl at the edges if stored rolled, so the flattening step in the surface prep section still applies when it arrives. It sits in the budget tier for a mat of its size.
Razer Strider XXL Hybrid Mouse Mat
The Strider is the hybrid option for the mid tier setup described above. It measures roughly 940 by 410 mm and 3 mm thick, with a smooth, fast surface layered over a soft rubber base, so it glides more like a hard pad while keeping the cushioning and flexibility of cloth. That combination suits players who want quicker flicks than a standard control mat but do not want the sharp edges of a hard or glass pad.
Two features matter for placement. The surface is water resistant, which makes it more forgiving when your drink sits near the rear corner, and the anti-fraying stitched edges stay low profile, which helps with the seam position rule. The base resists warping, so it lies flat quickly after unrolling. It is a mid-range purchase and works especially well on sit-stand desks, where its grippy base helps resist the extra sliding at standing height.
Pulsar Superglide Pad v3 Glass Mouse Pad

For the high tier setup with a hard or glass mat, the Superglide v3 is a good example of what a modern glass pad offers. The M size measures 330 by 260 mm with a 1.5 mm alumino-silicate glass top on a molded silicone rubber base, and the surface uses a special texture designed for extremely low friction. Pulsar includes UHMW-PE dot skates in the box, which can be applied to your mouse for smoother, quieter glide on glass.
The v3 adds softer, rounded R-edge machining and larger corner radii, which directly addresses the edge-awareness problem mentioned in the high tier section. Because the M size is compact, it pairs best with high-sensitivity or wrist aiming and is usually placed on top of a protective desk mat or directly on a flat desk beside the keyboard rather than under it. Low-sensitivity players should look at the larger L, XL, or XLE sizes in the same line. Glass pads sit in the mid-range to premium tier and reward a clean, flat desk.
HyperX Wrist Rest

A keyboard wrist rest helps solve the height step problem from the keyboard overlap setting, particularly with tall mechanical keyboards that the mat alone cannot level. The full-size HyperX Wrist Rest uses memory foam with a cooling gel layer and an anti-slip base, and it runs the length of a full-size keyboard.
Place it directly against the front edge of the keyboard, on the mat if you use full overlap, so it sits under the heel of your palm rather than the wrist crease. Use it during pauses and typing breaks rather than anchoring your wrist on it while gaming, because pressure on the underside of the wrist can contribute to discomfort over time. It fits the budget tier and is one of the simplest ways to make the keyboard side of your setup match the comfort of the mouse side.
FAQ
Should the mousepad go under the keyboard or next to it?
Under it, for compact boards: overlap the bottom row 2–3 cm onto the mat so both wrists share one surface height. For full-size boards with flip-out feet, place the mat flush against the keyboard’s front feet instead. The rule is never half-on — a keyboard straddling the mat’s edge rocks when you type and shifts your wrist angle every time it moves.
How much mouse room do I actually need on the mat?
Measure your widest swipe in your aim trainer’s range or sensitivity converters, then add a 3 cm buffer on each end. Most low-sensitivity players need 35–45 cm of usable horizontal mouse space; if your mat can’t provide it after centering, drop your cm/360 slightly or accept re-lifts on 180s. There’s no in-game menu for this — it’s pure geometry between your sensitivity and mat dimensions.
Does a thick mat change placement?
Yes, slightly. Mats 4 mm and thicker raise your wrist noticeably, which matters more if your keyboard is also thick. Compensate by overlapping the keyboard more (3 cm rather than 2) so the height step at the wrist shrinks, and avoid letting thick mats reach the desk edge — they curl more at the lip than 2–3 mm mats do.
How often should I re-check or reposition my mat?
Do a full check — flatness, seam position, keyboard rock, and stand clearance — whenever you clean, and a quick fingertip sweep of the borders weekly. Mats migrate a centimeter or two over weeks of normal play because every swipe pushes them subtly toward your non-dominant side. If you find yourself chasing consistent aim, note the mat’s position with two small pieces of tape on the desk so drift becomes obvious at a glance.
Should my desk mat be centered on the desk or on me?
Center it on you. Your keyboard and mouse zone should line up with your seated position and primary monitor, not the physical middle of the desk. On a wide desk with speakers or a PC case on one side, this often means the mat sits noticeably off center, which is correct.
Can I put a mouse pad on top of a desk mat?
Yes. Many players use a large decorative or leather desk mat to protect the desk and then place a dedicated gaming pad on top for the mouse. Make sure the top pad has a grippy base that holds on the mat surface, and keep the desk mat completely flat underneath, since any wrinkle shows up as tracking inconsistency.
Is a leather or PU desk pad good for gaming?
Leather and PU desk pads are excellent for protecting the desk, writing, and office work, but they are not tuned for optical gaming sensors. Some sensors track well on them and others do not, and the glide can feel sticky in humid conditions. If aim consistency is your priority, use a cloth, hybrid, or hard gaming surface in your mouse zone.
What size desk mat should I buy for a gaming setup?
Measure your desk depth and your widest comfortable swipe first. As a general guide, 80 to 90 cm wide and 30 to 40 cm deep suits most keyboard-and-mouse combinations on standard desks. Shallow desks under about 60 cm deep work better with a separate mouse pad, and very deep desks can take 40 cm or more.
Does mat color or pattern affect tracking?
Modern gaming sensors track well on almost all printed cloth mats. Very glossy surfaces, reflective metallic prints, or strongly textured areas can cause problems with some sensors. If you notice jitter only over certain parts of a patterned mat, move your mouse zone to a plainer area or adjust the mouse’s lift-off and surface calibration in its software.


