Creating an efficient, streamlined home office is more than just an aesthetic choice; it is a direct investment in your daily productivity. As we design modern workspaces in 2026, the demand for multi-monitor setups continues to grow. However, trying to expand your screen real estate by connecting multiple displays to a single laptop or desktop can quickly turn into a frustrating technical puzzle if approached incorrectly.
When done poorly, attempting to run multiple monitors through an incompatible or low-grade USB hub can lead to a host of headaches. You might experience constant screen flickering, dropped signals, or resolutions restricted to a blurry, low-resolution output. In worst-case scenarios, drawing too much power through an unpowered hub can cause overheating, system instability, or even permanent damage to your laptop’s motherboard ports. To prevent these issues, you must select the right hardware and follow a precise connection sequence.
As an Amazon Associate we earn from qualifying purchases at no extra cost to you.


With the right equipment—specifically a multi-display USB-C docking station designed for high-bandwidth video transmission—you can drive two or three independent displays from a single port on your computer. Below is the complete guide to selecting your gear and configuring your multi-monitor workspace safely and successfully.
Our Top Picks


What You Need
Before you begin plugging in cables, you must gather the correct hardware. Standard USB hubs designed for keyboards and flash drives do not have the bandwidth or video protocols required to run multiple external screens. You will need a dedicated multi-display USB-C docking station or hub that supports Alt Mode (DisplayPort Alternate Mode) or DisplayLink technology.
| Item | Why | Optional? |
|---|---|---|
| Multi-Monitor USB-C Docking Station | Acts as the central traffic controller, splitting your laptop’s single video signal into two or three outputs. Look for models supporting dual HDMI 4K or triple display configurations (typically priced between $30 and $45). | No |
| High-Speed HDMI or DisplayPort Cables | Connects your monitors to the docking station. Ensure they support HDMI 2.0 or DisplayPort 1.4 for smooth 60Hz refresh rates. | No |
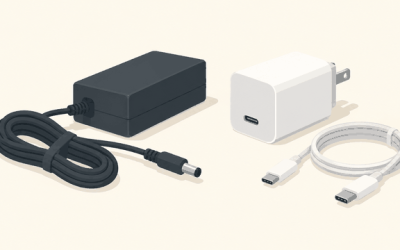
| USB-C Power Delivery (PD) Charger | Supplies power directly to the hub (65W to 100W recommended) so the hub does not drain or overload your laptop’s internal power supply. | Highly Recommended |
| Compatible Host Laptop/PC | Must feature a USB-C port that supports video output (DisplayPort Alt Mode) or Thunderbolt 3/4. | No |
| External Monitors | Your primary display targets. Ensure they have matching input ports (HDMI or DisplayPort) to avoid needing additional adapters. | No |
Step-by-Step
Setting up your multi-monitor hub takes roughly 15 to 20 minutes. Follow these steps in order to ensure your operating system recognizes each screen correctly and distributes power safely.
Step 1: Verify Port Compatibility (Time Estimate: 5 Minutes)
Before connecting any cables, inspect the USB-C port on your laptop. Not all USB-C ports are created equal. Look for a small lightning bolt icon (indicating Thunderbolt 3 or 4) or a “D” shape icon (indicating DisplayPort Alt Mode). If your port is data-only, it will not transmit video signals to your docking station. Check your computer manufacturer’s spec sheet to confirm that your specific USB-C port supports video output.
Step 2: Connect Power to the Docking Station (Time Estimate: 2 Minutes)
Running multiple monitors, a keyboard, a mouse, and external storage requires significant power. Plug your laptop’s USB-C power adapter (typically 65W to 100W) directly into the dedicated “PD” (Power Delivery) port on your docking station. This ensures the dock is self-powered and can pass power upstream to charge your laptop, preventing battery drain and signal drops during heavy use.
Step 3: Connect the Dock to your Host Laptop (Time Estimate: 1 Minute)
Using the built-in or provided high-speed USB-C cable (usually measuring 1 to 2 feet to minimize signal degradation), connect the docking station to your computer’s compatible USB-C or Thunderbolt port. Your operating system should play a connection sound or display a notification indicating that new hardware has been recognized.
Step 4: Plug in the Monitors One by One (Time Estimate: 5 Minutes)
Take your first HDMI or DisplayPort cable and connect your primary external monitor to the first video port on the hub. Wait 5 to 10 seconds for the screen to register and display your desktop. Once stable, connect your second monitor to the second video port on the hub (such as the dual HDMI ports found on standard $35 to $40 docking stations). If you are using a triple-display dock, connect the third monitor last.
Step 5: Configure Display Settings in Your OS (Time Estimate: 5 Minutes)
Once all screens are physically connected, you must arrange them virtually so your mouse moves naturally between them.
- For Windows: Right-click your desktop and select Display settings. Scroll down to the “Multiple displays” section. Click Identify to see which number corresponds to each physical screen, then drag and drop the onscreen rectangles to match their physical layout on your desk. Ensure the drop-down menu is set to “Extend desktop to this display” rather than “Duplicate.”
- For macOS: Go to the Apple menu > System Settings > Displays. Click Arrange to align your screens. Note that standard macOS does not natively support Multi-Stream Transport (MST) over a single USB-C cable without DisplayLink drivers; if your screens are mirroring instead of extending, see the FAQ section below.
Mistakes to Avoid
- Ignoring Power Delivery (PD) Requirements: Trying to run two 4K monitors solely on “bus power” (drawing power directly from the laptop) is a recipe for system instability. Always connect a 65W to 100W power supply to the hub’s PD input port to keep the video chips stable.
- Using Passive HDMI-to-DisplayPort Adapters: If your hub has HDMI ports but your monitor only has DisplayPort inputs, you cannot use a simple, cheap passive adapter. You must use active adapters to convert the signal, or stick to native HDMI-to-HDMI and DisplayPort-to-DisplayPort connections.
- Buying a Data-Only USB-C Hub: Many budget hubs (priced under $20) look identical to video docking stations but only support USB data transfer and card readers. Ensure your hub explicitly lists “Dual HDMI,” “MST,” or “DisplayPort Alt Mode” compatibility.
- Overlooking Cable Length and Quality: Using old, worn-out HDMI cables longer than 15 feet can introduce digital noise, resulting in intermittent black screens or snow-like static on your monitors. Stick to high-quality, shielded cables under 6 feet for optimal performance.
How Often
To keep your multi-monitor setup running smoothly, establish a quick maintenance routine. Once every month, inspect the docking station for dust buildup around the video ports, as dust can trap heat and cause the internal video processing chips to thermal throttle. Every three months, check your computer’s operating system settings and graphics card control panel (Intel, AMD, or NVIDIA) for driver updates; display drivers are frequently updated to patch multi-monitor bugs and sleep-mode wake issues. Finally, once a year, unplug and re-seat all HDMI and USB-C connections to clear out micro-corrosion and ensure tight physical connections.
When to Call a Pro or Replace
While most multi-monitor issues can be resolved with simple troubleshooting, certain hardware limitations or failures require you to replace your gear. If your docking station becomes hot to the touch (exceeding normal operating temperatures) and smells of warm plastic, or if your screens randomly disconnect and reconnect every few minutes even when powered by a wall adapter, the internal chipsets may be failing.
Additionally, if you upgrade your monitors to high-refresh-rate gaming screens (such as 144Hz or 240Hz) or ultrawide displays, older budget hubs (which are typically capped at 4K at 30Hz or 1080p at 60Hz) will bottleneck your hardware. In this case, it is time to replace your hub with a premium Thunderbolt 4 docking station capable of handling higher bandwidth demands.
FAQ
Can I connect three monitors to a single USB-C hub?
Yes, but this depends heavily on your laptop’s graphics card and the hub’s capabilities. Triple-monitor docking stations (typically weighing 4 to 6 ounces and measuring around 5 x 2 inches) can split a single USB-C signal into three video outputs. However, your laptop’s integrated graphics processor must support three external displays, and you may need to disable your laptop’s built-in screen to drive all three external monitors simultaneously.
Why are my external monitors mirroring each other instead of extending?
This is a common issue for Mac users. macOS does not natively support Multi-Stream Transport (MST) over standard USB-C ports. Consequently, if you plug a standard MST dual-HDMI hub into a MacBook, both external screens will show the exact same image (mirroring). To get independent, extended screens on a Mac, you must purchase a docking station that uses DisplayLink technology and install the corresponding DisplayLink manager software on your Mac.
Do I need to install drivers for my multi-monitor USB hub?
For most Windows laptops using a standard USB-C Alt Mode dock, the setup is entirely plug-and-play; the operating system automatically detects the screens using native drivers. However, if your hub uses DisplayLink or Silicon Motion chipsets to bypass native video limitations (common for MacBooks or older USB-A laptops), you will need to download and install the official drivers from the manufacturer’s website before the monitors will display an image.
What is the difference between a USB hub and a docking station?
While the terms are often used interchangeably, a standard USB hub primarily expands your USB ports for data peripherals (keyboards, mice, flash drives) and usually lacks video outputs. A docking station is a more advanced, powered device designed to replace desktop connectivity entirely, offering dedicated video processing chips, ethernet ports, audio jacks, and high-wattage power pass-through to run multiple displays and charge your laptop simultaneously.