Even a great chair cannot fix a keyboard that sits too high. When the desktop forces your forearms upward, your shoulders creep toward your ears and your wrists bend back—the classic recipe for forearm ache and tingling fingers. An under-desk keyboard tray drops the typing surface 5–10cm below the desk and, on better models, tilts it slightly downward so your wrists stay neutral. It is the single most effective posture fix for anyone whose desk is a fixed height.
Our Top Picks
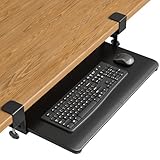
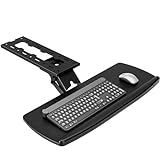
 OUKMIC 27" x 12" Height Adjustable Keyboard Tray27"X12"11 x 27 x 5.71 inches11.2 poundsCheck on Amazon


Top 3 picks at a glance


What to look for
Three features decide whether a tray helps or just gets in the way: drop distance, negative tilt, and mounting style. Drop distance of 5–10cm is what actually lowers your hands; a shallow tray barely helps. Negative tilt (the back edge angled down 5–15 degrees) is what keeps wrists straight—this is the opposite of the little feet under your keyboard, which tilt the wrong way. Mounting is either screw-in (rock solid, needs a drill and enough clearance under the desk) or clamp-on (renter-friendly, no holes, but slightly less stable).
As an Amazon Associate we earn from qualifying purchases at no extra cost to you.



| Feature | Budget tray | Ergonomic tray |
|---|---|---|
| Drop below desk | 3–5cm | 7–10cm |
| Negative tilt | Fixed flat | Adjustable 0 to -15° |
| Track length | Short, no swivel | Full slide + swivel |
| Price | Budget | Mid-range to premium |
More keyboard trays worth a look
The picks above cover the most popular clamp-on and pull-out trays, but they lean heavily toward flat platforms. If you want real negative tilt, a long-established brand, or a clamp that handles a thick desktop, these six trays fill the gaps. Each one solves a different problem, so read the “who it’s for” line first and skip the ones that do not match your desk.
3M Knob Adjust Keyboard Tray (AKT65LE)

Who it’s for: anyone who wants a true ergonomic arm with genuine negative tilt and is willing to spend in the premium tier for it. This is the classic office-ergonomics design: a steel track under the desk, an arm that drops the platform below the desktop, and a single knob that locks both height and tilt.
Key specs: 3M lists a 25.5-inch-wide platform about 12 inches deep, a height range of roughly 5.5 inches (from about 1 inch above the mounting surface to about 4.5 inches below it), tilt of +15 to -15 degrees, and a full 360-degree swivel. The track is short, around 17 inches, which helps on shallower desks, though you still need roughly 17-18 inches of clear depth and about 26 inches of width underneath. It ships with a gel wrist rest and a mouse pad and 3M backs the arm with a long warranty (check the listing for current terms).
Strengths: the -15 degree tilt is exactly what the “What to look for” section above recommends, and very few clamp-on trays offer it. One knob adjusts everything, so you can fine-tune the angle in seconds instead of re-mounting brackets. The swivel lets you push the platform aside when you want to write on the desktop.
Drawbacks: it costs several times more than the budget clamp trays above, and it is a track mount, so it attaches to the underside of the desk rather than clamping to the edge. Desks with a front apron or a crossbar near the front edge may block the track. The single-knob design is convenient but needs a firm turn to stop the platform from creeping under heavy typing.
Setup notes: because the track is short, mount it as far forward as your desk’s underside allows so the arm has room to retract fully. Set height first, then tilt, and re-tighten the knob after a day of use once the platform settles. Its wide platform holds a full-size keyboard with the included mouse pad beside it, so you do not need a separate mouse extension.
How it compares: next to the HUANUO 360 tray in the main list, the 3M arm is the more traditional, office-grade option with a longer warranty. Against the VIVO clamp-on trays, it is a different class of product: it changes your wrist angle rather than just lowering the keyboard.
Uncaged Ergonomics KT1

Who it’s for: budget-conscious typists who want negative tilt and swivel without paying office-furniture prices. The KT1 is one of the cheapest ways to get an adjustable arm tray rather than a fixed drawer.
Key specs: the KT1 uses a 16-inch rail that screws to the underside of the desk, and the maker includes a bridge piece to help the rail clear crossbars. The keyboard platform is 18.5 x 8.75 inches with a separate 7 x 8.75-inch mouse platform that mounts left or right, bringing total width to about 25.5-27.5 inches. The platform tilts down to -15 degrees via a lever, swivels 360 degrees, and is rated for roughly 11 lbs.
Strengths: it delivers the two features that matter most for wrist posture, drop and negative tilt, in the lower price tier. The independent mouse platform keeps your mouse at keyboard level, which avoids the “mouse stranded on the desktop” problem. The short rail suits desks that are not very deep.
Drawbacks: the keyboard platform is narrower than most trays here, so a full-size board with a number pad fills it edge to edge. Owner feedback commonly mentions a mechanism under the tray that can bump your knees, and the warranty is short compared with 3M or Kensington. It needs screws, so renters should look elsewhere.
Setup notes: use the included bridge if your desk has a front crossbar, and mount the mouse platform on your dominant side before you lock the tilt. Start at about -5 degrees and work down; jumping straight to -15 can feel odd for the first few sessions. Tenkeyless keyboard owners get the most out of this tray because the narrower board leaves space for a wrist rest.
How it compares: think of it as the affordable alternative to the 3M arm: similar tilt range, lighter build, shorter warranty. Compared with the BONTEC and XINLEI trays above, it costs a little more but actually changes your wrist angle instead of simply sliding out flat.
Fellowes Office Suites Underdesk Keyboard Drawer

Who it’s for: people who want a simple, permanent screw-in drawer from a well-known office brand, and who mostly need to lower the keyboard a little and clear the desktop when they are not typing.
Key specs: the keyboard tray is about 20 x 7.75 inches, with a roughly 7.4 x 7.6-inch mouse tray that attaches to either side or stows underneath. Ball-bearing glide tracks around 10 inches long carry the drawer, and three height settings put the keyboard roughly 1.75, 2.1, or 2.5 inches below the track. You need about 23.5 inches of clear width under the desk (closer to 29 inches with the mouse tray out). Fellowes lists a 3-year limited warranty.
Strengths: it is compact and inexpensive, the short track suits shallow desks, and the side-swappable mouse tray suits left-handed users. Ball-bearing slides keep the pull smooth for daily use.
Drawbacks: the drop is modest, at most about 2.5 inches below the track, so it will not help much if your desk is very tall for you. The keyboard surface is shallow at under 8 inches, which leaves little room for a wrist rest with deeper mechanical boards, and there is no tilt adjustment. It is a screw-in drawer, not a clamp.
Setup notes: choose the lowest of the three bracket positions unless your knees hit the drawer, since the deepest drop delivers the biggest posture gain. Pre-drill pilot holes, and confirm the 10-inch tracks are parallel before tightening the last screws, otherwise the drawer can bind. A low-profile or tenkeyless board suits the shallow surface best.
How it compares: it sits closest to the BONTEC and XINLEI pull-out trays above, but trades their clamp mounting for a drilled, more permanent install. If you need a bigger drop or tilt, skip to the 3M or Uncaged picks.
Kensington SmartFit Underdesk Comfort Keyboard Drawer
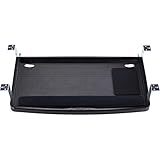
Who it’s for: anyone who wants a wide, screw-in drawer that fits an oversized or split ergonomic keyboard plus a mouse, without stepping up to an articulating arm.
Key specs: the drawer is listed at about 24.5 inches wide and 11.75 inches deep, with a built-in mousing area, wrist rest, and mouse pad. Kensington’s SmartFit system uses a color-coded chart to pick the right mounting height with several mounting-height levels. It includes cable management and carries a 3-year limited warranty.
Strengths: the platform is noticeably deeper than the Fellowes drawer, which leaves room for a keyboard, wrist rest, and mouse on one level. The SmartFit chart takes the guesswork out of setting the height for your body. The lowest setting gives a meaningful drop for tall desks.
Drawbacks: height is set at installation rather than adjusted on the fly, so it is a poor fit for shared desks. It does not offer the adjustable negative tilt of an arm-style tray. It needs a wide, clear underside without crossbars or drawers in the way.
Setup notes: measure your seated elbow height and use Kensington’s color chart before drilling, because moving the brackets later means new holes. The deep platform is a good home for a split or curved keyboard with a palm rest, which many narrower trays cannot hold. Route the keyboard cable through the cable-management slot so it does not snag when the drawer closes.
How it compares: it is the roomy, set-and-forget alternative to the Fellowes drawer, and a sturdier screw-in option than the clamp-on VIVO trays. If your keyboard is a wide ergonomic model, this is one of the few drawers wide and deep enough.
EUREKA ERGONOMIC Height Adjustable Keyboard Tray (25 x 9.13 in)

Who it’s for: standing-desk and gaming-desk owners who want a full-motion tray that can also cope with desks that have support beams underneath.
Key specs: a 25 x 9.13-inch sliding platform with mouse pad, a full-motion design that adjusts height, swivels, and tilts, and a listed height adjustment range of about 5.8 inches. The mounting bracket is about 17.8 inches deep, so plan on a desk roughly 20 inches deep or more. It comes in black, maple, and walnut finishes to match common desktops.
Strengths: the large height range lets you set the keyboard well below the desktop for seated typing, then bring it closer to the surface for other tasks. Wood-tone finishes look more like furniture than the all-black office trays. The listing describes it as suitable for desks with beams, which is a common headache on frame-style gaming desks.
Drawbacks: it sits in the upper-mid price tier and the whole unit is heavy, so installation is a two-hand job. The platform depth of just over 9 inches is fine for a keyboard plus slim wrist rest but tight for deep mechanical boards with large rests. Exact tilt angles are not clearly published for this model, so check the listing if you need a specific negative tilt.
Setup notes: because it is heavy, have a second person hold the mechanism while you drive the first screws. Confirm your desktop is solid wood or MDF thick enough for the screws to bite; particleboard edges and glass are not suitable for this kind of mount. On a standing desk, check the tray clears the desk legs and crossbar through the full height range before finishing the install.
How it compares: it competes directly with the HUANUO and AX WABER adjustable trays in the main list, adding finish options and beam-friendly mounting. It costs less than the 3M arm but is a newer design without the same long track record.
Mount-It! Clamp-On Under Desk Keyboard Tray (MI-7143)

Who it’s for: renters and anyone with a thick desktop that is too chunky for typical clamp-on trays. Many clamp trays top out at about 1.25 inches of desk thickness; this one is rated for much thicker tops.
Key specs: a 27 x 11-inch platform (about 33 inches wide including the clamps), stainless-steel slide rails with roller balls, no-drill clamp mounting, and a listed fit for desks up to 2.2 inches thick (some retailers list up to 2.5 inches, so plan around 2.2 to be safe). Mount-It! says it is designed to meet or exceed ANSI/BIFMA standards.
Strengths: the thick-desk clamp range is its headline feature and the main reason to choose it over the VIVO clamp trays. The 27-inch platform takes a full-size keyboard and mouse together, and nothing gets drilled.
Drawbacks: like most clamp trays it is a flat slide-out platform, so there is no negative tilt and only a small drop below the desk. The clamps need about 33 inches of clear edge, which rules out narrow desks or edges crowded by monitor-arm clamps. It is also heavier to handle than budget trays.
Setup notes: position the clamps before you load the tray, check that the platform sits level side to side, then tighten each clamp evenly. If you also run a monitor arm, plan the clamp locations together so neither crowds the other. Add a slim wrist rest along the front edge to make up for the lack of tilt.
How it compares: pick it over the VIVO MOUNT-KB05E when your desktop is thicker than about 1.25 inches, and over the BONTEC when you want a wider platform. If tilt matters more than drill-free mounting, the 3M or Uncaged arm is the better buy.
Quick comparison of the additional trays
Use this table to narrow the six extra picks down to one or two. Price tiers are approximate and change often, so treat them as a guide to the class of product rather than a quote.
| Tray | Mounting | Negative tilt | Platform size | Best for | Price tier |
|---|---|---|---|---|---|
| 3M AKT65LE | Screw-in track + arm | Yes, to -15° | 25.5 x 12 in | Best wrist posture, long warranty | Premium |
| Uncaged Ergonomics KT1 | Screw-in rail + arm | Yes, to -15° | 18.5 x 8.75 in + mouse platform | Tilt on a budget | Mid-range |
| Fellowes Office Suites | Screw-in drawer | No | 20 x 7.75 in + mouse tray | Shallow desks, compact boards | Budget |
| Kensington SmartFit | Screw-in drawer | No | 24.5 x 11.75 in | Wide ergonomic keyboards | Budget to mid-range |
| EUREKA 25 x 9.13 in | Screw-in, beam-friendly | Tilt adjustable | 25 x 9.13 in | Standing and gaming desks | Upper mid-range |
| Mount-It! MI-7143 | Clamp-on, no drill | No | 27 x 11 in | Thick desktops up to ~2.2 in | Mid-range |
Tray types explained: drawer, clamp, and articulating arm
Most buying mistakes come from choosing the wrong type of tray rather than the wrong brand. Three designs dominate, and each lowers your hands in a different way.
Fixed drawers
A fixed drawer is a flat platform on two slide rails that screw to the underside of the desk. Height is set once, at installation, usually with a choice of two or three bracket positions. Drawers are inexpensive and stable, and they are the easiest way to reclaim desktop space because the keyboard slides away when you are done. The trade-off is a limited drop, often only 2-4 inches, and no tilt. They work best when your desk is only slightly too tall for you.
Clamp-on slide-out trays
Clamp-on trays behave like drawers but grip the desk edge with C-clamps instead of screws. They are the renter-friendly choice and suit laminate or veneered tops you do not want to drill. Check the clamp range against your desktop thickness before ordering: many fit up to about 1.25 inches, while a few heavy-duty models handle 2 inches or more. Clamp trays are almost always flat, so pair one with a slim wrist rest rather than raising the back of the keyboard.
Articulating arm trays
An articulating arm hangs the platform from a sliding mechanism, so you can raise, lower, tilt, and swivel it independently of the desk. This is the style that most reliably delivers 4 inches or more of drop together with 10-15 degrees of negative tilt, which is what most ergonomics guidance recommends for neutral wrists. Arms cost more, need a longer clear track under the desk, and take longer to install, but they are the right choice for long typing days, shared desks, or anyone already feeling wrist strain.
A simple rule: if your desk is less than about 2 inches too tall and you mainly want desk space back, a drawer or clamp tray is enough. If it is 3 inches or more too tall, or your wrists already ache, budget for an arm.
Measurements to take before you order
Five minutes with a tape measure prevents most returns. Write these numbers down and compare them with each tray’s listing before you buy.
- Seated elbow height. Sit in your adjusted chair, bend your elbows to 90 degrees, and measure from the floor to the underside of your forearm. Subtract that from your desk height: the difference is roughly how far the tray needs to drop.
- Desk height. Measure from the floor to the top of the desktop. Standard fixed desks sit around 29-30 inches, which is too high for many people under about 5 ft 10 in.
- Desktop thickness. Needed for any clamp-on tray. Include edge banding or a raised lip.
- Clear underside depth. Measure from the front edge back to the first obstacle: a crossbar, drawer, modesty panel, or cable tray. Track trays typically need 16-24 inches, depending on the model.
- Clear underside width. Most trays need 23-28 inches of uninterrupted width. Check for desk legs, drawer pedestals, and monitor-arm clamps.
- Knee clearance. Measure from the floor to the top of your thighs while seated. The tray plus its mechanism must sit above that line, with a little room to spare.
- Keyboard and mouse footprint. Measure your keyboard’s width and depth, then add your mouse pad. That total decides whether you need a wide platform or a separate mouse extension.
Keyboard trays for gaming setups
Gaming desks bring a few extra wrinkles. Many have a carbon-fiber-look laminate over particleboard, steel frames with front beams, and RGB strips or cable trays underneath, all of which can block a track. Clamp-on trays tend to be the simplest fit, as long as the desktop is not too thick for the clamp.
Mouse space is the bigger issue. Most trays include a mouse area of 7-10 inches, which suits office mice and high-sensitivity players but cramps anyone who uses arm aiming in shooters. If that is you, look for a platform of 30 inches or more, such as the extra-large clamp trays in the main list, and put a wide pad across the whole surface. Some players keep the keyboard on the tray for long chat or work sessions and slide it away for competitive play, moving the keyboard back onto the desk mat. That compromise still saves your wrists during the hours you spend typing, which is when most strain builds up.
Heavy boards also matter. Aluminum-case custom keyboards can weigh 4-5 lbs on their own, so check the tray’s rating and avoid flimsy budget platforms if your keyboard plus wrist rest plus mouse is heading toward the limit.
Matching a tray to your desk
Check clearance before you buy
Measure the flat underside of your desk from the front edge back at least 30cm; the tray’s track needs that space to mount and retract. Desks with a front apron, drawers, or a curved lip under 6cm of clearance rule out many screw-in trays. Clamp-on trays need a flat overhang of a few centimeters to grip. Also confirm your knees still fit—a tray steals 3–5cm of thigh clearance.
Size it for your keyboard and mouse
If you use a full-size board plus a mouse, get a wide tray (around 68–70cm) with a mouse platform, or your mouse ends up back on the high desktop and defeats the purpose. A 60% or TKL keyboard user can run a narrower tray. A gel wrist rest along the front edge finishes the neutral-wrist setup.
How to set the tray to your body
A tray only helps if it is set correctly. Spend ten minutes on this sequence after installation and adjust again after a week of real use.
- Set your chair first. Adjust seat height so your feet rest flat on the floor (or a footrest) with thighs roughly level. Never set the chair around the tray; set the tray around the chair.
- Find your elbow height. Sit back with shoulders relaxed and arms hanging, then bend your elbows to about 90 degrees. The home row of the keyboard should sit at or slightly below that height.
- Set the drop. Lower the tray until the keys meet that elbow line. On a fixed drawer, choose the bracket position that gets closest; on an arm, lock it at that height.
- Add negative tilt if available. Angle the back edge of the platform down a few degrees at a time until your wrists are straight while typing. Most people land between 5 and 15 degrees. Fold in the keyboard’s own feet so they do not undo the tilt.
- Bring the mouse to the same level. Place the mouse right beside the keyboard on the tray’s mouse platform, not on the desktop above. Reaching up for the mouse cancels much of the benefit.
- Check the screen. Lowering your hands often means you sit a little further back. Re-check that the top of the monitor is near eye level and the screen is about an arm’s length away.
- Check knee clearance. Stand up and sit down a few times. If the tray hits your thighs, raise the chair slightly and use a footrest rather than raising the tray.
Gamers should note one extra point: low-sensitivity players who make big mouse sweeps need a wider mouse area than a tray’s side platform offers. Either choose an extra-wide platform that holds a large mouse pad, or keep the keyboard on the tray and accept a slightly higher mouse on the desktop with a soft wrist support.
Installation tips
For screw-in trays, pre-drill pilot holes to avoid splitting the desk, and use the shortest screws that bite firmly—going too deep can pop through a thin desktop. Slide the tray in and out a few times to confirm the track is level; a tray that drifts down at one side usually means one bracket sits lower. Set the negative tilt just enough that a pen laid on the keyboard rolls gently toward you, then dial it back until your wrists feel flat.
FAQ
Will a keyboard tray fit a standing desk?
Usually yes, but confirm the tray mounts to the underside without fouling the crossbar or lift motor. Because the whole desk raises, the tray keeps its relative drop at any height, which is a genuine bonus for tall standing users.
Clamp-on or screw-in?
Screw-in is more stable and better for heavy typing; clamp-on is right for renters or glass desks where drilling is out. Just verify the clamp fits your desk thickness—many fit tops up to about 3cm, while heavy-duty clamps such as the Mount-It! reach roughly 5.5cm.
What is negative tilt and why does it matter?
Negative tilt means the back of the keyboard sits lower than the front, angling the keys away from you. When you type with hands below the elbow, this angle lets your wrists stay straight instead of bending upward. Keyboard feet create positive tilt, which bends the wrists back, so on a tilted tray keep the feet folded in.
How far below the desk should a keyboard tray sit?
Far enough that the keyboard meets your elbow height when you sit correctly. For many people at a standard 29-30 inch desk, that means 2-4 inches below the desktop; shorter users may need more. Measure from the floor to your bent elbow while seated and compare it with your desk height to find your number before buying.
Can a keyboard tray hold a full-size mechanical keyboard and mouse?
Yes, if the platform is about 25 inches wide or more and at least 10 inches deep. Narrower trays fit tenkeyless or 75% boards with a mouse, but a full-size board with a number pad usually needs a wide platform or a separate mouse extension. Check the tray’s weight rating too; heavy aluminum keyboards can approach the limits of budget trays.
Do keyboard trays wobble?
Some movement is normal, especially on clamp-on and arm-style trays, because the platform hangs out from its mount. Keep it to a minimum by tightening all hardware fully, mounting the track as far forward as practical, and choosing a tray with a steel track. If a tray bounces noticeably during fast typing, check that both brackets are level and fully tightened.
Will a keyboard tray work with a gaming desk that has a metal frame?
Often, but check the underside first. Many gaming desks have a crossbar or beam near the front edge that blocks a screw-in track. Look for trays designed to mount around beams, ones that include a bridge plate, or a clamp-on model that grips the desk edge instead.
Signs your keyboard sits too high
How do you know a tray will help? Watch your shoulders and wrists during a typing session. If your shoulders creep up toward your ears, your elbows open past 90 degrees, or your wrists bend upward to reach the keys, the typing surface is above where your hands want to be—the exact problem a tray solves. Another tell is that you rest your wrists on the hard desk edge, which compresses the nerves running through them. A properly set tray drops the keyboard so your elbows stay near 90 degrees with forearms parallel to the floor and wrists straight. Test the effect for free first: type with your keyboard on your lap for a few minutes and notice how much your shoulders relax. If that feels dramatically better, a tray brings that lap-level comfort to your desk permanently, with the added negative tilt that a lap cannot provide.
Common mistakes to avoid
- Ignoring the mouse. A tray that holds only the keyboard leaves your mouse arm reaching up to the desktop, which can make shoulder strain worse on one side.
- Buying for the wrong desk thickness. Clamp ranges vary widely. Measure your desktop before ordering, including any lip or edge banding.
- Forgetting the crossbar. Standing desks and gaming desks often have a front beam that blocks a long track. Measure the clear depth back from the front edge.
- Using keyboard feet on a tray. Flipping out the feet adds positive tilt and undoes the posture benefit. Keep the feet folded.
- Setting the tray too low. Dropping the keyboard far below elbow height pushes your shoulders forward. Aim for elbows at roughly 90 degrees, not lower.
- Leaning on the hard edge. Resting on the front lip of a tray presses on the underside of the wrist. A soft rest along the edge spreads that pressure; rest the palms during pauses rather than while actively typing.
Alternatives if a tray will not fit
Not every desk can take a tray. If yours has drawers in the way, a deep apron, or no clear underside, consider these options. A height-adjustable desk solves the problem at the source because you lower the whole surface to elbow height, though it costs far more than a tray. A lower side table or desk return can hold the keyboard and mouse at elbow height while the monitor stays on the main desk. Finally, raising your chair and adding a footrest brings your elbows up to the desktop, which works when the gap is small. A tray remains the cheapest fix for a fixed-height desk, but it is not the only one.
Which keyboard tray should you buy?
With fourteen trays across the main list and the extra picks, it helps to start from your situation rather than the product names.
- You rent or cannot drill: a clamp-on tray. The VIVO MOUNT-KB05E suits desks up to about 1.25 inches thick; the Mount-It! MI-7143 handles thicker tops.
- Your wrists already ache: an arm tray with real negative tilt, such as the 3M AKT65LE or, on a tighter budget, the Uncaged Ergonomics KT1.
- You use a wide or split ergonomic keyboard: the Kensington SmartFit drawer or one of the extra-large clamp trays, so the board and mouse share one level.
- You own a standing or frame-style gaming desk: a tray built to work around beams, like the EUREKA model, or a clamp-on tray that avoids the underside entirely.
- Your desk is only slightly too tall: a simple drawer such as the Fellowes Office Suites, which lowers the keyboard a couple of inches and clears the desktop when you are done.
Whatever you choose, the deciding numbers are the same: enough drop to bring the keys to elbow height, a platform wide enough for keyboard and mouse together, and a mount that fits the desk you actually own.
Bottom line
Aim for a tray that drops your hands to elbow height and is wide enough to hold both keyboard and mouse; our top pick, the VIVO MOUNT-KB05E clamp-on tray, does that without drilling, and if your wrists need negative tilt of 5–15 degrees, step up to an arm tray such as the 3M AKT65LE. Confirm under-desk clearance first, pick clamp-on if you cannot drill, and your forearms will thank you within a week.