
Few things elevate a gaming battle station, creative studio, or home office desk quite like the vibrant, ambient glow of RGB LED strip lights. When installed correctly, they cast a seamless, indirect halo of light that reduces eye strain and adds an undeniable aesthetic appeal. However, many DIYers encounter a frustrating rite of passage: waking up a few mornings after installation to find their expensive light strips sagging, peeling, or completely detached, dangling behind the desk like loose spaghetti.
This common failure happens because stock adhesive backings are often low-grade, and desk surfaces are rarely prepared correctly to receive them. Dust, microscopic wood oils, finger grease, and temperature fluctuations all conspire to break the adhesive bond. If you want to know how to stick rgb light strips to desk without peeling, you must treat the installation as a precise, multi-step process. By choosing the right materials, preparing the mounting surface, and using mechanical reinforcements, you can ensure your lighting setup remains locked in place for years to come.
As an Amazon Associate we earn from qualifying purchases at no extra cost to you. Product prices and availability are accurate as of the date shown and are subject to change.

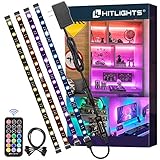
What You Need
Before you begin, gather the necessary tools and materials. Relying solely on the double-sided tape that comes pre-applied to your LED strip is a gamble. Having these supplemental items on hand will guarantee a permanent hold.
| Item | Why You Need It | Optional? |
|---|---|---|
| RGB LED Light Strip | The primary light source. Budget options (like a 32.8-foot roll) usually run between $8 and $15, while premium pre-cut 4-foot kits with heavy-duty backing range from $20 to $30. | Required |
| Isopropyl Alcohol (70% or 91%) | Cleans away dust, finger oils, and manufacturing residues without leaving a slick film behind. | Required |
| Microfiber Cloth | Wipes the cleaning solvent clean without shedding fibers or leaving lint on the mounting surface. | Required |
| Double-Sided Acrylic Foam Tape | Provides an incredibly strong, heat-resistant bond to reinforce high-tension areas and corners. | Highly Recommended |
| Silicone or Plastic Cable Clips | Secures the heavy power cord and controller so their weight does not pull the light strip down. | Required |
| Hairdryer or Heat Gun | Slightly warms the adhesive during application to maximize its tackiness and conformability. | Optional |
Step-by-Step
Follow this systematic guide to prep, apply, and secure your RGB light strips. Rushing through these steps is the single biggest reason why LED strips fail and peel.
Step 1: Plan Your Layout and Test the Lights (Time Estimate: 10 minutes)
Never stick a light strip down without testing it first. Unroll your LED strip—whether it is a long 32.8-foot budget roll or a pre-cut 4-foot kit—plug it into the power supply, and turn it on using the remote or controller. Check for dead diodes, flickering segments, or incorrect color rendering. Once you verify the strip is fully functional, unplug it. Next, map out exactly where the strip will sit on your desk. For the best ambient glow, place the strip roughly 0.5 to 1 inch away from the rear edge of the desk, facing the wall. Mark the starting and ending points lightly with a pencil.
Step 2: Clean the Desk Surface Thoroughly (Time Estimate: 5 minutes)
The number-one cause of peeling LED strips is dust. Even a brand-new desk has a microscopic layer of dust, manufacturing oils, or wood polish that prevents adhesive from making direct contact with the surface. Pour a generous amount of 71% or 91% isopropyl alcohol onto a clean microfiber cloth. Wipe down the entire path where the light strip will go. Do not use household glass cleaners or multi-surface sprays; these products contain silicone, wax, or essential oils that leave a slick residue, which actually makes it harder for the tape to stick. Allow the alcohol to air-dry completely for two to three minutes.
Step 3: Measure, Cut, and Prep the Strip (Time Estimate: 5 minutes)
Measure the exact length of your desk’s mounting path. If your light strip is longer than your desk, you will need to cut it down to size. Locate the designated cut lines on the strip, which are always marked by copper pads (usually spaced every 2 to 4 inches) and a small scissor icon. Cut precisely along these lines using sharp scissors. If you cut anywhere else, you will break the electrical circuit, rendering that section of the strip useless. If you are using a pre-cut kit, ensure the layout fits perfectly without needing modifications.
Step 4: Apply Supplemental Adhesive to High-Tension Spots (Time Estimate: 10 minutes)
Stock adhesive backings on budget light strips are notoriously thin. To ensure they never peel, apply small pieces of heavy-duty, double-sided acrylic foam tape (such as VHB tape) to critical high-tension areas. These areas include the very beginning of the strip (where the heavy power cable connects), the very end of the strip, and any spots where the strip must bend around a corner. Cut a 1-inch piece of acrylic tape, press it firmly onto the desk surface at these key points, and peel away the protective top liner.
Step 5: Adhere the Light Strip with Consistent Pressure (Time Estimate: 10 minutes)
Start at the end of the desk closest to your power outlet. Peel back the first 6 inches of the light strip’s adhesive backing. Press the strip down firmly onto your pre-marked path. Use your thumb to apply direct, firm pressure to the strip for at least 15 seconds. LED strip adhesives are pressure-sensitive; they require physical force to activate the chemical bond. Continue peeling the backing and pressing the strip down in 6-inch increments. If your room is cool (below 65°F), run a hairdryer on low heat over the tape for a few seconds just before pressing it down to soften and activate the adhesive.
Step 6: Secure the Power Cable and Corners (Time Estimate: 5 minutes)
The heavy power brick, controller receiver, and thick power cord exert a constant downward gravitational pull on the end of your light strip. Over time, this weight will inevitably peel the strip away from the edge. To prevent this, place a plastic or silicone cable mounting clip directly next to the connection point where the power cord meets the light strip. Secure this clip to the desk frame or underside of the desktop using its own heavy-duty adhesive or a small screw. This transfers all the physical tension of the hanging wire to the clip rather than the delicate light strip.
Mistakes to Avoid
- Touching the Adhesive: Avoid touching the sticky backing of the light strip with your bare fingers. The natural oils on your skin will instantly contaminate the adhesive, drastically reducing its holding power.
- Bending Strips at Sharp 90-Degree Angles: Forcing a flat LED strip to bend sharply around a 90-degree corner creates immense physical tension that will pull the adhesive off the desk. Instead, create a small, loose loop at the corner, or use clip-on 4-pin corner connectors to bridge the turn.
- Powering on the Lights Immediately: LED strips generate subtle heat, especially high-output models. If you turn the lights on immediately after installation, the heat can soften the fresh adhesive before it has a chance to cure. Leave the lights turned off for at least 12 to 24 hours to let the bond set completely.
- Installing on Unfinished or Highly Porous Wood: Raw, unpainted, or unvarnished wood is highly porous and dusty. Standard tape cannot grip it. If your desk is raw wood, you must seal it first, or use mechanical mounting brackets to secure the light strip.
How Often
Maintaining your LED setup is simple but necessary to maximize its lifespan. Inspect your light strips every six months. Check the ends of the strips and the power cable connection to ensure no sagging has started. If you notice a small section beginning to lift, do not wait for it to peel further; immediately tuck a small piece of double-sided acrylic tape underneath it and press firmly.
Dust your light strips every few months using a dry microfiber feather duster. Avoid using wet cloths or liquid cleaners directly on active, uncovered LED diodes. Accumulated dust acts as an insulator, trapping heat around the LEDs and the copper strip. This excess heat can degrade both the diodes and the adhesive backing over time, shortening the overall lifespan of your system.
When to Call a Pro or Replace
Because desk-mounted RGB strips are low-voltage devices (typically operating on safe 12V or 24V DC power adapters), they are perfectly safe for DIY installation and do not require professional electrical work. However, as we look toward workspace designs in 2026, integrated smart desks with built-in aluminum channels are becoming the norm. If you are retrofitting a high-end, custom-built desk and want to routing deep, flush-mount aluminum channels directly into the wood, hiring a local cabinetmaker or carpenter is wise to avoid ruining expensive furniture.
You should completely replace your light strip if you experience major hardware failures. If multiple sections of your lights turn different colors, flicker constantly, or fail to light up entirely, the internal copper circuitry has likely cracked due to excessive bending. At this point, no amount of fresh adhesive will fix the strip, and it is time to invest in a new kit.
FAQ
Can I reuse an LED light strip if I move my desk?
Yes, you can reuse the light strip, but you cannot reuse the original adhesive backing. Once peeled off, the original tape loses its stickiness and collects dust. To reinstall the strip on a new desk, carefully peel off the old adhesive residue from the back of the strip, and apply a fresh roll of double-sided, high-bond acrylic tape along the entire length of the strip before mounting it again.
Will removing the LED strip adhesive damage my wooden desk?
It can, especially on cheap veneer, laminate, or delicate varnishes. To remove an LED strip safely without damaging your desk’s finish, use a hairdryer on a warm setting to heat and soften the adhesive first. Slowly peel the strip back at a shallow angle. If any sticky residue remains, wipe it away with a small amount of Goo Gone or rubbing alcohol on a microfiber cloth.
Why does my LED strip peel off even though I cleaned my desk?
If the surface is clean but the strip still peels, the culprit is likely surface texture or heat. Highly textured finishes, matte laminates, or porous woods do not offer enough flat surface area for standard tape to grip. Additionally, if you run your LEDs at 100% brightness immediately after sticking them down, the heat can liquefy the uncured adhesive. Always allow the tape to cure for 24 hours before powering on the lights.
Are mounting clips better than adhesive tape?
A combination of both is the ultimate solution. While adhesive tape keeps the strip perfectly flat and hidden, silicone mounting clips provide a mechanical hold that cannot fail due to temperature or humidity. Placing mounting clips every 12 to 18 inches along your strip guarantees that even if the adhesive backing softens over time, the strip will never sag or fall off the desk.


