
Walk into any serious gaming room and you’ll notice one thing fast: controllers never stay where they’re supposed to. They end up wedged between couch cushions, balanced on a speaker, or worse—on the floor. If you’re finally ready to fix that, you’ve probably narrowed it down to two solutions: a controller stand that sits on your desk or media console, or a wall mount system that takes your gear up and off every flat surface. Both are cheap, both work, and both have passionate defenders. But they solve the problem in very different ways, and the right choice depends less on the gear itself and more on your room, your walls, and how you actually play.
Here’s the real decision you’re making: a stand trades floor and desk space for convenience and portability, while a wall mount trades installation effort for a permanently clean setup. Neither is strictly better. A renter with a strict security deposit on the line has different priorities than a homeowner building out a dedicated gaming den. This guide breaks both options down honestly so you can pick the one that fits your space.
As an Amazon Associate we earn from qualifying purchases at no extra cost to you.

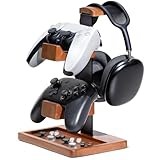
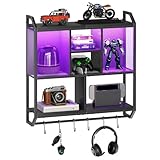

Top 3 picks at a glance
Quick Verdict
If you want the short answer: most people should start with a desk stand. It’s cheaper upfront, requires zero installation, moves with you, and does the job for one or two players. A wall mount system earns its keep when you have multiple controllers, want the cleanest possible look, or you’re a homeowner building a permanent gaming room. In rental apartments and homes with kids or pets, stands are the safer bet. In long-term homes with a dedicated play space, wall mounts shine—especially when paired with LED floating shelves that turn storage into part of the room’s design.
Side by Side
| Factor | Controller Stand | Wall Mount for Gaming Room |
|---|---|---|
| Comfort of access | Grab-and-go from your desk or console; no standing up mid-session | Reach up or to the side; fine for most, less ergonomic at a desk |
| Installation | None—place it and load it | Drilling, anchors, and level work; 30–60 minutes for a full set |
| Price range | $15–$35 for most quality stands | $25–$60+ depending on capacity and finish |
| Capacity | Typically 1–8 controllers plus a headset on tiered models | Individual mounts from 1 controller up to 14-piece kits covering a whole wall |
| Durability | Solid wood and steel models last years; cheap acrylic can crack | Very durable once anchored properly; can hold 5–15 lbs per mount |
| Maintenance | Dust collects on tiers; occasional wipe-down | Nearly maintenance-free; occasional dusting of exposed surfaces |
| Space needed | Roughly 6×8 inches of desk or shelf footprint | Zero surface footprint, but needs 12–18 inches of clear wall per mount |
| Look | Functional; wood options can look genuinely handsome | Cleanest option; floats everything, pairs well with LED lighting |
| Portability | Move it, pack it, take it to a new place in a box | Committed once installed; patching holes is on you |
| Best for | Desk gamers, renters, small setups, 1–2 players | Homeowners, multi-controller households, dedicated gaming rooms |
Where Controller Stand Wins
You play at a desk. If your gaming happens at a PC battlestation, a stand keeps your controller within arm’s reach without a single tool. Tiered options like the Kytok 4-tier stand show how much you can stack into a small footprint—up to eight controllers plus a headset, all organized around a built-in cable channel, for about $19.99. That’s hard to beat on value per controller stored.
You rent or move often. A stand weighs between one and five pounds, packs flat-ish, and asks nothing of your walls. Landlords never know it existed.
You like flexibility. Rearrange your desk? Switch rooms? A stand adapts in seconds. Solid wood models around $27.99—built from actual walnut, oak, or rubberwood rather than MDF—also age beautifully and look at home next to a monitor or a TV stand, not just in a gaming room.
You’re testing the waters. If you’re not sure how many controllers you’ll actually accumulate, a $20 stand is a low-risk experiment. If you outgrow it, you’ve lost less than a pizza night.
Where Wall Mount for Gaming Room Wins
You’re drowning in controllers. Households with Switch, PS5, Xbox, and retro gear can hit six or more controllers fast. Individual wall mounts let you display every one of them face-out like a museum. A comprehensive option like the PEGZONE 14-piece wall mount kit ($42.99) covers controllers, headsets, and even handheld consoles in one coordinated system—something no desk stand can match at that scale.
You want the cleanest possible room. Wall mounting clears every surface. Combined with something like a HOOBRO 28.7-inch floating shelf with LED lighting ($47.99, typically drawing under 10 watts for the light strip), you get storage, display, and ambient lighting in one wall footprint. It’s the difference between a gaming room that looks assembled and one that looks designed.
You have pets or toddlers and a desk. This one cuts both ways, but if your desk is a cat highway, a stand is a knock-waiting-to-happen. A mount two inches behind a desk’s reach keeps gear out of the danger zone.
You own your walls. Once you can drill without consequences, the biggest downside of wall mounts disappears. Anchored properly into studs or with quality anchors, mounts routinely hold 5–10 pounds per bracket—far more than any controller or headset weighs.
Cost Over 5 Years
Both options are cheap to buy and cheap to own, but the math differs slightly.
Stands: Plan on $15–$35 upfront. Over five years, expect to potentially replace one unit—spring-loaded arms wear out, acrylic yellows and cracks, and cheap plastic joints loosen. Realistic five-year cost: $25–$60. If you upgrade from plastic to solid wood mid-way, add $28.
Wall mounts: Budget $25–$60 for a quality kit, plus $10–$20 in anchors, drill bits, or a borrowed drill if you don’t own one. But quality wall mounts are genuinely set-and-forget; steel and ABS mounts don’t wear out from holding a one-pound controller. Realistic five-year cost: $35–$80, most of it spent on day one. The hidden cost is labor—your installation time—and reversal if you move, which means patching and repainting.
The honest takeaway: over five years, the price gap narrows to almost nothing. Choose based on your room and lifestyle, not the sticker price.
Which One for Your Home
Small Apartment
Go with a stand. Desk space is already precious in a small apartment, so choose a vertical tiered design that stacks 3–4 controllers in a footprint smaller than a coffee mug. If your desk is maxed out, a single compact wall mount above the desk is a reasonable compromise—one anchor, one hole, easy to patch at move-out. Avoid large multi-piece wall systems; they’ll overwhelm a small room and complicate your deposit.
Family with Kids or Pets
A stand placed high on a console works, but wall mounts are the unsung hero here. Mounts positioned 48–60 inches off the floor put controllers out of toddler reach and out of the dog’s tail-wag radius. Bonus: controllers on a wall are visible and accounted for, which cuts down on the “where’s the second controller” hunt. Just make sure mounts sit away from the couch’s swing zone, and anchor into studs—kids yank things.
Rental
Stand first, no contest. If you must mount, check your lease (many allow small anchor holes that get patched), use removable adhesive-style mounts for lightweight headsets, and keep drilled holes behind furniture so they’re invisible at inspection. A solid wood stand also softens the look of a rental—a good thing when your walls are landlord beige.
Long-Term Home
Now you can go big. Dedicated gaming rooms are where wall mounts earn their keep. Build out a wall system: individual controller mounts arranged in a grid, a floating LED shelf for your console or collectibles, and cable routing hidden behind the drywall. By 2026, this display-wall approach has become the signature look of serious gaming rooms, and it starts at under $100 in hardware. Plan your layout before drilling—measure controller dimensions (a PS5 DualSense is roughly 6.3 inches wide, a Switch Pro controller about 6.4) and space mounts 4–6 inches apart so everything reads cleanly.
FAQ
Do wall mounts damage controllers?
No, not if you choose mounts with padded or rubberized contact points. Controllers weigh 8–12 ounces, so there’s no structural stress. The only risk is scratches from rigid plastic cradles—look for felt-lined or silicone-padded models, and wipe dust off your controllers occasionally so grit doesn’t rub into the finish.
How much weight can a controller wall mount hold?
Most individual mounts are rated for 5–10 pounds each when anchored into a stud, which is 5–10 times more than any controller weighs. The weak point is usually the wall, not the mount: hollow drywall anchors typically hold 10–25 pounds, so whenever possible, hit a stud or use heavy-duty toggle anchors.
Can I use a controller stand for headphones too?
Yes—many stands are designed as dual-purpose units. Tiered models commonly include a dedicated headset hook or top tier rated for headphones weighing up to a pound or so. Check the top tier’s weight capacity before hanging an heavier studio-style headset on it.
Do floating shelves with LED lights use a lot of power?
No. LED shelf strips typically draw 5–15 watts—less than a standard phone charger. Running one four hours a day costs roughly $1–$3 per year depending on your local electricity rates, so you can leave the lighting on every evening without thinking about it.


