
The best back braces for heavy lifting are semi-rigid lumbar supports with dual-pull tension straps, breathable mesh panels, and stays that stabilize without locking your hips, with the Bauerfeind LumboTrain, Mueller Sports Medicine Adjustable Back Brace, and Harbinger FirmFit Contoured Belt consistently ranking at the top for support, sizing accuracy, and comfort during long sessions.
For heavy lifting, you are not looking for maximum immobilization like a post-surgical brace. You need intra-abdominal pressure support, precise adjustability to tighten between sets, and enough mobility to hinge, squat, and brace correctly. The wrong brace traps heat, rides up, or restricts breathing, which reduces performance faster than it helps your back.
As an Amazon Associate we earn from qualifying purchases at no extra cost to you.
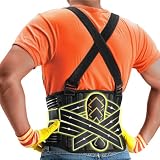

How to Choose Support Level Without Losing Mobility
Back braces for lifting fall into three functional classes. Choosing by class is more reliable than choosing by marketing labels like “extra firm.”
| Support Class | Construction | Best For | Mobility Trade-off | Typical Price Range |
|---|---|---|---|---|
| Flexible / Elastic | Wide elastic panels, no stays or 2 flexible boning stays | Light assistance, posture cues, long-duration wear | High mobility, low stabilization | Usually $25–$55 |
| Semi-Rigid (Recommended for Lifting) | Elastic body + 4-6 flexible stays + dual-pull straps | Squats, deadlifts, overhead press, warehouse work | Balanced – supports lumbar flexion without blocking hip hinge | Usually $40–$90 |
| Rigid / Powerlifting Belt Style | Non-elastic leather or nylon, uniform 4″ or 6″ width, single buckle/lever | Maximal lifts over 85% 1RM, competition lifting | Low mobility, high IAP – not comfortable for hours | Usually $60–$130 |
For most people doing 60-90 minute sessions with mixed lifts, semi-rigid is the correct class. It allows you to create tension on demand with the outer straps, then loosen slightly between sets to breathe and cool down. Rigid belts excel for single heavy singles but cause rib and hip pinch when worn for extended volume work.
The Tightness Test: Why Adjustability Matters More Than Size
A brace only works if you can adjust intra-abdominal pressure quickly. Look for dual-pull side straps with a mechanical advantage of 3:1 or 4:1, where pulling the outer straps requires less force to achieve high compression. Single Velcro wrap designs rely entirely on your pull strength and loosen as you sweat.
Check these adjustability features before buying:
- Dual independent tension straps vs. single wrap-around strap
- Velcro contact area at least 4 inches wide to prevent creep during reps
- Overlap range of 6-8 inches so the same size fits over a t-shirt and a hoodie
- Low-profile contoured front (5-6 inches in back tapering to 3 inches in front) to avoid digging into ribs when seated or bent over
Breathable Materials vs. Heat Trap: What Actually Keeps You Cool
All braces generate heat, but material construction determines whether that heat becomes sweat-soaked discomfort. Neoprene provides the most support and heat retention for muscle warmth, but is the worst for extended lifting in warm gyms. Mesh and perforated elastic blends sacrifice some warmth for airflow.
For heavy lifting sessions longer than 45 minutes, prioritize this material stack:
- Inner lining: Moisture-wicking knit or spacer mesh, not raw neoprene against skin. This prevents sliding and skin irritation.
- Main panels: Perforated elastic or ventilated 3D knit (like Bauerfeind’s knit fabric) rather than solid rubber. Perforations should be visible, not just textured.
- Stays: Flexible spring steel or high-density polymer that returns to shape. Cheap plastic stays bend permanently after a few weeks and create pressure points.
- Outer straps: Non-stretch nylon for lock, not elastic – so tension does not fade mid-set.
If you lift in a garage gym or non-air-conditioned warehouse above 78°F, avoid full neoprene sleeves entirely. A ventilated semi-rigid brace will keep core temperature lower and reduce the need to constantly remove the brace to dry off.
Worked Calculation: Heat Load and Why Breathability Changes Wear Time
You can estimate how long you can comfortably wear a brace before needing to loosen it. This is not medical advice, but explains why breathable braces feel better longer.
Assume a 180 lb lifter generates roughly 400-500 watts of metabolic heat during compound lifting, with about 10% retained under the brace area (approx. 0.3 square meters). A solid neoprene brace has a thermal resistance about 2.5x higher than a perforated mesh brace.
Simple comparison: Evaporative cooling capacity under the brace = airflow factor x area. Mesh = factor 0.8, Neoprene = factor 0.3.
Mesh: 0.8 x 0.3 = 0.24 effective cooling units. Neoprene: 0.3 x 0.3 = 0.09 effective cooling units. That means neoprene traps about 2.6x more heat per minute. In practice, lifters report needing to loosen or remove a neoprene brace every 15-20 minutes in a warm environment, while a perforated brace can be worn for 45-60 minutes before sweat accumulation forces adjustment. If your sessions involve high-rep circuits, breathability directly equals fewer interruptions.
Sizing Accuracy: How to Avoid the Most Common Fit Failure
Sizing errors cause 90% of returns. Do not use pant size. Measure your waist circumference at the level of the navel, not the hips, while standing relaxed and exhaled. Then compare to the brand’s specific chart.
Sizing accuracy varies significantly by brand:
| Brace Example | Sizing Method | Accuracy | Fit Note |
|---|---|---|---|
| Bauerfeind LumboTrain | Numeric waist + hip measurement (7 sizes) | Very high – knit sizes to exact cm | Contoured, stays do not dig. Usually $110–$160 for medical-grade knit. |
| Mueller Sports Medicine Adjustable Back Brace | S/M/L/XL by waist range (overlap 3-4 inches) | Moderate – generous overlap forgives errors | Double-layer closure, fits over clothes well. Usually $30–$50. |
| McDavid 493 Lumbar Support | S/M/L/XL by waist range | Moderate-high | 6 stays, stays slightly stiffer. Runs small, size up if between sizes. |
| Sparthos Work Back Brace | S/M/L/XL/XXL by waist range | Moderate | Wide elastic with mesh, very breathable but less rigid. Usually $30–$45. |
| Harbinger FirmFit Contoured Belt (5 inch) | XS-XL by waist, belt not wrap | High for belt style | Nylon, powerlifting-style – not wrap-around, use over shirt. Usually $35–$60. |
Rule of thumb: If you are between sizes, size down for elastic wrap braces (they stretch) and size up for rigid belts (they do not). Always check where the brace should sit: the bottom edge just above the posterior iliac crests, not resting on the hips. If it rides up when you squat to parallel, it is too small or the front is too tall.
Decision Matrix: Match Your Lifting Situation to the Right Brace
Use your primary use case to decide, not the strongest-sounding product:
| Your Situation | Recommended Class | Key Feature to Prioritize | Example Spec to Look For |
|---|---|---|---|
| General gym lifting, 3-5x per week, sets of 5-12 reps | Semi-rigid wrap with mesh | Breathability + dual-pull adjustability | 4 flexible stays, perforated elastic, 6-inch back height |
| Heavy powerlifting singles/doubles over 80% max | Rigid 4-inch belt | Uniform pressure, lever/buckle lock | 10mm thickness, 4-inch width all around, roller buckle |
| Warehouse / manual labor, worn 4-8 hours | Semi-rigid with suspenders option | Comfort + suspension + moisture control | Lightweight mesh, removable suspenders, tapered front |
| History of lumbar strain, need posture cueing | Medical-grade knit (LumboTrain class) | Precise fit + flexible stays that train posture | Anatomical knit, triangular pad, graded compression |
| Hot environment, high sweat | Ventilated elastic wrap | Spacer mesh and perforations | Full mesh side panels, less than 30% neoprene content |
Comfort During Extended Sessions: What to Check Before You Buy
Comfort is not just padding. It is pressure distribution over time. After 30 minutes, a brace that feels fine initially will reveal flaws:
- Edge binding: Look for bound or rolled edges, not raw cut elastic. Raw edges curl and create a sharp pressure line around your abdomen.
- Stay pockets: Stays should be sewn into separate channels, not a single pocket where they clump together.
- Front closure: A contoured V or tapered front prevents the brace from jabbing your ribs when you bend forward for deadlifts or rows.
- Anti-slip: Silicone grip strips or brushed inner lining prevents migration. If it slides down during walking lunges, the sizing or inner material is wrong.
How to Break In and Wear Correctly
Do not wear a new brace at maximum tightness for a full workout. Set it to 70% tension for the first two sessions, then adjust.
- Put the brace on standing, align the back panel centered on the spine at L3-L4 level.
- Tighten the inner wrap first, snug but allowing one finger underneath.
- Pull outer tension straps simultaneously forward, then secure. You should be able to take a deep belly breath and brace against the belt, not be restricted from breathing.
- Loosen one notch between sets if you feel lightheaded or cannot get a full breath. The goal is proprioceptive support and increased intra-abdominal pressure when you actively brace, not passive squeezing.
For extended sessions over an hour, plan to loosen the outer straps during rest periods and re-tighten before heavy sets. This on-off micro-adjustability is why dual-pull designs outperform single-wrap braces for anyone lifting longer than 30 minutes.
Frequently Asked Questions
Will a back brace weaken my core if I use it for every lift?
A brace does not replace core activation. You still need to actively brace your abs outward into the brace. Dependence becomes an issue only if you wear a rigid brace for all loads including warm-ups and daily activities without any unbraced training. Most lifters use a brace only for working sets above 70% intensity and do direct core work without a brace.
How tight should a lifting brace be?
Tight enough to feel increased pressure when you inhale and push your abs out, but not so tight that you cannot expand your ribs. A practical check: you should be able to slide two fingers under the front, but not a fist. If your legs tingle or you feel pressure in your groin, it is too tight or too low on the hips.
Can I wash a back brace without ruining the Velcro?
Yes, close all Velcro before washing to prevent lint buildup. Hand wash in cold water with mild detergent, press dry with a towel, air dry flat. Avoid machine drying with heat, which warps flexible stays and degrades elastic compression over time.


