The best aquarium LED lighting for a healthy tank is a dimmable, appropriately sized light that reaches every part of your aquarium without forcing you to run it at full power all day. For low-maintenance fish-only tanks, prioritize even coverage and simple controls; for planted tanks, choose adjustable intensity and a controllable schedule so you can match light to plant growth without inviting algae.
As an Amazon Associate we earn from qualifying purchases at no extra cost to you.
Quick picks by tank type
| Tank and goal | Best light class | What to prioritize | Starting schedule |
|---|---|---|---|
| Fish-only, up to 18 in. long | Adjustable white LED bar | Even spread, subdued brightness, timer | 6–8 hours daily |
| Low-tech planted, 24 in. long | Dimmable full-spectrum bar | Adjustable output, broad coverage | 6 hours daily at 40–60% output |
| Carpet plants or a deeper tank | High-output planted-tank light | Measured PAR, compatible dimmer, adequate spread | Begin at 5–6 hours at reduced output |
| Long aquarium, 36–48 in. | Length-matched bar or two fixtures | Coverage at both ends, secure mounting | Set one consistent daily photoperiod |
These schedules are cautious starting points, not universal targets. Plant species, tank depth, nutrient availability, and ambient light all affect the right intensity and duration. Increase light gradually only when plants need it.
How to choose the right aquarium LED
1. Match the fixture to the tank’s length and depth
Check the light’s supported length range against the aquarium’s actual length, not just its nominal gallon capacity. A 20-gallon tank can be long and shallow or compact and deep; those shapes need different coverage. A fixture that is too short may leave dark corners, while one that is too powerful for a shallow tank can make algae control harder.
For long tanks, look for a bar that spans most of the tank or use two fixtures when a single bar leaves dim ends. On deeper aquariums, prioritize usable light at the substrate. If the manufacturer provides PAR measurements, compare values at the depth where plants will grow—not just directly beneath the LEDs near the surface.
2. Choose spectrum for plant needs, not a “magic” color label
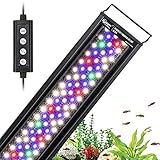
White full-spectrum lighting is a practical choice for most freshwater community aquariums: fish and plants look natural, and common aquatic plants can grow under it when intensity and nutrients are adequate. Red and blue channels can adjust appearance and may help tailor a planted setup, but colorful LEDs alone do not guarantee healthy growth.
For a low-tech aquarium with hardy plants such as Anubias, Java fern, or many Cryptocoryne varieties, moderate adjustable output is usually more useful than maximum intensity. Carpeting plants and demanding species generally need stronger, more consistent light—and often stable carbon dioxide and nutrient conditions too.
3. Treat brightness as an adjustable setting
Wattage is electrical consumption, not a dependable measure of light reaching your plants. PAR (photosynthetically active radiation) is more useful for comparing plant-available light, but measurements depend on distance, tank depth, and placement. If PAR data is unavailable, choose a fixture with a dimmer and start low rather than relying on a watt-per-gallon rule.
As a practical starting point, set a dimmable light to about 40–60% output for a low-tech planted tank and run it for six hours a day. Observe new growth and algae for two to three weeks before making a small change—around 10% in intensity or 30 minutes in daily duration. Changing one variable at a time makes the result easier to interpret.
4. Check controls, heat, and mounting before buying
- Controls: A built-in timer prevents accidental long days. Dimming and gradual sunrise or sunset are useful, but a reliable daily schedule matters more than elaborate app features.
- Heat: LEDs generally transfer less heat into the water than many older lighting types, but high-output fixtures can still warm a small tank. Leave ventilation space around the fixture and monitor water temperature after installation.
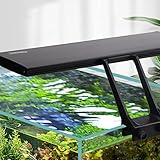
- Mounting: Extendable brackets suit rimmed tanks with changing layouts; rests or clips may fit rimless aquariums. Check the supported tank width and whether the fixture sits securely above the water.
- Moisture protection: Aquarium lights are exposed to splashes and condensation. Follow the specified placement and safety instructions, and use a drip loop on the power cord so water cannot run toward an outlet.
Decision matrix: which setup fits your aquarium?
| Your situation | Choose | Why | Watch out for |
|---|---|---|---|
| Fish-only display; plants are absent or artificial | Simple dimmable white bar sized to the tank | Provides clear viewing without paying for plant-focused controls | Excessive brightness can stress fish and encourage algae on décor |
| Hardy plants, no injected CO₂ | Adjustable full-spectrum bar with a timer | Moderate, repeatable light is easier to balance in a low-tech tank | Longer days are not a substitute for suitable nutrients |
| Carpet plants or demanding stems | Higher-output planted fixture with dimming and useful PAR data | Lets you deliver stronger light to the substrate and tune it gradually | High light can increase algae pressure if CO₂ and nutrients are inconsistent |
| Tank longer than the fixture’s rated span | A longer model or two appropriately placed bars | Improves end-to-end coverage | Overlapping bright zones can create uneven intensity in the middle |
Worked example: setting up a 24-inch low-tech planted tank
Suppose your aquarium is 24 inches long and 16 inches deep, with Anubias, Java fern, and Cryptocoryne. Choose a light whose stated range includes 24 inches and whose brackets fit the tank. Because the plants are relatively undemanding, a high-output model is not automatically an advantage; dimming and a timer are more valuable.
- Mount the fixture centrally and confirm it covers both ends of the tank.
- Set output to roughly 50% and schedule six hours of light per day.
- Keep the schedule consistent for two to three weeks. Check for fresh, healthy plant growth and new algae on glass or leaves.
- If growth is weak and algae remains limited, raise output by about 10%. If algae increases, reduce intensity or shorten the photoperiod before making several changes at once.
This is a controlled starting point, not a promise of a particular growth rate. Nutrients, water conditions, plant health, and light reaching the leaves all influence the result.
Common buying mistakes
- Buying by wattage alone: Two fixtures with similar power draw can deliver different usable light. Compare dimensions, dimming, and PAR information when available.
- Choosing the brightest light by default: Extra output can be difficult to balance in a low-tech tank. You can always increase a dimmable light gradually.
- Ignoring mounting fit: A light that is the right length may still have brackets that do not fit your tank’s rim or width.
- Running long days to compensate for weak light: A longer photoperiod can fuel algae without solving inadequate intensity at the substrate.
- Expecting lighting to fix every plant problem: Yellowing, holes, or melting can also result from nutrient deficiencies, poor water conditions, or newly transplanted plants.
For most aquariums, the safest choice is a tank-length-matched LED with adjustable brightness, a dependable timer, and mounting suited to the aquarium. Favor modest, controllable light for fish-only and low-tech tanks; reserve high-output fixtures for setups that need stronger plant growth and can support the accompanying maintenance.
Frequently asked questions
Do I need a high-output aquarium LED for a planted tank?
No, a high-output light is not necessary for every planted tank. Hardy plants such as Anubias, Java fern, and many Cryptocoryne varieties usually benefit more from moderate, adjustable output than maximum intensity. Higher output is more appropriate for carpet plants or demanding species, especially when the fixture provides useful PAR data and the aquarium can maintain suitable carbon dioxide and nutrient conditions.
How long should I leave my aquarium light on each day?
Start with about six hours daily for a low-tech planted tank, using roughly 40–60% output when the light is dimmable. Fish-only tanks can begin at 6–8 hours daily. These are cautious starting points rather than universal targets, so observe plant growth and algae for two to three weeks before changing intensity or duration.
What should I do if algae appears after installing a new aquarium light?
If algae increases, reduce the light’s intensity or shorten the photoperiod before changing several factors at once. Begin with modest, controllable output and make only a small adjustment, such as about 10% intensity or 30 minutes of daily duration. Excessive brightness and long days can encourage algae, while nutrients and water conditions also affect plant health.
Can I use wattage to compare aquarium LED lights?
No, wattage measures electrical consumption and does not reliably show how much usable light reaches plants. PAR is more useful, although its readings depend on distance, tank depth, and placement. When PAR information is unavailable, prioritize a fixture with adjustable brightness, suitable coverage, and a dependable timer rather than relying on a watt-per-gallon rule.
How can I tell whether an aquarium light will fit my tank?
Check the fixture’s supported length range against the aquarium’s actual length, then confirm that its brackets or clips fit the tank’s rim and width. A light that is too short may leave dark corners, while the correct length may still have unsuitable mounting hardware. For longer tanks, use a bar spanning most of the tank or two appropriately placed fixtures.