When you add a real microphone to a desk, you have to hold it somewhere, and the two common choices are a clamp-mounted boom arm or a small desktop stand. They cost about the same at the entry level, but they behave very differently in daily use. The right pick depends on how you type, how much desk space you have, and how much you move while you talk.
As an Amazon Associate we earn from qualifying purchases at no extra cost to you.


Top 3 picks at a glance
How each one works
Boom arm
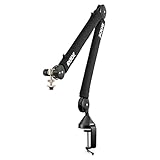
A boom arm clamps to the edge of your desk and swings the mic in from the side or above, keeping the desk surface clear. Spring or gas-strut arms hold a mic in position and let you reposition it in a second. Because the mic is suspended and usually paired with a shock mount, keyboard and desk thumps transmit far less into the recording.
Desktop stand
A desktop stand sits on the desk with the mic on a short pole or tripod. It is simpler, needs no clamp, and cannot fall if your desk edge is too thick or glass. The downside is that it occupies prime desk real estate right in front of you, and it picks up vibrations traveling through the desk from your keyboard and mouse.
| Factor | Boom arm | Desktop stand |
|---|---|---|
| Desk space used | None (clamped) | 6-10 in footprint |
| Vibration isolation | Good with shock mount | Poor without isolation |
| Repositioning speed | Instant, one hand | Slide or lift |
| Setup complexity | Clamp + route cable | Set and go |
| Typical price | $25-90 | $12-40 |
| Max mic weight | Check strut rating, ~1.5-3.5 lb | Usually light mics only |
Which to choose
Pick a boom arm if
You want a clear desk, you type on a loud mechanical keyboard, or you move around and need to swing the mic close for a session and out of the way afterward. Match the arm’s weight rating to your mic; a heavier condenser needs a sturdier gas-strut arm rated to around 3 pounds, and internal cable channels keep the cable tidy.
Pick a desktop stand if
Your desk edge is glass, unusually thick, or otherwise cannot take a clamp, or you simply want the cheapest, no-fuss option for a light USB mic. If you go this route, add a stand with a shock mount and put the mic on an isolation pad to cut down on keyboard rumble.
Positioning matters more than the mount
Whichever you choose, aim for the mic about 4 to 8 inches from your mouth and slightly off-axis so plosives do not pop. A boom arm makes hitting that sweet spot easier because you can angle it in from above, out of the camera frame and away from your keyboard.
Setup and cable details
Balancing a boom arm
A boom arm works best when it is balanced for your mic’s weight. Spring arms often have adjustable tension screws; tighten or loosen them until the arm holds position without drifting down or springing up. An arm that constantly sags is either overloaded or needs tensioning, and an overloaded arm will not stay where you put it. Route the cable through the arm’s built-in channels or clip it along the arm so it does not dangle into your workspace or tug the mic out of position.
Desk stand isolation
If you go with a desktop stand, the single biggest upgrade is decoupling it from the desk. A dedicated isolation pad or even a folded towel under the base absorbs the low rumble that travels through the desk from typing and mouse clicks. Combine that with a shock mount in the mic clip, and a desktop stand can approach a boom arm’s noise rejection, though it still sits in your workspace and cannot swing away when you are done.
FAQ
Does a boom arm reduce keyboard noise?
It helps, especially paired with a shock mount, because the mic no longer sits directly on the vibrating desk. You will still capture airborne key clatter, so a directional mic and good positioning matter too.
Will a boom arm clamp fit any desk?
Most clamps handle desks up to about 2 inches thick with a flat underside edge. Glass, very thick, or beveled edges can be a problem, in which case a desktop stand or a grommet-mount arm is the safer choice.
Bottom line
A boom arm is the better tool for most desk setups: it clears the surface, isolates vibration, and repositions instantly. Choose a desktop stand only when your desk cannot take a clamp or you want the simplest possible mount for a light mic, and add isolation to tame keyboard rumble.