USB and XLR microphones can both produce clear, professional-sounding streams. The meaningful difference is not that one connector sounds “better.” It is how much equipment, control, troubleshooting, and future expansion you want between your voice and the streaming app. A USB microphone contains its own audio conversion and connects directly to the computer. An XLR microphone sends an analog signal to an audio interface or mixer, which converts it for the computer.
For many solo streamers, USB is the sensible starting point: fewer devices, a faster setup, and fewer places for gain or routing mistakes to hide. XLR becomes more attractive when you need physical controls, more than one microphone, easier hardware monitoring, or the freedom to replace one part of the signal chain without replacing everything. Your room, microphone distance, and gain workflow usually affect the result more than the connector does.
Top 3 picks at a glance
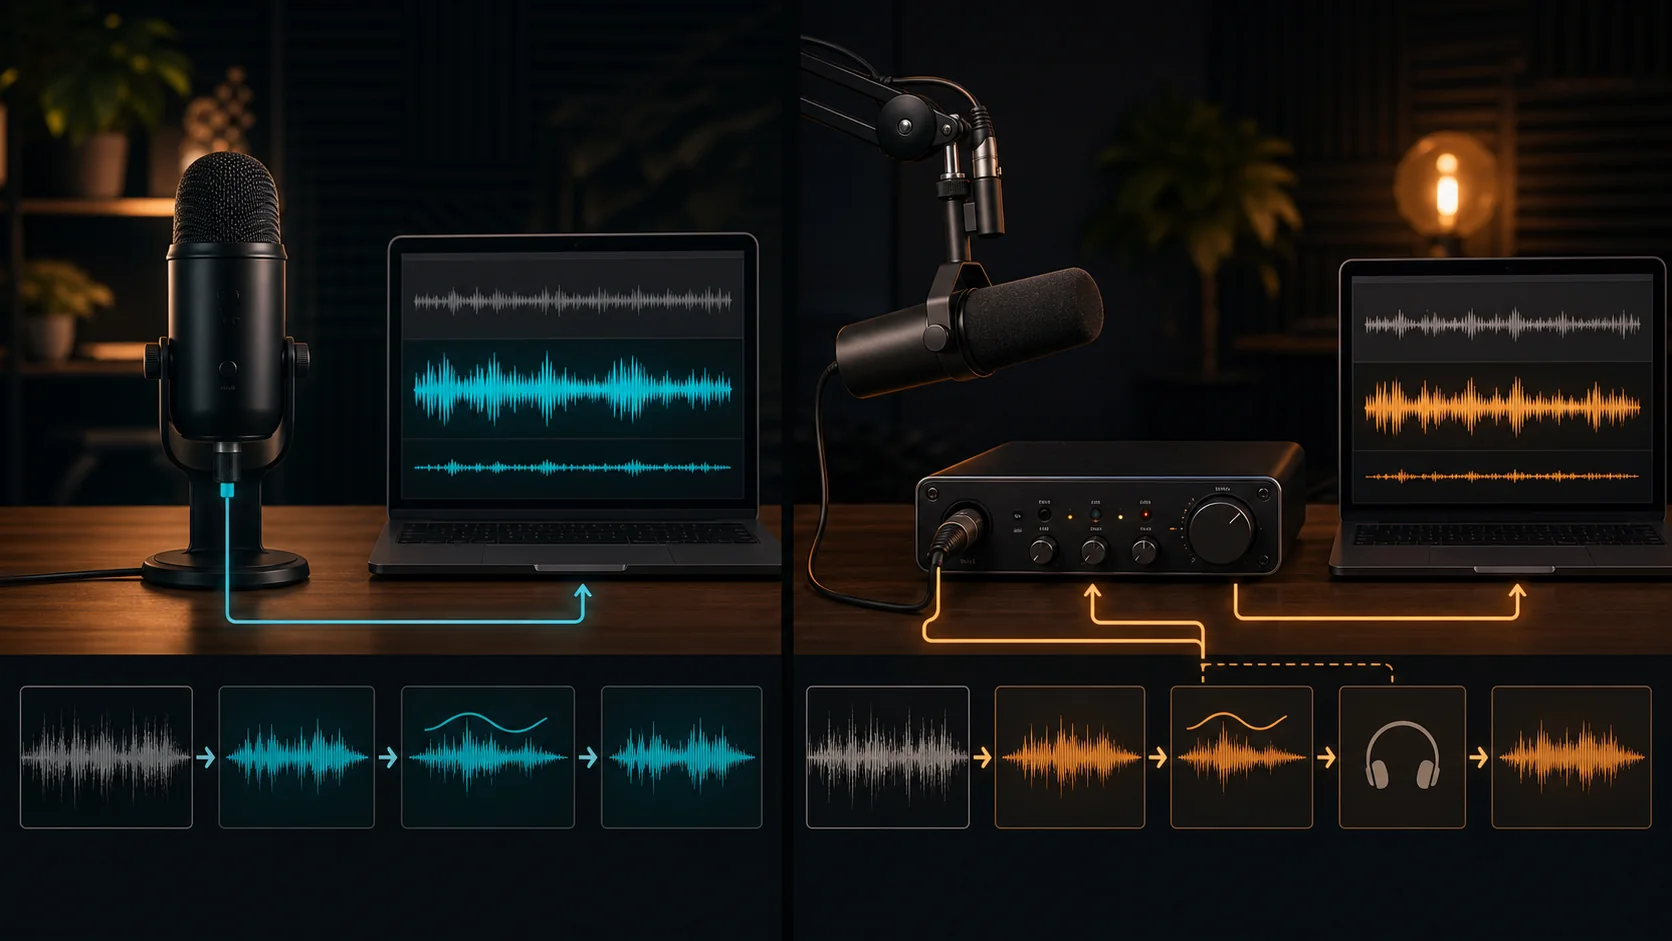
USB and XLR signal paths in plain English
The models below span both paths, so you can compare a capable USB microphone against an XLR microphone plus interface at a similar total cost.
As an Amazon Associate we earn from qualifying purchases at no extra cost to you.


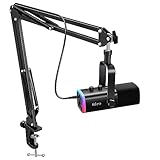


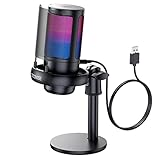

A USB setup has a short signal path: voice, microphone capsule, electronics inside the microphone, USB cable, computer, and streaming software. The microphone appears as an input device in the operating system. Some USB models include a headphone output and a direct-monitor control, but capabilities differ, so check the manual rather than assuming every model supports latency-free monitoring.
An XLR setup separates the stages. Your voice reaches the microphone, the analog signal travels through an XLR cable, and an interface or mixer supplies gain and converts the signal to digital audio. The interface then connects to the computer, normally over USB. This adds equipment, cables, drivers, and settings, but it also places important controls within reach and lets you change the microphone or interface independently.
Neither path automatically removes keyboard noise, fan noise, echo, or poor microphone technique. A microphone close to your mouth can capture a strong voice signal at a lower gain than the same microphone placed across the desk. That signal-to-noise advantage applies to USB and XLR alike.
Start with the room, not the connector
A quiet-looking gaming room may still contain broadband fan noise, air-conditioning rumble, a mechanical keyboard, controller clicks, and reflections from bare walls. Listen to a raw recording through headphones before choosing equipment. Speak at normal streaming volume, pause for ten seconds, type, and let the PC run under load. This reveals whether the main problem is constant noise, intermittent impacts, or room echo.
If the room is untreated or shared, prioritize close placement and a pickup pattern that suits the position. Keep the sensitive side of the microphone aimed at your mouth and the least sensitive direction toward the loudest predictable noise where the microphone design permits. A boom arm can be more valuable than a connector upgrade because it lets you maintain a consistent mouth-to-microphone distance while keeping the mic away from desk vibration.
Soft furnishings can reduce reflections, but they cannot silence a noisy computer. Move the PC farther from the microphone if practical, clean obstructed filters, and avoid aiming the microphone toward exhaust fans. Solve mechanical noise at its source before relying on software suppression.
Choose based on the interface and workflow
USB fits a simple one-person desk
USB is a strong fit when you use one microphone, stream from one computer, and want to be ready quickly after a restart or desk move. It reduces the number of gain controls and routing layers you must document. That simplicity is useful for a streamer who also joins games, Discord calls, meetings, or recordings and wants the same input available across applications.
The tradeoff is that the microphone and converter are one product. If its electronics no longer meet your needs, you may have to replace the entire microphone. USB hubs, sleep behavior, or switching ports can also change device detection. Use a reliable port and save a short setup checklist.
XLR fits modular or multi-source production
XLR is useful when you want two hosts, a guest microphone, an instrument, external processing, or physical faders. An interface can provide separate inputs, gain controls, headphone monitoring, and output control. A mixer may add routing features, although more routing also creates more opportunities for doubled audio, feedback, or a muted channel.
Check that the interface has enough inputs for the actual plan, not a hypothetical studio. Also check monitoring, driver support, desk space, and whether it can meet the selected microphone’s requirements. A clear front panel and dependable driver workflow matter more than unused inputs.
A practical decision tree
- Will one person use one microphone on one computer? If yes, begin with USB unless another requirement below points to XLR.
- Do you need two or more microphones at the same time? An XLR interface with enough microphone inputs is normally the cleaner route.
- Do you need physical gain, mute, headphone, or mix controls? USB can offer some controls, but XLR interfaces make this workflow easier to specify and upgrade.
- Is your room noisy or reflective? Treat placement, distance, vibration, and noise sources first. Changing connector type will not fix the room.
- Do you frequently travel or rebuild the desk? USB minimizes hardware. XLR is reasonable only if the added control justifies carrying and reconnecting the interface.
- Do you expect to change microphones while keeping the rest of the chain? XLR provides the more modular upgrade path.
- Is the budget fixed? Compare the complete working setups: microphone, arm or stand, cable, headphones, and, for XLR, the interface. Do not compare microphone prices in isolation.
If you want model-specific options after deciding on a signal path, see our streaming microphone picks. For a setup focused mainly on games, party chat, and Discord, use the narrower USB microphone guide for gaming. Those pages cover products; this guide is about choosing the workflow first.
Set gain before adding filters
Gain determines how strongly the input stage amplifies the microphone signal. Too little gain produces a quiet recording that may reveal noise when boosted later. Too much gain can overload a stage and create distortion that a limiter cannot repair. Place the microphone where it will remain, speak at your normal and excited streaming levels, and adjust the input so ordinary speech is healthy while louder moments retain headroom.
Avoid stacking large boosts at the microphone, operating system, interface, and OBS without knowing which stage is doing the work. For USB, start with the microphone or system input level recommended by its documentation, then confirm the meter in the streaming app. For XLR, establish clean interface gain first. Leave software gain near neutral unless a measured reason requires a change.
Record a local test containing speech, silence, keyboard use, a laugh, and a loud game moment. Listen for clipping, pumping, missing word beginnings, and a changing noise floor. Meters help, but the recording reveals interactions that a single peak value cannot.
Build a controlled OBS audio chain
Add the microphone once and confirm that only one source captures it. The official OBS Audio Sources guide warns that selecting the same device globally in Settings > Audio and as a scene-level Audio Input Capture can create an echo. If you prefer scene-level control, disable that device globally; if you prefer a global microphone, do not add a duplicate scene source.
Start with no filters and make a reference recording. Then add only the processing that solves a heard problem. The official OBS Filters Guide describes noise suppression for background or white noise, an expander for reducing quieter background sounds, a noise gate for cutting audio when you are not speaking, a compressor for controlling level above a threshold or ducking another source, gain for boosting a quiet source, and a limiter for preventing output from exceeding a ceiling.
A sensible troubleshooting order is placement, hardware gain, noise control, dynamics, then final limiting. Aggressive suppression can make speech sound artificial. A gate set too firmly can cut quiet syllables or breaths and open noisily around keyboard clicks. Compression can raise the apparent noise between phrases if its settings and makeup gain are not considered. Change one setting at a time and label test recordings.
Setup checklist for USB
- Mount the microphone close enough for a strong voice signal without blocking the screen.
- Connect it directly to a stable USB port during initial testing rather than an unverified hub.
- Select the intended microphone in the operating system and communication apps.
- Choose one capture method in OBS and remove or mute duplicates.
- Set the microphone level using normal and loud speech.
- Enable direct monitoring if the microphone supports it and you find it helpful.
- Record a clean reference before adding filters.
- Save the device name, port, input level, OBS source, and filter order in a short note.
Setup checklist for XLR
- Mount the microphone and connect it to the correct interface input with a sound cable.
- Confirm any required interface setting from the microphone and interface manuals before enabling it.
- Connect headphones to the interface if you plan to use hardware monitoring.
- Install the current supported driver when the manufacturer requires one.
- Set interface gain while speaking at realistic streaming volume.
- Select the intended interface channel in OBS rather than capturing an unused or mixed input.
- Check that monitoring does not create a second delayed software return.
- Make a raw recording, then introduce filters one at a time.
Common mistakes that affect both formats
- Buying for a distant position: a microphone placed far away needs more gain and captures more room.
- Judging through speakers: use headphones while checking noise, echo, and monitoring loops.
- Processing before placement: filters cannot fully rescue poor distance or strong reflections.
- Capturing the device twice: duplicate OBS sources can sound like echo or phasing.
- Testing only calm speech: streams include laughter, shouting, typing, and changing game volume.
- Ignoring repeatability: mark boom-arm position and document settings so tomorrow’s stream sounds like today’s.
Frequently asked questions
Does XLR always sound better than USB?
No. Results depend on the microphone, conversion, gain staging, room, position, and processing. XLR offers modularity and control; it does not automatically improve an untreated room or distant placement.
Is USB good enough for a professional stream?
Yes, when one suitable microphone meets the production needs and is positioned and configured well. Viewers care about intelligible, stable speech more than the connector behind the desk.
When should I upgrade from USB to XLR?
Upgrade when a specific requirement appears: multiple microphone inputs, physical mixing, more useful monitoring, replaceable signal-chain components, or routing that the current USB setup cannot provide cleanly.
Will a dynamic microphone remove keyboard noise?
No microphone removes noise by category alone. Close placement and sensible orientation can improve the voice-to-noise relationship, but keyboard distance, desk vibration, room reflections, gain, and typing style still matter.
Do I need a mixer for one XLR microphone?
Usually not. A compatible audio interface with the required input, gain, conversion, and monitoring may be sufficient. Add a mixer only when its routing or physical controls solve a real production need.
Should I use noise suppression, a gate, or an expander?
Use the least processing that solves the identified problem. Suppression targets steady background noise, a gate closes the signal below a threshold, and an expander reduces quieter sounds more gradually. Test each against soft and loud speech before streaming.
Final recommendation
Choose USB for a compact, repeatable single-microphone workflow. Choose XLR for modular hardware, multiple sources, physical control, or a planned upgrade path. In either case, reserve budget and attention for a stable mount, close placement, reliable monitoring, controlled gain, and a documented OBS chain. Those decisions make the setup easier to operate and are more likely to improve real streams than changing the connector alone.