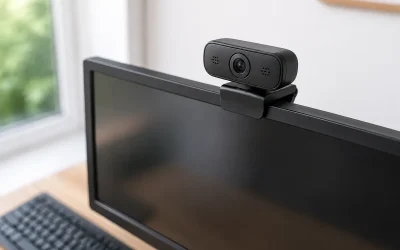
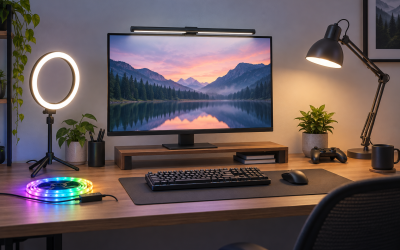
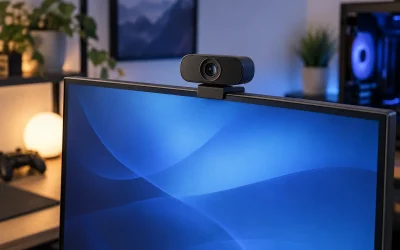
Balancing a webcam on top of your monitor works until you add a second display, a light, or a boom mic, and suddenly there is nowhere to perch it. A dedicated webcam desk mount frees the camera to sit exactly where your eyeline is best, which is the single biggest upgrade to how you look on stream. This guide covers the mount styles that matter and how to match one to your desk and camera.
Top 3 picks at a glance
Mount styles that work
Clamp arm mounts
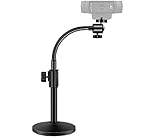
A desk-clamp arm is the streamer favorite. It bolts to the desk edge like a monitor arm and reaches the camera out over the desk on an adjustable arm, letting you place the lens at eye level, dead center, without blocking your screen. Look for a clamp jaw that fits 0.4-2.4 inch desktops and a 1/4-inch camera screw (or, on mic-style goosenecks such as our #1 KDD stand, a 5/8-inch thread used with a 1/4-inch adapter) so it fits most webcams and small cameras.
As an Amazon Associate we earn from qualifying purchases at no extra cost to you.




Overhead and boom mounts
For top-down shots of a keyboard, desk mat, or craft, a boom arm that swings overhead is the tool. These often share the same clamp base as a mic arm and support heavier mirrorless cameras when counterweighted.
More webcam and camera desk mounts worth considering
The main list is strong on goosenecks and light clamp arms, which suit standard webcams. Streamers who move up to a mirrorless camera, want overhead hand-cam shots, or need to carry a camera, light, and phone on one rig will want something sturdier. These six mounts fill that gap, from a rigid articulating arm to a full two-pole overhead frame.
ULANZI ZJ02 Camera Desk Mount with Articulating Arm

Who it’s for: streamers who want one clamp to handle both a face-cam at eye level and an overhead shot of hands, keyboard, or desk projects, with a camera heavier than a webcam.
Key specs: an aluminum-alloy 4-section arm with toothed, knob-locked joints that adjust through 180 degrees, a maximum arm reach of about 98 cm (38.6 inches), and a maximum overhead shooting height of about 65 cm (25.6 inches). It is rated for 2 kg (4.4 lbs), and the 1/4-inch ball head rotates 360 degrees and tilts 90 degrees. The C-clamp opens to about 4.8 cm (1.89 inches) and has a silicone pad, and the whole stand folds down to about 42 cm for storage.
Strengths: toothed joints hold position far better than friction joints, which is exactly what the “Reach and joints” section above asks for. The long reach lets the camera sit centered in front of a monitor or swing fully overhead without moving the clamp. A 2 kg rating covers webcams, compact mirrorless bodies with small lenses, and lights.
Drawbacks: four knobbed joints take longer to adjust than a single-lock magic arm. At full extension with a heavier camera, any long arm becomes more sensitive to desk bumps, so keep heavier loads closer to the clamp. The clamp opening is fine for most desks but too small for very thick tops.
Setup tip: lock the joints nearest the clamp first and work outward, so the arm does not swing while you tighten. Run the camera cable along the sections with velcro ties, leaving slack at each joint.
How it compares: it is a sturdier, longer-reaching alternative to the SMALLRIG 22-inch magic arm and the goosenecks in the main list, built for loads that would make those droop.
SMALLRIG Camera Desk Mount with Magic Arm (3992)

Who it’s for: streamers who want a vertical, light-stand-style pole for a mirrorless camera or ring light, plus a side arm for a second device such as a phone, small light, or mic.
Key specs: a clamp-on aluminum pole with three extending sections, adjustable from roughly 13 to 35 inches (about 90 cm maximum working height). The main 1/4-inch ball head rotates 360 degrees and SmallRig rates the main mount for about 3 kg when the head is tilted and up to 10 kg straight up. A 355 mm aluminum side arm with its own 1/4-inch ball head holds up to 2 kg. The C-clamp fits desks under about 2 inches thick, and the kit weighs roughly 1.4 lbs.
Strengths: a vertical pole is inherently stable because the camera’s weight sits over the clamp instead of at the end of a long lever. Height changes are quick, and the extra arm lets one clamp carry a camera and a light or phone.
Drawbacks: a pole cannot reach out over the desk the way an articulating arm can, so the camera sits at the desk edge rather than directly in front of your monitor. Overhead shots are limited to what the short side arm can reach. Like other aluminum stands, it benefits from cable clips to keep the USB run tidy.
Setup tip: clamp it right behind the monitor so the camera rises just above the screen’s top edge, and use the side arm for a small key light angled from the same direction.
How it compares: it is a step up from the SMALLRIG C stand in the main list, adding the magic arm for a second device. Choose it over an articulating arm when stability matters more than reach.
TARION TitanRig Lite Z Desk Mount

Who it’s for: streamers and creators running a full-size mirrorless or DSLR camera who need a heavy-duty mount that will not sag over a long session.
Key specs: a vertical pole with two C-clamps and silicone pads, an articulating arm that slides up and down the pole and extends to about 18.9 inches, and height adjustable up to about 21.85 inches. TARION rates the main arm and clamp for up to 17.6 lbs (8 kg) and the ball head for 4.4 lbs (2 kg). It includes 1/4-inch and 3/8-inch threads, a screw adapter, and a tablet clamp for 5.5-10.6-inch devices. The aluminum body weighs about 7 lbs, and desk-thickness figures vary by listing, so confirm the clamp range for your desk.
Strengths: the dual-clamp base and heavy build make it one of the most stable options here, which matters for the “Stability” point in “Getting the framing right” below. The arm reaches out from the pole, combining a stand’s stability with some articulating reach. The tablet clamp is useful for a chat or teleprompter display beside the camera.
Drawbacks: it is heavy, bulky, and in the upper-mid price tier, which is overkill for a webcam. The two clamps need more desk-edge space than single-clamp arms. Assembly and adjustment take longer than a simple pole.
Setup tip: keep the ball-head load within its 2 kg rating even though the arm can hold far more; heavier cameras should mount on a sturdier head or be balanced close to the pole.
How it compares: it is the heavy-duty option the comparison table above points to for “compact mirrorless” and “DSLR” rows, far sturdier than any gooseneck or 22-inch magic arm in the main list.
JEBUTU Heavy Duty Overhead Camera Desk Mount (14.5-41 in)

Who it’s for: budget-minded creators who want an overhead boom for hand-cams, unboxings, or keyboard builds, and occasional face-cam use, without paying for a premium rig.
Key specs: a detachable 3-section aluminum articulating arm with reach adjustable from about 14.5 to 41 inches. Each section rotates 360 degrees and articulates 180 degrees, every pole has a standard 1/4-inch screw, and the C-clamp opens to about 1.96 inches with rubber padding. The stand weighs around 2.2 lbs, and JEBUTU claims it can carry close to 6.6 lbs, which is best treated as a maximum for loads kept close to the clamp.
Strengths: long reach at a low-to-mid price, a fold-away design that clears the desk when you are not recording, and detachable sections that let you build a shorter, stiffer arm when you do not need full reach.
Drawbacks: at full 41-inch extension, any weight at the tip creates a lot of leverage, so heavier cameras will bounce when the desk is bumped. The load figure is the maker’s claim and is not broken down by extension. Build quality is lighter than the TARION or JUSMO rigs.
Setup tip: remove a section if you do not need full reach; a shorter arm is noticeably steadier. For overhead shots, angle the final section straight down and check the shot for arm shadows from your key light.
How it compares: it covers the “Overhead and boom mounts” category at a lower price than the ULANZI ZJ02, with more reach but less rigid joints.
JUSMO LS15 Pro Overhead Camera Desk Rig

Who it’s for: creators who shoot top-down product, craft, or keyboard-building content, or who want to hang a camera, lights, and mics from one rigid frame over the desk.
Key specs: a modular aluminum rig built from two clamped uprights and a horizontal crossbar, about 47 inches tall and wide when assembled with all included poles. Enlarged C-clamps fit desktops up to about 90 mm (3.54 inches), and JUSMO lists a maximum load of 10 kg (22 lbs). The kit includes seven universal poles with anti-slip ridges and tick marks, two fixed bases, and a super clamp; extra poles and clamps are sold separately.
Strengths: because both ends are clamped, the crossbar does not wobble the way a single-arm mount can. It can carry several devices at once, such as an overhead camera, a light bar, and a mic on super clamps. The very wide clamp range handles thick desks that defeat most mounts.
Drawbacks: it is the largest and most expensive option here, needs clear desk edge on both sides, and dominates the look of the desk. Assembly takes time, and the listed warranty is short. For a simple face-cam it is far more than you need.
Setup tip: build the uprights slightly taller than your planned camera height so the crossbar sits out of frame, then use super clamps to position the camera directly over the area you want to film.
How it compares: nothing in the main list matches it for overhead stability or multi-device mounting; it is the dedicated top-down solution for creators who film their desk regularly.
K&F CONCEPT 22-Inch Magic Arm Clamp Kit
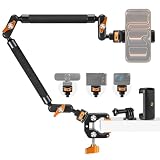
Who it’s for: streamers with a standard webcam, phone, or action camera who want a compact magic arm that also clamps to round surfaces such as a monitor-arm pole or desk-shelf tube.
Key specs: a 22-inch all-metal arm with three 360-degree ball heads controlled by a single locking knob, foam padding on both long sections, and a load rating of 1 kg (2.2 lbs). The clamp grips flat surfaces up to about 50 mm thick and round tubes from about 20 to 60 mm, with silicone pads and anti-twist pins at both ends. Extra 1/4-inch and 3/8-inch threads on the clamp let you add accessories, and a phone holder and action-camera adapter are included.
Strengths: one knob locks all three joints, so repositioning takes seconds. The pole-friendly clamp lets you hang a webcam off a monitor-arm column or light stand instead of using up desk edge. Anti-twist pins keep the camera from slowly rotating out of position, a common annoyance with cheaper magic arms.
Drawbacks: the 1 kg limit rules out most mirrorless cameras with lenses, especially at full extension. K&F designs it for static use, so it is not the right choice for a camera you move constantly during a stream. Like any single-knob arm, it needs a firm twist to hold a heavier webcam steady.
Setup tip: clamp it to a monitor-arm pole just behind the screen so the camera hovers above the monitor’s top edge, centered on your face, with almost no visible arm in the shot.
How it compares: it is a close alternative to the SMALLRIG 22-inch magic arm in the main list, with the added ability to clamp round tubes and extra accessory threads on the clamp.
Quick comparison of the additional mounts
Price tiers are approximate and change frequently; use them to compare classes of product rather than as exact figures.
| Mount | Style | Reach or height | Rated load | Best for | Price tier |
|---|---|---|---|---|---|
| ULANZI ZJ02 | 4-section articulating arm | Up to ~38.6 in reach | 2 kg / 4.4 lbs | Face-cam plus overhead from one clamp | Mid-range |
| SMALLRIG 3992 | Vertical pole + side arm | ~13-35 in height | ~3 kg tilted (main head) | Stable camera plus light or phone | Budget |
| TARION TitanRig Lite Z | Pole + articulating arm, dual clamps | ~18.9 in arm, ~21.85 in height | 8 kg arm, 2 kg ball head | Full-size mirrorless or DSLR | Mid-range |
| JEBUTU MS05 | 3-section overhead boom | ~14.5-41 in reach | Up to ~6.6 lbs (maker claim) | Budget overhead shots | Budget |
| JUSMO LS15 Pro | Two-pole overhead frame | ~47 in tall and wide | 10 kg / 22 lbs | Top-down content, multi-device rigs | Premium |
| K&F CONCEPT 22 in Magic Arm | Single-knob magic arm | 22 in arm | 1 kg / 2.2 lbs | Webcams and phones on poles or desk edges | Budget |
Desk mount, monitor clip, or tripod?
A desk mount is not the only way to hold a webcam. Knowing the alternatives helps you decide whether you really need one.
- Monitor clip (built into most webcams): free and simple, but it puts the camera at the top edge of the screen, often above eye level on tall monitors, and it can wobble when you type. It fails completely on many curved or very thin monitors.
- Mini tripod on the desk: cheap and flexible, but it takes desk space, sits low, and gets knocked when you reach for the mouse.
- Gooseneck clamp: inexpensive and reachable anywhere, good for light webcams, but prone to drooping and shake with heavier cameras.
- Articulating or magic arm: the best balance of reach and stability for webcams and small cameras, and easy to swing out of the way.
- Vertical pole or light-stand mount: the most stable single-clamp option, ideal for mirrorless cameras, but limited in forward reach.
- Overhead rig or boom: the specialist choice for top-down shots of hands, products, or keyboards.
- Monitor-arm or light-bar attachments: some monitor arms and light bars accept a 1/4-inch screw for a camera, which saves a clamp but ties the camera to the screen’s movement.
If you only use a standard webcam on a single monitor and are happy with the angle, the built-in clip may be enough. Once you add a second monitor, a ring or key light, a heavier camera, or overhead shots, a dedicated mount pays for itself.
Match the mount to camera weight
| Camera type | Typical weight | Recommended mount |
|---|---|---|
| Standard webcam | 0.1-0.3 lb | Any clamp arm or gooseneck |
| Premium 4K webcam | 0.3-0.6 lb | Rigid clamp arm |
| Action cam | 0.2-0.4 lb | Gooseneck or short arm |
| Compact mirrorless | 1-1.8 lb | Heavy arm + counterweight |
| DSLR | 1.5-3+ lb | Sturdy boom, floor stand better |
Key features to check
Reach and joints
A useful arm gives you 15-20 inches of reach and at least two or three pivot points so you can dial in height, distance, and tilt independently. A single-hinge gooseneck is cheaper and fine for a light webcam but sags under anything heavier.
Cable routing and thread size
Nicer arms include cable clips to hide the USB run along the arm, which keeps the shot clean. Confirm the head uses a 1/4-inch thread, the universal camera standard, and that it comes with or accepts a cold-shoe or ball head if you want fine tilt control.
Step-by-step: installing a camera desk mount
- Plan the position. Sit in your streaming position and decide where the lens should be: centered on your face, at or slightly above eye level, about 20-28 inches away. Note which desk edge can reach that point without blocking the screen.
- Check the clamp area. Measure desk thickness and confirm the underside is flat and solid where the clamp will sit. Avoid hollow-core edges, cable trays, and crossbars.
- Clamp firmly, not brutally. Tighten until the base does not rotate when pushed, then stop. Overtightening can crack laminate or glass.
- Build out from the base. Attach sections in order, locking each joint as you go. Keep heavy cameras close to the base where leverage is lowest.
- Mount the camera. Thread the 1/4-inch screw by hand until snug, then use the ball head to level the camera. Use a quick-release plate if you remove the camera often.
- Route the cable. Run the USB or HDMI cable along the arm with clips or velcro, leaving a loop at each joint so movement does not tug the camera off-angle.
- Test for shake. Start a preview and tap the desk, type quickly, and move your mouse. If the image shakes, shorten the arm, lower the camera’s position on the pole, or move the clamp to a stiffer part of the desk.
Reducing shake and droop
The longer the arm and the heavier the camera, the more a mount amplifies desk movement. A few habits keep the shot steady. Clamp near a desk leg, where the surface flexes least. Use the shortest arm configuration that reaches the shot. Choose toothed or locking joints over friction joints for anything heavier than a webcam. If you type loudly or use a heavy mechanical keyboard, place the clamp on the opposite side of the desk from the keyboard. Finally, check every joint after the first few streams, since new joints often settle slightly.
Mounting tips for different desks
Standing desks
A camera clamped to a sit-stand desk moves with the surface, which keeps the framing consistent whether you sit or stand, as long as your face stays at a similar height relative to the desk. Route the camera cable with enough slack to cover the full height range, and avoid clamping right at the desk’s lifting columns, where wiring and motors may sit.
Glass desks
Use a padded clamp, tighten gently, and keep the arm short and light. Spread the load with a rubber or wood plate under the clamp jaw if possible. Very heavy rigs belong on a solid desk or a floor stand instead.
L-shaped and corner desks
Corner desks often put the main monitor at an angle to the desk edges. An articulating arm with long reach helps here, since it can clamp to whichever edge is free and still reach the center of the screen.
Desks with monitor arms
A monitor arm’s pole or a light bar can double as a camera mount with a pole clamp, saving a desk-edge clamp. Remember the camera will then move whenever you reposition the monitor.
Webcam or real camera?
The mount you need depends heavily on the camera. Standard 1080p and 4K webcams weigh a few ounces, plug straight into USB, and work on almost any arm. Mirrorless cameras offer better low-light quality and background blur, but they need a capture card or USB streaming mode, a dummy battery for long sessions, and a mount rated for 1-2 kg or more once a lens is fitted. Phones used as webcams fall in between, at roughly 0.4-0.5 lbs, and work well on magic arms with a phone holder. Decide on the camera first, then buy a mount with comfortable load headroom, ideally 50% more than the setup’s real weight, so the joints never sit at their limit.
FAQ
Will a webcam arm clamp damage a glass desk?
Quality clamps include rubber pads that protect the surface, and glass 8mm or thicker generally handles a light camera arm fine. For thin or tempered glass, favor a lighter gooseneck to reduce leverage on the edge, and never overtighten.
Can I mount a webcam and a mic on the same clamp?
Some heavy-duty arms accept both, but stacking a camera and a mic on one clamp point adds vibration and can transmit keyboard thumps to the mic. Separate clamps on opposite desk edges usually give cleaner audio and steadier video.
What is the best height for a streaming webcam?
At or slightly above eye level, centered on your face. A lens just above the eyes, angled down a few degrees, gives the most natural, flattering view. Below eye level creates an up-the-nose angle; far above makes you look small and distant.
Can a webcam desk mount hold a mirrorless camera?
Some can. Check the rated load against your camera body plus lens and any cage or battery adapter. Light goosenecks and 22-inch magic arms are usually rated around 0.5-1 kg, which suits webcams and phones. Mirrorless setups typically need a 2 kg-plus articulating arm, a vertical pole mount, or a heavy-duty rig.
What thread size do webcams and cameras use?
Almost all webcams and consumer cameras use a 1/4″-20 tripod thread. Larger cameras and some cages also offer 3/8″-16, and some mic stands use 5/8″. Many mounts include adapters; make sure the one you buy matches the threads on your gear.
Is an overhead camera mount safe for expensive cameras?
Yes, if you respect the load rating and keep the camera within the safe reach of the arm. Use the rig’s locking joints, add a safety tether for valuable cameras, and avoid fully extended arms with heavy loads. Two-pole frames are the safest for heavy overhead setups because both ends are supported.
How do I hide the webcam cable on an arm?
Use the arm’s cable clips if it has them; otherwise, velcro ties every few inches work well. Leave a loose loop at each joint, run the cable down the clamp side of the desk, and use a short, flexible USB cable or extension to reach the PC.
Accessories that make any mount work better
- Quick-release plate: lets you pop the camera off for travel or charging and click it back in at the same angle, instead of unscrewing it from the ball head each time.
- Better ball head: the small ball heads bundled with budget arms often slip under mirrorless cameras. A larger ball head with a separate tension knob holds heavier loads at an angle.
- Cold-shoe adapter: lets you add a small light or microphone on top of the camera or arm without another clamp.
- Super clamp: turns any pole or tube into a mounting point for a second device.
- Safety tether: a short steel cable or strap linking camera to arm, so a loosened joint does not send the camera onto the desk.
- Cable sleeve and velcro ties: keep USB, HDMI, and power cables bundled along the arm for a clean look on camera and in room shots.
- Longer USB cable or active extension: arms often move the camera further from the PC than the stock webcam cable allows. Use a quality extension to avoid dropouts.
Framing by shot type
Face-cam for gaming streams
Keep the camera at eye level beside or above the main monitor, framed from mid-chest up, with some headroom. If the camera sits off to one side, angle it toward you and keep your eyes looking at the screen edge closest to it so you do not appear to be looking away.
Talking-head or video calls
Center the camera directly above the screen at eye level, framed head and shoulders, with your eyes about a third from the top of the frame, as described in “Getting the framing right.”
Overhead hand-cam
Point the camera straight down over the keyboard, controller, or work surface, high enough to capture the whole area without wide-angle distortion. Check that your head and arms do not block the light and that the arm itself stays out of frame.
Angled desk shot
For setup tours or keyboard sound tests, place the camera above and slightly in front of the desk, angled down about 30-45 degrees. A long articulating arm or overhead frame makes this angle easy to repeat between videos.
Getting the framing right
The point of a desk mount is control over framing, so use it to place the lens at or just above eye level and centered on your face. Cameras below eye level create an unflattering up-the-nose angle, while a lens slightly above eye line is the most natural and is exactly what a good arm lets you dial in. Set the camera 20-28 inches from your face for a typical streaming headshot, then fine-tune tilt so your eyes sit about a third from the top of frame.
Stability is the other reason a rigid arm beats a floppy gooseneck. A heavier camera on a thin gooseneck droops over the course of a stream and shakes every time you bump the desk, which ruins the shot. A stiff, well-jointed arm holds position through hours of use and absorbs desk knocks, so your framing stays put without constant readjustment.
Lighting interaction
Remember the mount shares desk space with any key light. Plan the arm’s reach so the camera can sit centered without the arm casting a shadow across your face or blocking your ring light. Mounting the camera arm to one edge and the light to the other usually keeps both out of each other’s way.
Building a multi-device streaming rig
Many streamers end up with a camera, key light, microphone, phone, and sometimes a teleprompter or chat screen around the monitor. Planning how they share clamp points prevents a forest of arms.
- Spread loads across clamps. As noted in the FAQ above, keep the mic on its own arm to avoid transmitting camera bumps and keyboard noise. Put the camera and light on different desk edges so the light can come from the side.
- Use super clamps on poles. A vertical pole or overhead frame can carry several small devices on super clamps or magic arms, which keeps the desk edge free.
- Mind the frame. Check your preview after adding each device. Arms, lights, and mics creeping into the shot are common, especially with wide-angle webcams.
- Keep cables grouped. Route all cables from one rig down the same leg and bundle them with a sleeve.
Common mistakes to avoid
- Buying for reach instead of load. A long, light arm with a heavy camera will droop and shake.
- Ignoring desk thickness. Clamp openings range from under 2 inches to over 3.5 inches. Measure first.
- Camera too close. Wide-angle webcams distort faces at short range. Keep the lens at least 18-20 inches away.
- Forgetting lighting shadows. Arms between the key light and your face cast visible shadows.
- Skipping a safety tether. For cameras worth more than the mount, a short safety cable is cheap insurance.
Which mount should you buy?
- Standard webcam, clean eye-level shot: a rigid clamp arm or 22-inch magic arm from the main list.
- Face-cam plus overhead from one clamp: ULANZI ZJ02.
- Mirrorless camera with a light: SMALLRIG 3992 desk mount for stability.
- Full-size camera that must not sag: TARION TitanRig Lite Z.
- Budget overhead hand-cam: JEBUTU MS05.
- Serious top-down content or multi-device rig: JUSMO LS15 Pro.
Bottom line
For a standard webcam, our top pick, the KDD gooseneck stand, is the simplest way to get the lens to eye level at a budget price; if you run a heavier camera, step up to a rigid desk-clamp arm with 15-20 inches of reach, multiple joints, and a 1/4-inch head, which usually sits in the budget to mid-range tier. Match the arm’s rated weight to your camera, protect glass with padded clamps, and route the cable along the arm. Getting the lens to true eye level does more for your on-camera presence than almost any other cheap upgrade.