
The best snowshoes depend on your loaded weight, snow conditions, and terrain: for most hikers, the MSR Lightning Ascent is the strongest all-around choice, while the Tubbs Flex ALP suits rolling trails and the Atlas Helium-BC is a lighter option for backcountry travel.
As an Amazon Associate we earn from qualifying purchases at no extra cost to you.

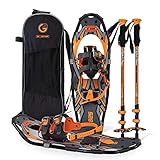

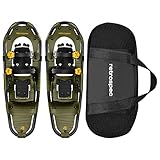
Top 3 picks at a glance
Best snowshoes at a glance
| Model | Best for | Typical size range | Published load range* | Approximate weight per pair | Typical market range |
|---|---|---|---|---|---|
| MSR Lightning Ascent | Steep, icy, technical terrain | 22–30 in, depending on version | About 120–280 lb with tails and conditions considered | About 3.5–4.5 lb | Usually $300–$450 |
| Tubbs Flex ALP | Mixed trails and rolling hills | 24–30 in | About 150–250 lb | About 4–5 lb | Usually $200–$350 |
| Atlas Helium-BC | Long approaches and backcountry touring | 23–26 in, with compatible tails on some versions | About 120–250 lb | About 3–4 lb | Usually $250–$400 |
| MSR Evo Trail | Beginners and maintained winter trails | 22 in, with optional tails | About 180–240 lb with tails and conditions considered | About 3.5–4 lb | Usually $150–$250 |
| Crescent Moon Eva | Lightweight recreational use | Single compact size | Roughly 165–220 lb, depending on snow and footwear | About 3 lb | Usually $150–$250 |
*Snowshoe load ratings are not directly comparable. They commonly include the user, boots, clothing, pack, and sometimes a recommended range of snow conditions. Always confirm the current manufacturer specification before buying.
How to choose the best snowshoes
1. Calculate your real carried weight
Do not choose a pair using body weight alone. Add your winter clothing, boots, water, food, emergency equipment, poles, and pack. A useful calculation is:
Snowshoe load = body weight + clothing and boots + pack contents + pack weight.
For example, a 175-pound hiker wearing 12 pounds of winter clothing and boots with a 28-pound daypack has a loaded weight of 215 pounds. In soft powder, that person may need a longer snowshoe or optional flotation tails. On a firm packed trail, a shorter model may be easier to maneuver and still provide enough support.
Leave a practical margin rather than buying at the absolute limit. If your calculated load is 215 pounds and a model is rated to 220 pounds only under favorable conditions, choose the next size or a model with tail extensions.
2. Match flotation to snow, not just body size
Longer and wider snowshoes spread your weight over more surface area. That reduces sinking in unconsolidated powder, but it also makes walking through brush, tight switchbacks, and steep terrain more cumbersome.
- Packed trails and firm snow: 20–25 inch shoes are often sufficient for many users.
- Mixed trails and moderate powder: 24–28 inch shoes offer a useful balance.
- Deep, dry powder or heavy loads: choose 28–36 inches, or use a modular shoe with flotation tails.
- Dense forest and technical slopes: favor the shortest size that supports your loaded weight.
Optional tails are especially valuable because they let one compact shoe handle both packed approaches and deeper snow. They do not turn a short technical snowshoe into a full powder platform, but they can add meaningful flotation when the trail changes.
3. Compare the binding systems
A binding should hold your boot securely without creating pressure points. It also needs to remain adjustable with gloves and resist collecting ice.
- Ratchet bindings: quick to tighten and easy to fine-tune, but buckles can collect snow and require occasional clearing.
- Strap bindings: simple, light, and reliable in cold conditions; they may take longer to adjust.
- Boa-style cable systems: fast to tighten and convenient for repeated use, although a damaged cable can be harder to repair in the field.
- Flexible decking: improves comfort and reduces the harsh feel of each step on uneven ground.
- Rigid frames: transfer power efficiently on steep slopes but can feel less forgiving on long, flat walks.
Check the binding’s boot compatibility. Large insulated boots may need more deck clearance than ordinary hiking footwear. Try the snowshoes with the actual boots you plan to wear, not thin indoor shoes.
Traction: the key difference on hills
Flotation keeps you from sinking; traction keeps you from sliding. For flat trails, modest crampons may be enough. For steep or icy routes, look for a full-length traction rail or frame, aggressive toe crampons, and heel lifts.
Best traction for each terrain
- Flat park trails: basic underfoot teeth and a simple pivoting binding are adequate.
- Rolling woodland: a steel or hardened-aluminum traction rail improves grip during traverses.
- Steep mountain routes: aggressive toe crampons, side rails, and heel elevators are more important than maximum deck length.
- Hard ice: snowshoes have limits. If the route involves prolonged exposed ice, mountaineering crampons may be safer.
The MSR Lightning Ascent is particularly well suited to steep terrain because its traction system extends along the frame and its heel lift reduces calf strain on climbs. The Tubbs Flex ALP is a better fit for hikers who spend more time on rolling trails and want a less technical, comfortable platform. The MSR Evo Trail is easier to learn on and works well where routes are relatively moderate.
Head-to-head: which snowshoe fits your use?
| Your situation | Prioritize | Best match | Why |
|---|---|---|---|
| First pair for groomed or packed trails | Simple binding, moderate traction, easy sizing | MSR Evo Trail | Predictable handling and a straightforward design |
| Day hikes with changing snow depth | Balanced flotation and traction | Tubbs Flex ALP | Good compromise between comfort, grip, and maneuverability |
| Steep, icy, or uneven mountain routes | Full-length traction and heel lifts | MSR Lightning Ascent | Designed for confident climbing and traversing |
| Long approaches where every pound matters | Low weight, efficient binding, packability | Atlas Helium-BC | Light construction helps reduce fatigue over distance |
| Recreational walks and minimalist packing | Low weight and uncomplicated use | Crescent Moon Eva | Compact, light, and appropriate for moderate terrain |
Best snowshoes for beginners
The MSR Evo Trail is the safest starting point for most beginners who stay on established trails. It avoids the complexity of highly technical mountain models while offering enough traction for ordinary winter hills. Choose the version and size based on your loaded weight, and add tails if your local snow is frequently deep.
Beginners should also avoid buying an oversized powder model “for extra flotation” if most outings are on narrow trails. A very long shoe catches on roots, fences, and branches and requires a wider gait. That can make a supposedly easier snowshoe more tiring.
Best snowshoes for hikers and backcountry users
For regular hikers covering varied terrain, the Tubbs Flex ALP offers a sensible middle ground. Its flexible platform is comfortable on rolling routes, while its traction and heel-lift features make it more capable than a basic recreational pair.
Backcountry users should consider the Atlas Helium-BC when approach distance and pack weight are major concerns. It is most appropriate when the route includes firm or variable snow and long travel, rather than consistently bottomless powder. For remote travel, also value repairability: carry spare straps, a small repair sleeve or wire, and an adjustable pole or binding tool where appropriate.
For technical mountain travel, the MSR Lightning Ascent is the stronger choice. Its aggressive traction is useful on traverses and firm climbs, but that capability comes with a higher price and a somewhat more purposeful feel underfoot.
What else to pack with snowshoes
- Adjustable poles with large snow baskets for balance and flotation.
- Waterproof gaiters to keep powder out of boots.
- Extra binding straps or replacement hardware.
- Insulated gloves that still allow binding adjustments.
- A map, charged phone, headlamp, and emergency insulation for remote routes.
Before a longer trip, practice clipping into the bindings at home while wearing your winter gloves. On the trail, clear ice from the binding and traction teeth before tightening. If your feet slide sideways inside the binding, stop and readjust rather than compensating with an awkward stride.
Frequently asked questions
Do I need snowshoe tails?
Snowshoe tails are useful when one pair must handle both packed trails and deeper snow. They add flotation to a compact shoe, helping support heavier loads or unconsolidated powder. However, tails do not turn a short technical snowshoe into a full powder platform. Choose a model with compatible tails if snow depth changes regularly during your outings.
Can I use snowshoes on hard ice?
Snowshoes can work on some icy routes, but they have limits on prolonged exposed ice. For steep or icy terrain, look for aggressive toe crampons, side or full-length traction, and heel lifts. If the route involves sustained hard ice, mountaineering crampons may be safer than relying on snowshoes alone.
How should snowshoes fit insulated winter boots?
Snowshoes should hold your actual winter boots securely without pressure points or sideways movement. Large insulated boots may require more deck clearance than ordinary hiking footwear, so check boot compatibility before buying. Try the snowshoes with the boots you plan to wear, and adjust the binding while wearing your winter gloves.
What should I carry for a remote snowshoe trip?
For remote travel, carry spare binding straps, replacement hardware, and a small repair sleeve or wire. Adjustable poles with large snow baskets, waterproof gaiters, insulated gloves, a map, charged phone, headlamp, and emergency insulation are also recommended. An adjustable pole or binding tool may help with repairs where appropriate.
Why does my foot slide sideways inside the binding?
Sideways foot movement usually means the binding needs to be readjusted. Stop and retighten it so the boot is held securely without creating pressure points. Before longer trips, practice clipping into the bindings at home while wearing winter gloves. On the trail, also clear ice from the binding and traction teeth before tightening.
Final recommendation
Choose the MSR Evo Trail for beginner-friendly packed trails, the Tubbs Flex ALP for general hiking, the MSR Lightning Ascent for steep and icy terrain, and the Atlas Helium-BC when low weight matters on long backcountry approaches. The correct size is determined by your complete loaded weight and expected snow, not by body weight alone.


