
A wireless charging controller stand base is one of the most satisfying upgrades you can make to a modern gaming desk. It eliminates the unsightly tangle of USB cables, keeps your expensive gamepads off the floor, and ensures you never pick up a dead controller right when your friends log online. Whether you are setting up a streamlined, single-platform dock like a PowerA-style Switch base (typically retailing in the $18 to $25 range) or a heavy-duty, multi-functional headphone and controller tree with RGB lighting (averaging $22 to $30), the process is straightforward but requires attention to detail.
If you rush the installation, several things can go wrong. An unstable stand can easily tip over, sending $70 controllers crashing onto hardwood floors. Worse, using an underpowered wall adapter can result in agonizingly slow charge times, or cause the charging base to cut out repeatedly. In some cases, poorly aligned magnetic pins or incorrect wattage inputs can cause localized overheating, which degrades your controller’s internal lithium-ion battery over time. Learning how to set up wireless charging controller stand base systems correctly ensures your gear remains safe, organized, and fully powered.
As an Amazon Associate we earn from qualifying purchases at no extra cost to you. Product prices and availability are accurate as of the date shown and are subject to change.
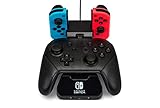

What You Need
Before you begin the installation, gather these essential items to ensure a smooth, uninterrupted setup process.
| Item | Why You Need It | Optional? |
|---|---|---|
| Wireless Charging Stand Base | The main dock or tree that holds and transfers power to your controllers. | No |
| USB Power Adapter (5V/2A or 9V/2A) | Provides the steady 10W to 18W of power required to charge multiple controllers simultaneously. | Yes (often not included in the box) |
| Magnetic Dongles / Rechargeable Battery Packs | Converts standard controllers (like Xbox or Switch) into wireless-charging-compatible devices. | No (unless controllers have native wireless charging) |
| Microfiber Cloth | Used to clean the desk surface and wipe down electrical contacts to prevent connection interference. | Yes |
| Cable Ties or Organizers | Keeps the power cord tucked neatly behind your desk for a clean aesthetic. | Yes |
Step-by-Step
Setting up your charging stand takes less than 15 minutes. Follow these clear, chronological steps to get your station up and running.
Step 1: Unbox and Prepare the Surface (Time: 2 minutes)
Clear a flat, stable area on your desk or entertainment center close to a wall outlet. The ideal footprint for a standard single or dual controller base is about 5×5 inches, while larger vertical trees with headphone hangers require roughly 10×10 inches of clearance. Wipe the surface clean with a microfiber cloth to remove dust and oil. Dust underneath the stand can cause the rubberized non-slip feet to lose their grip, making the stand slide around when you dock your controllers.
Step 2: Install Battery Packs or Magnetic Dongles (Time: 3 minutes)
Most modern controllers do not have built-in wireless charging coils. Instead, they rely on small magnetic dongles that plug into the USB-C port, or proprietary rechargeable battery packs with exposed metal contact plates.
- For Xbox/PlayStation: Remove the standard battery cover, insert the custom rechargeable battery pack included with your stand, and snap on the specialized battery door that features exposed metal contacts.
- For Nintendo Switch/Universal USB-C: Insert the tiny magnetic USB-C adapters directly into the charging port of the controllers. Ensure they are pushed in completely flush against the controller body so they do not wiggle or drop connection.
These components add minimal weight (usually less than 0.1 lbs), maintaining the natural, ergonomic feel of your gamepad during gameplay.
Step 3: Route and Connect the Power Cable (Time: 2 minutes)
Locate the input port on the back or bottom of your charging stand base (most modern stands use a USB-C input). Plug the included cable into the stand, then route the cable behind your desk or media console. For the best performance, plug the other end of the USB cable into a dedicated 5V/2A or 9V/2A wall adapter. Avoid plugging the stand directly into a console’s USB port; many consoles cut power to their USB ports when placed in deep sleep mode, which will stop your controllers from charging overnight.
Step 4: Dock and Align the Controllers (Time: 2 minutes)
Gently place your controllers onto the cradles. If your stand uses magnetic pins, you will feel a slight magnetic pull that snaps the controller into the perfect charging position.
- Observe the LED indicator lights on the base. A solid red or amber light typically indicates that the controller is actively drawing power.
- If the light flashes rapidly, the controller is misaligned or there is a foreign object blocking the connection. Lift the controller and place it down again.
- A solid blue or green light indicates that the battery has reached 100% capacity.
Step 5: Configure Extra Features and Cable Management (Time: 3 minutes)
If you are using a premium desktop accessory with extra features—such as a 360-degree rotatable headset hanger or built-in USB-A and USB-C pass-through ports—take a moment to configure them. Adjust any RGB lighting modes using the physical button on the base (many models offer up to 9 distinct light cycles, from solid colors to breathing effects). Finally, use cable ties to secure the power cord to your desk leg, keeping your gaming station looking clean, organized, and ready for 2026 gaming sessions.
Mistakes to Avoid
To keep your equipment running safely and efficiently, avoid these common setup and usage pitfalls:
- Using Underpowered Wall Plugs: Do not use old 5-watt phone chargers. A multi-device stand requires at least 10W to 18W of power. Underpowering the stand can cause the lights to flicker, slow down charging times by hours, or prevent a second controller from charging at all.
- Forcing the Controllers Down: Wireless charging stands are designed for drop-and-go convenience. If you have to press down hard to get the charging light to activate, something is wrong. Check for misaligned dongles, thick protective silicone skins, or debris in the cradle.
- Ignoring Dust on the Charging Contacts: Over time, dust, pet hair, and skin oils can accumulate on the copper pins of the stand and the contact plates of the controller. This buildup acts as an insulator, blocking the electrical current and causing the stand to register a charging error.
- Placing Near Heat Sources: Keep the charging base away from console exhaust fans, radiators, and direct sunlight. Charging naturally generates mild warmth; external heat sources can cause the controllers to overheat, shortening their overall lifespan.
How Often
Maintaining your charging stand requires very little effort, but regular check-ups prevent connection dropouts and hardware wear.
- Every Month: Wipe down the metal charging pins on the stand and the receiver plates on your controllers with a dry microfiber cloth. If there is stubborn grime, use a cotton swab dipped in 90% isopropyl alcohol, ensuring the base is unplugged first.
- Every 3 Months: Inspect the USB cable connections at both the base and the wall adapter. Make sure the cable is not pinched behind heavy furniture.
- Every 6 Months: Blow out any dust from the accessory USB ports on the stand using a can of compressed air to maintain optimal data and power transfer speeds.
When to Call a Pro or Replace
Because wireless controller stands are low-voltage consumer electronics, they cannot be safely repaired at home if the internal circuitry fails. You should replace your charging stand base if you notice any of the following warning signs:
- Excessive Heat: If the base or the bottom of your controller feels hot to the touch (exceeding 110°F) during a charging cycle, unplug it immediately. This indicates a failing charge controller chip or a short circuit.
- Frayed Cables or Loose Ports: If the USB-C input port on the back of the stand becomes loose, wobbly, or only works when you wiggle the cable at a specific angle, the solder joints on the internal board have broken.
- Erratic LED Behavior: If the LED indicator lights flash rapidly even when no controllers are docked, the internal firmware or sensors have failed.
Given that high-quality replacement stands range from $15 to $35, replacing a damaged unit is always the safest and most economical choice to protect your expensive controllers.
FAQ
Can I leave my controllers on the stand base overnight?
Yes. Reputable charging stands are equipped with smart overcharge protection chips. Once your controller reaches 100% battery capacity, the base automatically switches to a trickle-charge or standby mode, preventing battery degradation and overheating.
Why is the LED light on my charging stand flashing?
A flashing light almost always indicates a charging error. This is usually caused by a slight misalignment between the controller’s contact pins and the stand, a foreign object (like dust or a hair) blocking the connection, or an underpowered wall adapter that cannot supply enough current to the base.
Do I need to remove my controller’s protective silicone case to charge it?
Yes, in most cases. Protective silicone skins or grips add 1mm to 2mm of thickness around the controller. This extra distance prevents the magnetic dongles or metal contact plates from making flush contact with the charging pins on the stand base.
Can I charge my smartphone on a controller charging stand?
Only if the stand features a dedicated, flat Qi-certified wireless charging pad on the base. The upright cradles designed for controllers use specific shapes and physical metal pins or proprietary magnetic dongles that are incompatible with standard smartphones.


