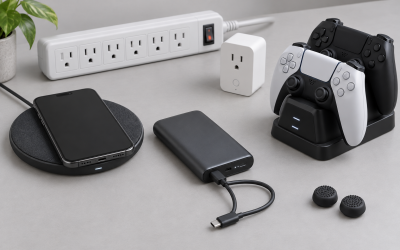
Your controller charging stand lights up but the controller never gains charge, or the LED blinks orange and then goes dark, or the stand shows no light at all while the controller still reports low battery. On PlayStation, Xbox, and most third-party stands this usually looks like the controller briefly flashing its charging icon and then stopping, or the stand’s indicator staying solid red instead of switching to green or white when docked. If you can still charge with a cable, the problem is isolated to the stand.
This is not urgent for the health of your controller, but it will leave you with a dead battery at the worst time if you rely on the dock as your only charger. Most charging failures are caused by power, contact, or seating issues you can fix in under ten minutes without opening anything. Work through the checks below in order before you consider replacing the stand or battery, and as of early 2026 modern stands for DualSense, DualSense Edge, Xbox Wireless, and Switch Pro controllers all share the same core troubleshooting steps.
Likely Causes
| Cause | How to confirm | Fix difficulty |
|---|---|---|
| Dirty or oxidized charging contacts | Stand LED blinks or flickers when you wiggle controller; visible dust or dark residue on pogo pins or controller pads | Easy |
| Weak or incompatible power source | Stand has no light or faint light when plugged into TV USB or front-panel PC USB; works when moved to wall adapter | Easy |
| Controller not seated / case or accessory interference | Controller sits crooked, wobbles, or charging starts only when you press down firmly | Easy |
| Firmware or power-state glitch | Controller charges fine via cable but not on stand; reset or console restart temporarily fixes it | Easy |
| Overheating or safety cutoff triggered | Stand and controller feel warm; charging stopped after extended play or in direct sunlight | Easy |
| Damaged pogo pins, cable, or internal board failure | One or more pins stuck down, bent, or missing spring action; different cable and adapter still fails | Moderate to Hard |
Fix 1: Clean the Charging Contacts
What causes it
The stand uses spring-loaded pogo pins that press against flat metal pads on the bottom or back of the controller. Skin oils, dust, and oxidation build up on both surfaces and create resistance, so the stand detects a controller but cannot pass enough current to start charging.
How to check
Unplug the stand. Look at the pins on the stand with a flashlight. They should be gold, uniform, and spring back when you press each one lightly with a dry cotton swab. Then look at the controller’s contact pads. If you see a dull gray film, black specks, or lint in the seam, that is enough to break the connection. Wiggle the docked controller gently. If the stand LED flickers between charging and idle, contacts are the culprit.
What to do
Power off the stand and remove the controller batteries if removable. Dip a cotton swab in 90% or higher isopropyl alcohol, squeeze out excess so it is damp not dripping. Rub the pins on the stand and the pads on the controller for 10 seconds each. For stubborn oxidation, use a clean pencil eraser to lightly polish the controller pads, then wipe again with alcohol. Use compressed air in two short 1-second bursts at 6 inches distance to clear debris from around the pins. Let everything dry 3 minutes before re-docking. Dock the controller straight down without sliding it.
How to undo it
No permanent change is made. If cleaning did not help, simply re-dock as before. Do not apply contact cleaner sprays that leave residue or use abrasive tools on the pogo pins themselves, as that will damage the plating.
Fix 2: Use the Correct Power Adapter and Cable
What causes it
Most dual-controller stands require 5V at 1.5A to 2.0A minimum. TV USB ports, monitor hubs, and unpowered PC front-panel ports often supply only 5V at 0.5A to 0.9A, which is enough to light the stand but not to charge. A damaged USB-A to USB-C or USB-C to USB-C cable can also drop voltage under load.
How to check
Check what you are plugged into. If the stand is connected to a TV, soundbar, or PC front panel, that is likely underpowered. Look at your wall adapter’s fine print for Output. If it says 5V 1A or 5V 0.5A, it is too weak for most stands. Swap to a known-good phone wall adapter rated 5V 2A or 5V 3A and a different cable. If the stand LED becomes brighter and solid, the power source was the issue.
What to do
Connect the stand directly to a wall adapter rated 5V 2A, 5V 2.4A, or USB Power Delivery 5V 3A. Avoid using extension cables or USB hubs. Use the cable that came with the stand if you still have it, or a USB-IF certified USB-A to USB-C cable that supports data and 3A. On PC, if you must use PC power, use a rear motherboard USB 3.0 port labeled SS or a USB port with a battery-charging icon, and avoid front-panel headers. After changing power, remove the controller for 10 seconds, then re-dock and wait 15 seconds for the handshake.
How to undo it
Just reconnect your previous cable and power source. No settings are changed on the console or controller, so reverting has no risk.
Fix 3: Reseat the Controller and Remove Interference
What causes it
Silicone skins, grips, controller shells with extended back buttons, and even decorative thumbstick caps can lift the controller by 1 to 2 millimeters. That is enough to prevent the pogo pins from aligning. The stand’s guide rails are also designed for a specific controller shape, so docking at an angle misses the contacts.
How to check
Remove any cover, skin, or add-on from the controller. Place the controller on the stand and look from the side at eye level. The base of the controller should sit flush with the dock with no visible gap. Press down gently with about 8 ounces of pressure. If charging starts only while pressing, the controller was not fully seated. Check for wobble by tapping the top. It should not rock side to side.
What to do
Take off silicone cases, trigger extenders, and snap-on battery covers that are not stock. Align the charging pads directly over the pins before lowering the controller straight down. Do not slide it in from the front. For stands with a USB dongle or alignment plug, make sure the plug is fully inserted into the controller’s USB-C or EXT port until it clicks. If your stand includes interchangeable adapters or spacers for different controller models, install the correct one. For Xbox stands that use a battery cover with built-in contacts, ensure the battery cover is snapped completely flush on all four corners.
How to undo it
Put the skin or accessories back on after testing. If you need the skin, cut a small relief window around the charging pads with scissors or switch to a dock-compatible shell that leaves the bottom edge exposed.
Fix 4: Reset the Controller and Power Cycle the Stand
What causes it
Controllers can get stuck in a state where they report full or stop accepting charge until the power management chip is reset. This happens after a failed update, after the battery drained to zero, or after hot-swapping between cable and dock.
How to check
Connect the controller directly to the console or PC with a USB cable. Go to the system menu to check battery level. On PlayStation 5, go to Settings > Accessories > Controller > Battery Level. On Xbox, press the Xbox button and check the battery icon in the top-right overlay. On PC, open Settings > Bluetooth and devices > Devices and check the battery indicator. If the controller charges normally over cable but not on the stand, the dock handshake or controller state is at fault rather than the battery.
What to do
Unplug the stand from power for 60 seconds. For PlayStation DualSense, find the small reset hole on the back near the Sony logo next to the L2 trigger. Press and hold with a SIM pin for 5 seconds. Reconnect the stand to power, then dock the controller. For Xbox Wireless Controller, hold the Xbox button for 6 seconds to power off, remove batteries for 30 seconds if using AA or the play-and-charge pack, then reinsert and dock. After docking, press the PS or Xbox button once to wake the controller so the stand can detect it. If the stand has a power switch, toggle it off for 10 seconds and on again.
How to undo it
Reset does not erase pairing on PlayStation, but you may need to re-pair via USB cable by connecting with a cable and pressing the PS button. On Xbox, press the Pair button on the console and then the Pair button on the controller for 3 seconds to re-sync if needed.
Fix 5: Let the Stand and Controller Cool Down
What causes it
Lithium-ion charging pauses automatically when the battery or stand temperature exceeds roughly 95 to 113 degrees Fahrenheit. A stand sitting on top of a console, AV receiver, or in direct sunlight will retain heat and trip this safety cutoff. The stand LED may stay red or turn off entirely until temperature drops.
How to check
Touch the bottom of the stand and the back of the controller. If either feels noticeably warm to hot, or if the issue started after a long gaming session while the controller was still warm, heat is likely. Check placement. If the stand is stacked on a console exhaust vent or enclosed in a cabinet with less than 2 inches of clearance on each side, airflow is restricted.
What to do
Move the stand to a hard, flat surface away from heat sources with at least 4 inches of open space around it. Remove the controller and let both cool for 20 minutes. Do not put them in a refrigerator or in front of a freezer fan. Power off the console or set it to full shutdown: on PlayStation 5 hold the power button until you hear two beeps, on Xbox hold the power button for 10 seconds. After cooling, plug the stand back in and dock the controller with the console off to see if the LED returns to a steady charging color.
How to undo it
You can return the stand to its original location once you confirm cooling helped. If the problem returns there, the location is too hot and you should keep the new placement.
Fix 6: Inspect Pogo Pins and Replace the Cable
What causes it
Pogo pins can get stuck compressed, bent sideways, or lose spring tension if the controller was dropped onto the stand. The USB cable that feeds the stand can also develop an internal break that passes no-load voltage but collapses under charging current. Internal board failure is less common but possible after a power surge.
How to check
Unplug the stand. Press each pogo pin down with a wooden toothpick. Each pin should travel 2 to 3 millimeters and snap back quickly. If a pin stays down, feels gritty, or leans, it is damaged. Inspect the USB port on the stand for bent contacts or lint. Try a different certified cable and wall adapter that you know charge a phone at full speed. Test the stand with a second compatible controller if you can borrow one. If no controller charges and pins move freely, the cable or board is suspect.
What to do
For a stuck pin, add one drop of isopropyl alcohol at its base, press it 10 times to free debris, then dry with compressed air. For lint in the stand’s USB port, power off and gently remove it with a wooden toothpick, not metal. Replace the cable with a new 3A-rated cable under 6 feet long. If the stand uses a removable AC adapter, match the exact voltage, amperage, and polarity printed on the original brick, typically 5V 2A center positive. Do not open the stand housing if it is under warranty, as that will void it.
How to undo it
If freeing the pin did not work, stop and leave it as is for a warranty claim. Reconnect the original cable if the new one made no difference so you can return it.
Fix 7: Test the Controller Battery Itself
What causes it
A battery that has been deep-discharged below safe voltage or that has exceeded 500 charge cycles may accept cable charging slowly but not the lower-current trickle from some stands, or it may report 100 percent and die quickly. Corroded battery terminals on Xbox AA packs cause the same symptom.
How to check
Charge the controller with a direct USB cable for 3 hours. On PlayStation, check Settings > Accessories > Controller > Battery Level every 30 minutes to see if it climbs steadily. Play unplugged and time how long it lasts. A healthy DualSense should run 6 to 12 hours, an Xbox Wireless with new AAs 20 to 30 hours. If it dies in under 2 hours or the level jumps from 20 percent to 100 percent instantly, the battery is degraded. For Xbox, remove the battery pack and check the metal contacts for white or green residue.
What to do
For PlayStation, perform two full calibration cycles: use the controller until it powers off on its own, then charge via cable to solid green without interruption for 3 hours. Repeat once. For Xbox AA packs, clean terminals with a dry cotton swab and replace AAs with fresh alkaline or a new official rechargeable pack. For sealed DualSense batteries that fail quickly, replace the battery with the same model number SP65M or equivalent, following the manufacturer’s service manual, or have a repair shop do it. After battery service, retest on the stand.
How to undo it
Calibration cannot be undone but causes no harm. If you opened the controller, reinstall the original battery before seeking warranty service. Keep the original screws and warranty sticker if applicable.
If Nothing Works
If none of the fixes restore charging, narrow down the faulty part. Test the controller with a direct cable. If it charges by cable but no controller charges on the stand with two different cables and wall adapters, the stand is faulty. If one controller fails on both the stand and cable while another controller charges fine on the same stand, the controller or its battery is faulty.
Check warranty status before buying parts. Most first-party and licensed stands have a 1-year limited warranty, controllers have 1 year, and many retailers offer 2-year protection plans. Document with photos: the stand model number on the bottom label, the purchase receipt, and a short video showing the LED behavior when docking. Contact the stand manufacturer with those details for a replacement. As a temporary workaround, charge with a USB-C cable directly from the console’s rear USB port or from a wall adapter rated 5V 2A until the replacement arrives.
FAQ
Why does my charging stand blink orange or red and never turn solid?
Blinking usually means poor contact or insufficient power. First clean the contacts and reseat without a case. If blinking continues, switch to a 5V 2A or higher wall adapter and a different cable. A steady blink that persists with good power and clean pins often indicates a stuck pogo pin or a battery that is too hot or too cold to accept charge.
Can I leave my controller on the charging stand overnight?
Yes for most modern stands. They have overcharge protection that switches to trickle or cuts power when the battery reaches 4.2 volts per cell. The stand LED should change from red or orange to green, white, or off when done. To extend long-term battery health, remove the controller within a few hours of full charge and avoid storing it on a warm stand on top of a console.
Do I need to update firmware for my stand or controller?
Charging stands themselves rarely have firmware, but the controller does. On PlayStation 5, connect the controller by cable and go to Settings > Accessories > Controller > Wireless Controller Device Software to update. On Xbox, open Settings > Devices and connections > Accessories > select the controller > ellipsis button > Firmware version. On PC, use the Xbox Accessories app. Updated controller firmware improves charging handshake and battery reporting.
Will a charging stand charge faster than a USB cable?
Usually no. Most stands charge at 5V 0.8A to 1.2A for safety, while a direct cable from a console or 5V 2A adapter can deliver slightly more. Expect 2 to 3 hours for a full charge from empty on a stand versus 1.5 to 2.5 hours via cable. If your stand charges noticeably slower than cable, that is normal as long as it reaches full within 3 hours.