
For comfortable, pain-free typing on a laptop stand, you need to prioritize neutral wrist posture and eye-level screen height over raw elevation. A stand that is too flat forces you to hunch forward and flex your neck, while a stand that is too steep forces your wrists into extension and increases pressure on the carpal tunnel. The ideal setup balances a slight keyboard incline with an external keyboard or proper hand support, so your elbows stay near 90 to 110 degrees, your wrists stay straight and floating, and your eyes hit the top third of the screen without tilting your head down. In 2026, with more compact adjustable aluminum stands and detachable keyboards as standard, you can achieve this without stacking books or improvising.
Our Top Picks


Top 3 picks at a glance

Quick Recommended Settings
| Setting | Recommended value | Why |
|---|---|---|
| Laptop Stand Angle (with external keyboard) | 30 to 45 degrees | Raises screen to eye level, reduces neck flexion to 0-15 degrees |
| Laptop Stand Angle (typing on laptop keyboard) | 10 to 20 degrees | Keeps wrist extension under 15 degrees for neutral typing posture |
| Wrist Position | Neutral, floating, 0 degrees extension | Prevents compression of median nerve and forearm fatigue |
| Elbow Angle | 90 to 110 degrees | Allows shoulders to relax and forearms to remain parallel to desk |
| Screen Height (top bezel) | Eye level or 2-3 inches below | Eliminates downward head tilt; check by closing eyes and opening to screen center |
| Keyboard Height Relative to Elbows | Keyboard home row at or slightly below elbow height | Prevents shoulder shrugging and upward wrist bending |
| Viewing Distance | 20 to 30 inches (arm’s length) | Reduces eye strain without leaning forward |
| External Keyboard Tilt | 0 to -7 degrees negative tilt | Negative tilt keeps wrists neutral vs. positive tilt which increases extension |
| Chair and Desk Adjustment | Feet flat, thighs parallel, chair height set first | Stand angle only works if base ergonomics are correct |
Setting-by-Setting
1. Stand Angle for Direct Laptop Typing: 10 to 20 Degrees
Set your adjustable stand to 15 degrees as a starting point. Most stands like the Nulaxy C1, Lamicall L1, or Rain Design mStand have 6 to 8 notches; notch 2 or 3 typically equals 15 degrees. Use your phone’s built-in level: iOS Measure app > Level or Android > Bubble Level, place phone on palm rest to read angle.
As an Amazon Associate we earn from qualifying purchases at no extra cost to you.


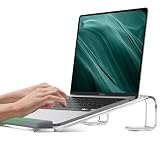


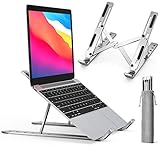
Trade-off: A lower angle (10 degrees) is better for long typing sessions because it minimizes wrist extension, but it requires you to look down more. A higher angle (20 degrees) improves screen visibility but forces greater wrist extension if you keep typing on the laptop keyboard, leading to faster fatigue. If you must type above 20 degrees, you need a separate keyboard.
2. Stand Angle with External Keyboard and Mouse: 30 to 45 Degrees
When you pair the stand with an external keyboard, set the stand to 35-40 degrees so the top of the display aligns with eye level. Path to check height: Sit upright, close eyes for 3 seconds, open and gaze naturally – your gaze should land on the address bar or top third of the screen. If you look over the screen, lower one notch; if you look at the keyboard, raise one notch.
Trade-off: Steeper angles up to 45 degrees give excellent neck posture and save desk depth, but they can make the laptop unstable on lightweight stands and put ports out of reach. Lower angles around 30 degrees are more stable and keep the laptop cooler due to better airflow, but may still require slight neck flexion.
3. Keyboard Tilt and Negative Tilt Configuration
Set any external keyboard to flat (0 degrees) or negative tilt (-4 to -7 degrees) with front legs extended, not rear legs. For mechanical keyboards with adjustable feet, fold the rear feet in and if available, raise the front edge using a detachable palm rest or a -7 degree keyboard tray. On Windows, verify comfort by typing for 5 minutes in Notepad with Settings > Accessibility > Keyboard > Sticky Keys off to avoid interference.
Trade-off: Negative tilt feels unusual at first and reduces visibility of key legends, but it preserves neutral wrists. Positive tilt (rear legs up) makes keys easier to see but forces 20-30 degrees of wrist extension, which is a primary cause of discomfort.
4. Wrist Support and Hand Position: Floating vs. Resting
Keep wrists floating 0.5 to 1 inch above the palm rest while actively typing, only resting palms between bursts. If you use a wrist rest, it should support the heel of your palm, not the wrist itself. Position: wrist rest height should be level with the keyboard’s front edge, typically 0.6 to 0.8 inches thick for low-profile keyboards (e.g., Logitech MX Keys, Apple Magic Keyboard).
Trade-off: A cushioned rest feels comfortable initially but resting wrists while typing compresses the carpal tunnel and encourages ulnar deviation. Floating requires more shoulder endurance for the first week but builds sustainable posture.
5. Elbow and Shoulder Alignment: 90 to 110 Degrees
Adjust chair height first, then desk or stand. Check: With arms at sides, bend elbows so forearms are parallel to floor, fingertips should hover over home row (ASDF/JKL;) without lifting shoulders. If elbows are above 110 degrees (arms too low), raise chair or lower stand angle. If below 90 degrees (arms too high), lower chair or add footrest.
Trade-off: A tighter 90-degree angle offers precision for fast typing, but can cause shoulder tension if held rigidly. A more open 105-110 degree angle is more relaxed for long sessions but may slightly reduce typing speed until adapted.
6. Screen Distance and Height Fine-Tuning
Set viewing distance to one arm’s length: extend arm, fingertips should barely touch screen center. Then adjust brightness so you do not lean in. On macOS: System Settings > Displays > Brightness > uncheck Automatically adjust brightness for consistent testing. On Windows 11: Settings > System > Display > Brightness > set slider to 50-70% initially.
Trade-off: Moving the stand further back reduces eye strain but makes the built-in keyboard unreachable, reinforcing the need for an external keyboard. Moving it closer improves keyboard access at the cost of increased eye convergence fatigue.
By Hardware Tier
Low Tier: Fixed or 2-Level Plastic Stand, No External Keyboard
Typical hardware: Amazon Basics plastic stand, single-fold mesh riser, 13 to 14 inch laptop without peripherals.
Use 12 to 15 degrees maximum. If your stand only has Flat and Raised positions, use Raised for video calls and Flat for typing sessions longer than 20 minutes. Add a $15 folding footrest if your knees rise above hips when you raise your chair to reach the keyboard. To compensate for lack of height, use Windows key + Plus (+) to open Magnifier or macOS System Settings > Accessibility > Zoom to enlarge text to 125% instead of leaning forward to see a low screen. What causes strain here is the compromise between screen height and wrist angle; you cannot optimize both without an external keyboard. How to check: Type a paragraph, then check for red marks on wrists or numbness in fingers 3-5. What to do: Cap typing blocks to 25 minutes with 5-minute breaks (use Clock > Focus Sessions on Windows or Clock > Timer on macOS). How to undo: Return stand to flat and lower chair one increment.
Mid Tier: Adjustable Aluminum Stand (6-8 Notches) + External Keyboard and Mouse
Typical hardware: Nulaxy C1, SOQOOL, or Twelve South Curve Flex with Logitech MK270/MX Keys or Keychron K3 and a separate mouse.
Set laptop stand to 35 degrees (notch 5-6) and place external keyboard on desk with zero tilt. Set mouse directly beside keyboard at same height. Configuration: Windows 11 Settings > Bluetooth & devices > Mouse > Pointer speed 7-10; macOS System Settings > Bluetooth > connect keyboard, then System Settings > Keyboard > Key repeat Fast, Delay until repeat Short. Elevate laptop so webcam is near eye level for calls; test via Teams > Settings > Devices > Make a test call.
This tier offers the best balance for typing. What causes remaining discomfort is desk height mismatch. How to check: If shoulders shrug while typing on external keyboard, desk is too high. What to do: Lower stand by one notch and lower chair until elbows hit 100 degrees, adding footrest if feet dangle. How to undo: Reset keyboard feet to flat and return stand to 30 degrees.
High Tier: Sit-Stand Desk + Monitor Arm or Laptop Arm + Ergonomic Split Keyboard
Typical hardware: Standing desk (Flexispot E7, UPLIFT V2), laptop arm (Ergotron LX), split keyboard (Kinesis Advantage360, ZSA Moonlander, Logitech Ergo K860) with negative tilt.
Mount laptop on arm at 38 to 45 degrees, top bezel at eye level, and split keyboard at desk height with -7 degree tenting/tilt. On desk control panel, set seated height so elbows are 100 degrees, standing height so elbows are 90-100 degrees with wrists neutral. Calibrate standing: File location for desk presets is stored on the desk controller itself (hold M + 1 to save seated, M + 2 to save standing). Wrist check: Use split keyboard software: Kinesis SmartSet App > Layout > confirm tenting at 10 degrees, or ZSA Oryx > Tenting setting.
Trade-off: Maximum adjustability solves neck and wrist issues simultaneously, but high angles and split keyboards require 1-2 weeks of adaptation and may slow typing initially. What causes issues now is over-elevation. How to check: If you extend wrists downward to reach keys, keyboard is too low. What to do: Raise desk 0.5 inches via Up arrow on desk keypad and retest. How to undo: Set desk preset 1 back to previous height, return laptop arm to 35 degrees.
Common Mistakes
Mistake 1: Setting the Stand to Maximum Height and Typing on the Laptop Keyboard
What causes it: You raise the stand to 45+ degrees to get the screen at eye level but continue typing on the angled laptop keyboard, forcing wrists into 30-40 degrees of extension.
How to check: Place a ruler along the back of your hand and forearm while typing. If the ruler shows a visible upward bend at the wrist, extension is too high. Also check for tingling after 15 minutes of continuous typing in any text editor.
What to do: Either lower the stand to 15 degrees for direct typing, or keep the high angle and add an external keyboard on the desk (connected via Bluetooth: Settings > Bluetooth & devices > Add device). Keep laptop stand at 35 degrees for viewing only.
How to undo: Remove external keyboard, set stand back to notch 2 (15 degrees), reconnect to laptop keyboard only.
Mistake 2: Using Rear Keyboard Feet to Create Positive Tilt
What causes it: Extending the flip-out feet on the back of the keyboard appears ergonomic but tilts keys toward you, increasing wrist extension.
How to check: Look at keyboard profile from the side. If rear edge is higher than front edge, you have positive tilt. Test comfort by typing “The quick brown fox” repeatedly and noting wrist pressure on the desk edge.
What to do: Fold rear feet in completely for 0-degree tilt. If you need support, place a thin palm rest (0.6 inches) at front edge only to create slight negative tilt, or use a keyboard tray that tilts away from you. On adjustable keyboards, set front legs up via Settings > Keyboard > Adjust tilt lever to Front Up.
How to undo: Flip rear feet back up to Raised position if flat feels too low for your preference.
Mistake 3: Resting Wrists on the Desk Edge While Typing
What causes it: You anchor wrists on the hard edge of the desk or laptop palm rest to stabilize hands, compressing tendons and restricting finger movement.
How to check: After typing, inspect wrists for red indent lines or check if fingers feel stiff. Film hands from side with phone; wrists should float, not press down during keystrokes.
What to do: Hover hands with elbows at 90-110 degrees, shoulders relaxed. Use light palm support only during pauses. Adjust chair armrests: Settings > Chair armrest height > lower until elbows float just above armrest, not resting weight on it. Use shortcut Ctrl + Shift + T to reopen closed tabs if you need to pause to adjust.
How to undo: Place wrist rest back under wrists if floating causes shoulder fatigue, but ensure rest contacts palm heel, not wrist crease.
Mistake 4: Ignoring Chair and Foot Position
What causes it: You optimize stand angle without setting chair height first, leaving feet dangling or knees above hips, which tilts the pelvis and forces shoulders to compensate.
How to check: Sit with back against chair. Thighs should be parallel to floor, feet flat. Thighs sloping down means chair too high; thighs sloping up means chair too low. Check via Windows Settings > System > About to note you are not adjusting display scaling to fix posture – posture comes first.
What to do: Adjust chair height lever until thighs are parallel, then adjust stand angle to bring keyboard to elbow height. If feet do not reach floor, add footrest at 10-15 degree incline, 0.5 inches off floor. Re-measure elbow angle to 90-110 degrees.
How to undo: Return chair to previous height marker (most office chairs have numbered height indicator on cylinder) and remove footrest.
FAQ
What is the single best angle for typing directly on a laptop stand?
15 degrees is the best all-around compromise for direct typing. It provides enough elevation to improve screen viewing without forcing significant wrist extension. Most adjustable stands hit this at notch 2 or 3. If you type more than 30 minutes continuously, stay between 10 and 15 degrees. If you do short bursts mixed with reading, 18 to 20 degrees is acceptable. Beyond 20 degrees, switch to an external keyboard. Check the angle with your phone’s level on the keyboard deck and fine-tune in 2-degree increments.
Do I need an external keyboard if I use a laptop stand?
Yes, if your preferred screen height is above 20 degrees. The conflict is physical: screen height wants a steep angle (30-45 degrees), wrist neutrality wants a shallow angle (10-20 degrees). You cannot satisfy both on one plane. The solution is to separate inputs and outputs: laptop on stand at 35-40 degrees for viewing, external keyboard at 0 to -7 degrees on desk for typing. Pair via Bluetooth (Windows: Settings > Bluetooth & devices > Add device > Bluetooth; macOS: System Settings > Bluetooth > Connect) and place the keyboard so home row is at elbow height.
How do I know if my stand angle is causing wrist pain?
What causes it is sustained wrist extension over 15 degrees or ulnar deviation (bending hands outward). How to check: After 20 minutes of typing, note location of discomfort. Extension pain is on the top of wrist and forearm; deviation pain is on pinky side. Also open Notepad or TextEdit and type at normal speed; if you frequently bottom out keys hard or feel pressure on the desk edge, angle is too steep. What to do: Lower stand 5 degrees, ensure wrists float, and set keyboard to negative tilt. Use a timer (Alt + Shift + T in many focus apps) to enforce 5-minute breaks every 25 minutes. How to undo: If pain persists after lowering, return to flat desk typing for a day and reassess; persistent pain warrants professional evaluation.
What is the best stand height for a standing desk?
For standing, raise the laptop so the top bezel is at eye level while standing upright with ears over shoulders. This often means 40-45 degrees on the stand or using a laptop arm clamped to the desk. Keyboard height should still be at elbow level with elbows at 90-100 degrees and wrists neutral. Set standing desk height via its keypad: hold Up/Down to adjust, then hold M + 2 to save. What causes issues is setting the desk to screen height instead of keyboard height. How to check: If you shrug shoulders to type while standing, desk is too high. What to do: Lower desk 0.5 to 1 inch until shoulders relax, keep screen at eye level by increasing stand angle one notch instead. How to undo: Press preset 1 to return to seated height, lower stand to 15 degrees.


