
Many people buy monitor bias lighting because their eyes ache after a long night of editing, gaming, or working. However, a common mistake is buying a high-lumen, color-changing LED strip, taping it to the back of a screen, cranking the brightness to the maximum, and setting it to a vibrant purple or deep blue. Within an hour, their eyes hurt worse, and the colors on their premium monitor look completely washed out.
This is the classic “stadium lighting” mistake. Bias lighting is not meant to turn your desk into a nightclub or act as a primary light source for your room. Its scientific purpose is to raise the ambient light level directly behind your screen, reducing the contrast ratio between the bright display and the dark wall. This stabilizes your iris dilation and prevents physical eye strain. To achieve this, you must understand how to choose monitor bias lighting brightness and lumens based on your specific screen size, wall distance, and color workflow.
As an Amazon Associate we earn from qualifying purchases at no extra cost to you. Product prices and availability are accurate as of the date shown and are subject to change.
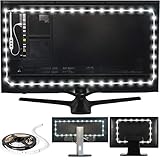


Top 3 picks at a glance
Decide These 3 Things First
Before diving into lumen counts and adhesive backings, you must clarify three foundational aspects of your workspace setup. These decisions will narrow your choices immediately and prevent you from buying a kit that is incompatible with your monitor or workflow.
- Your Primary Use Case (Color Accuracy vs. Aesthetics): If you are a professional photo editor, video colorist, or graphic designer, you require a calibrated “True White” light at exactly 6500K (known as D65) with a high Color Rendering Index (CRI) of 90 or above. If you are primarily a casual gamer or media consumer, a multi-color RGB strip with adjustable brightness modes may offer more immersion, even if it compromises color accuracy.
- Your Monitor-to-Wall Distance: The physical gap between the back of your monitor and the wall determines how light diffuses. The ideal distance is 2 to 6 inches. If your monitor is flush-mounted or extremely close to the wall (under 2 inches), you will need a lower lumen output or denser LED placement to prevent harsh “hot spots.” If your desk sits in the middle of the room with no wall behind it, traditional bias lighting will not work.
- Your Monitor’s USB Power Delivery: Most bias lights are USB-powered, drawing electricity directly from your monitor’s downstream USB ports. You must check your monitor’s manual to see if its USB ports output 0.5 Amps (2.5 Watts) or 1.0 Amps (5 Watts). A strip that requires more power than your monitor can output will flicker, dim, or fail to turn on entirely, forcing you to run an annoying cable to an external wall adapter.
1. Brightness, Lumens, and the 10% Rule
When researching how to choose monitor bias lighting brightness and lumens, the most critical concept to understand is the “10% Rule.” According to the Society of Motion Picture and Television Engineers (SMPTE), the wall behind your monitor should be illuminated to roughly 10% of the maximum brightness of your monitor when displaying a full white screen.
This means you do not need a 1,000-lumen light strip. In fact, a strip that bright will overpower your screen. For a standard 24-inch to 27-inch desktop monitor, a total light output of 150 to 250 lumens is the ideal sweet spot. For larger 32-inch monitors, ultrawides, or multi-monitor arrays, you should target 250 to 400 lumens.
Because every room has different ambient light levels and wall paint reflectiveness, you should never buy a fixed-brightness bias light. Always choose a strip that features a dimmer with at least 5 to 10 brightness levels (such as the Power Practical Luminoodle with its 10 brightness modes). This allows you to fine-tune the output until the wall behind the monitor matches the perceived brightness of your screen’s gray tones.
2. Monitor Size and Strip Length Selection
To get an even, halo-like glow without dark corners, the physical length of the LED strip must match your monitor’s dimensions. A strip that is too short will create a concentrated, weak blob of light in the center of your screen. A strip that is too long will wrap around the edges, causing light to spill directly into your eyes.
For small screens and standard office monitors up to 24 inches, a single straight strip of 12 to 18 inches (about 30 to 45 cm) mounted horizontally across the upper-middle section of the back panel is usually sufficient. This yields a clean, downward-and-upward glow. For larger screens, a three-sided (top and sides) or four-sided layout is ideal.
Use these general sizing guidelines when buying:
- Monitors up to 24 inches: Look for a strip length of 3 to 4 feet (approx. 1 meter), such as the Luminoodle Bias Lighting for Monitors up to 24″. These typically cost between $12.00 and $16.00.
- Monitors from 27 to 32 inches: Look for a strip length of 5 to 6 feet (approx. 1.5 to 1.8 meters).
- Monitors/TVs from 30 to 40 inches: Look for a strip length of 6.5 to 8 feet (approx. 2 to 2.4 meters), like the Power Practical True White size Medium. These run from $12.99 to $17.99 depending on color options.
3. Color Temperature, CRI, and “True White”
The color of the light backing your monitor drastically changes how your eyes perceive the colors on your screen. If your bias light has a warm yellow color temperature (like 2700K or 3000K), your brain will compensate for the yellow background by making the images on your monitor look colder and bluer than they actually are.
To prevent this optical illusion, professional bias lights utilize a color temperature of 6500K (Kelvin), which simulates natural daylight. This is the exact reference white point used by film directors, video editors, and game developers when mastering content.
Additionally, you must look at the Color Rendering Index (CRI). Cheap LED strips have a low CRI (under 80), meaning they emit a green or purple tint despite being labeled as “white.” For standard office tasks and gaming, a CRI of 80 to 85 is perfectly fine. For photo editing, video grading, or color-critical work, prioritize a high-end strip with a CRI of 90 or higher to ensure the reflected light off your wall is pure, neutral white.
4. Build Quality, LED Density, and Adhesives
A bias light is only as good as its physical construction. Because monitors generate heat from their internal components and backlights, the adhesive holding the strip in place is subject to constant thermal stress. Cheap, generic double-sided tape will dry out and peel off within a few weeks, leaving your light strip dangling behind your desk.
Look for strips that specify the use of genuine 3M adhesive backing (specifically 3M VHB or 3M 9080). Before applying the strip, always clean the back of your monitor with isopropyl alcohol to remove dust and manufacturing oils; failing to do this is the number one reason why adhesives fail.
Furthermore, pay attention to LED density. Cheap strips place LEDs far apart (e.g., 15 LEDs per meter). This results in uneven “hot spots” on your wall. High-quality strips feature a higher density of 30 to 60 LEDs per meter, creating a perfectly smooth, continuous gradient of light behind your screen.
5. Power Requirements and Control Interfaces
Most desktop monitor bias lights run on 5-Volt USB power. However, the current draw (measured in Amps) varies based on the brightness and length of the strip.
A standard 5V, 0.5A USB 2.0 port on a monitor can safely power a basic white LED strip up to 3 feet long (drawing roughly 2.5 Watts of power). However, if you are running a longer, high-density, or color-changing RGB strip, it may require 5V and 1.0A or even 2.0A (5 to 10 Watts). If you plug a high-draw strip into a low-power USB port, the lights will flash, fail to change colors, or cause your monitor’s USB hub to shut down.
For control interfaces, you have three primary options:
- Inline Controllers: A simple 3-button switch built directly into the USB cable. It is cheap and reliable but hard to reach if your monitor is pushed close to a wall.
- Wireless Remotes (RF or IR): Radio Frequency (RF) remotes are superior to Infrared (IR) remotes because they do not require a direct line of sight to work; you can control the lights even if the receiver is completely hidden behind the screen.
- Smart App/Screen Sync: Premium kits use desktop software or external cameras to sync the LED colors with whatever is currently playing on your screen. While highly immersive for gaming, these require constant background software usage and are much more expensive.
6. Price Tiers: What Do You Get for Your Money?
As we plan out desktop and home office workspaces for 2026, the market for bias lighting has matured into three distinct price tiers. Understanding these tiers helps you avoid overpaying for features you do not need.
- Budget ($10.00 – $15.00): These are simple, single-color (usually 6500K True White) or basic RGB strips with an inline controller. They run on standard 5V, 0.5A USB power and offer basic dimming (usually 3 to 5 levels). Examples include basic 3-foot Luminoodle or Maylit strips. They are reliable, straightforward, and perfect for standard productivity setups.
- Mid-Range ($15.00 – $35.00): In this tier, you get high-density LEDs, RF wireless remotes with 10+ dimming levels, better color presets, and certified 6500K white accuracy with higher CRI ratings (85+). The adhesives are typically genuine 3M, and the build quality includes thicker copper PCBs that dissipate heat better.
- Premium ($40.00 – $100.00+): This tier is dominated by smart-home integrated lighting (like Philips Hue or Govee) and screen-syncing systems. These kits often include external cameras, HDMI sync boxes, or complex desktop software to match the lighting to your on-screen action in real-time. They require external wall power (12V) rather than USB power.
Spec Checklist
Use this quick-reference table to match your specific workspace needs with the appropriate technical specifications across different budget categories.
| Specification | Budget Tier ($10 – $15) | Mid-Range Tier ($15 – $35) | Premium Tier ($40 – $100+) |
|---|---|---|---|
| Target Lumens | 100 – 180 lumens | 180 – 350 lumens | 350 – 600+ lumens |
| Color Temp & CRI | 6000K-6500K (CRI ~80) | True 6500K (CRI 85-90) | Calibrated D65 (CRI 90-95+) or RGBIC |
| Control Type | Inline 3-button controller | RF Wireless Remote / App | Wi-Fi, Smart Assistant, Camera Sync |
| LED Density | 15 – 30 LEDs per meter | 30 – 60 LEDs per meter | 60+ addressable LEDs per meter |
| Power Draw | 5V, 0.5A (2.5W via USB) | 5V, 1.0A (5W via USB) | 12V, 1.5A+ (Dedicated Wall Adapter) |
| Adhesive Quality | Standard double-sided tape | Genuine 3M VHB / 9080 | Premium 3M or brackets/clips |
Red Flags to Avoid When Shopping
When shopping for monitor bias lighting, keep an eye out for these warning signs that indicate a poor-quality product:
- “Cool White” Labeled as 6500K: Many cheap manufacturers label their strips as “6500K” or “True White,” but when you plug them in, they emit a harsh blue or purple hue. This indicates low-quality phosphor coatings on the LEDs, which will distort your monitor’s colors and cause rapid eye strain.
- No Dimmer Control: If an LED strip does not feature a dimmer, do not buy it. A bias light that runs constantly at 100% brightness is almost always too bright for a dark or moderately lit room, defeating the entire ergonomic purpose of the light.
- Generic “3M” Backing Without Branding: Some low-end strips use cheap adhesive tape printed with a fake, generic “3M” logo. Real 3M backing will clearly state the specific tape type (like “3M VHB” or “3M 200MP”) on the peel-off liner.
- Excessive Power Requirements on USB: Be wary of long, ultra-bright strips that claim to run on a standard USB port but require more than 1.5 Amps. These will either cause your monitor’s USB port to trip its safety fuse, or they will run incredibly hot, which degrades the LEDs and warps the plastic back of your monitor.
FAQ
How many lumens do I actually need for a 27-inch monitor?
For a standard 27-inch monitor, you need a bias light capable of outputting 150 to 250 lumens. However, you should rarely run the light at its maximum output. The goal is to dim the strip so that the reflected light on the wall behind your monitor matches roughly 10% of your screen’s maximum brightness, creating a gentle, non-distracting halo.
Why is 6500K (D65) the standard for bias lighting?
6500K represents the color temperature of natural, mid-day daylight. This is the exact white point standard used by the film, television, and digital imaging industries to calibrate screens. By placing a 6500K light source behind your screen, your eyes maintain a neutral color reference, ensuring that the whites, grays, and colors on your monitor look highly accurate and balanced.
Can I use an RGB light strip for color-accurate work?
No. Standard RGB light strips create “white” light by mixing red, green, and blue light waves together. This results in a very low Color Rendering Index (CRI) with a distinct color cast (usually green or pink). For color-accurate photo or video editing, you must use a dedicated “True White” LED strip with a CRI rating of 90 or higher, rather than an RGB strip set to white.
Is it safe to power bias lighting from my monitor’s USB port?
Yes, provided the light strip’s power draw matches your monitor’s USB output. Most standard USB 2.0 ports output 5V at 0.5A (2.5 Watts), which is plenty for a basic white strip up to 3 or 4 feet long. If you are using a longer, higher-density, or color-changing RGB strip, make sure to plug it into a USB 3.0 port (which supports 5V at 0.9A) or use an external USB wall charger.

